How to use Virtual Assistant Trainer App.
Table of Contents
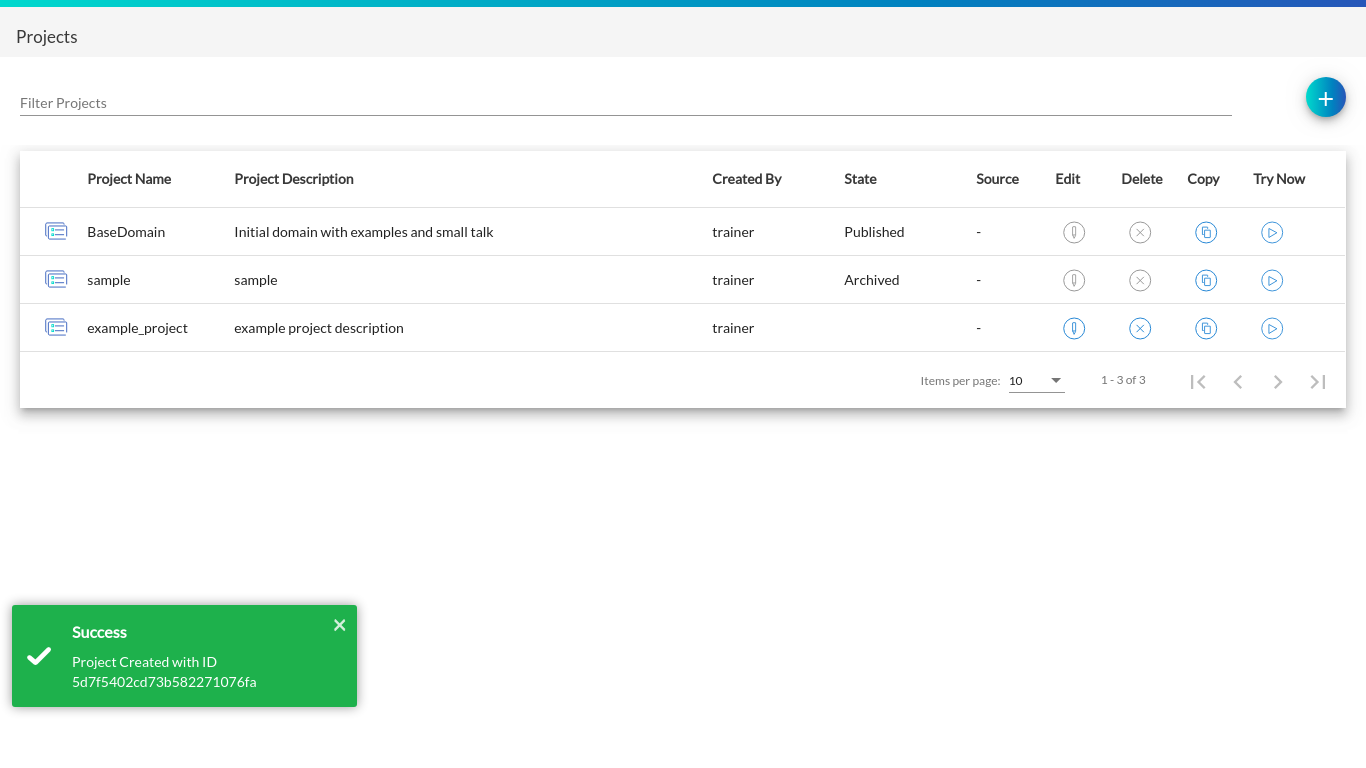
Projects
Projects can be defined as the canopy holding different domains in it. It holds the root level position in the trainer app hierarchy. Listing below the tasks associated with a project:
Note: User cannot add space in the project’s name while performing any of the operations mentioned below
1. Creating Project
By clicking on the add project button, a pop up appears where the user has to enter the project name & project description and hit the confirm button.

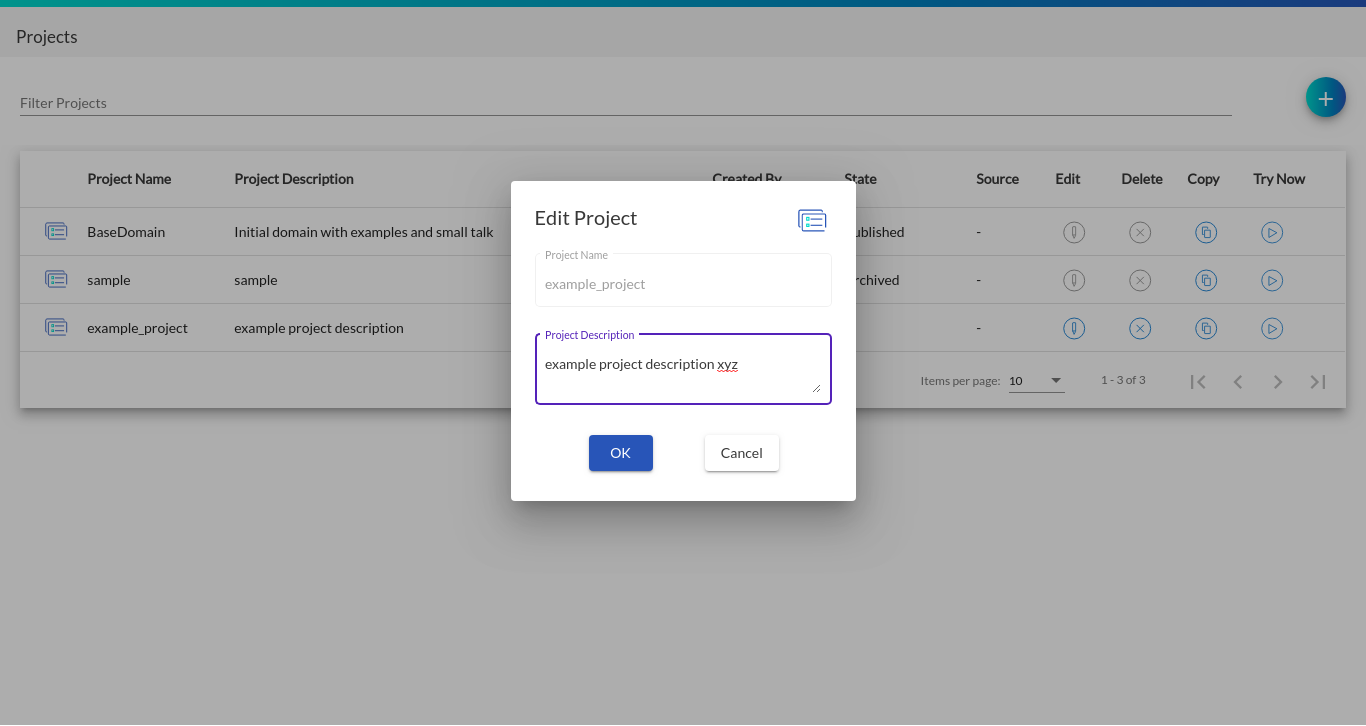
2. Editing Project
By clicking on the edit project button, a pop up appears where the user can only edit the project description and not project name.
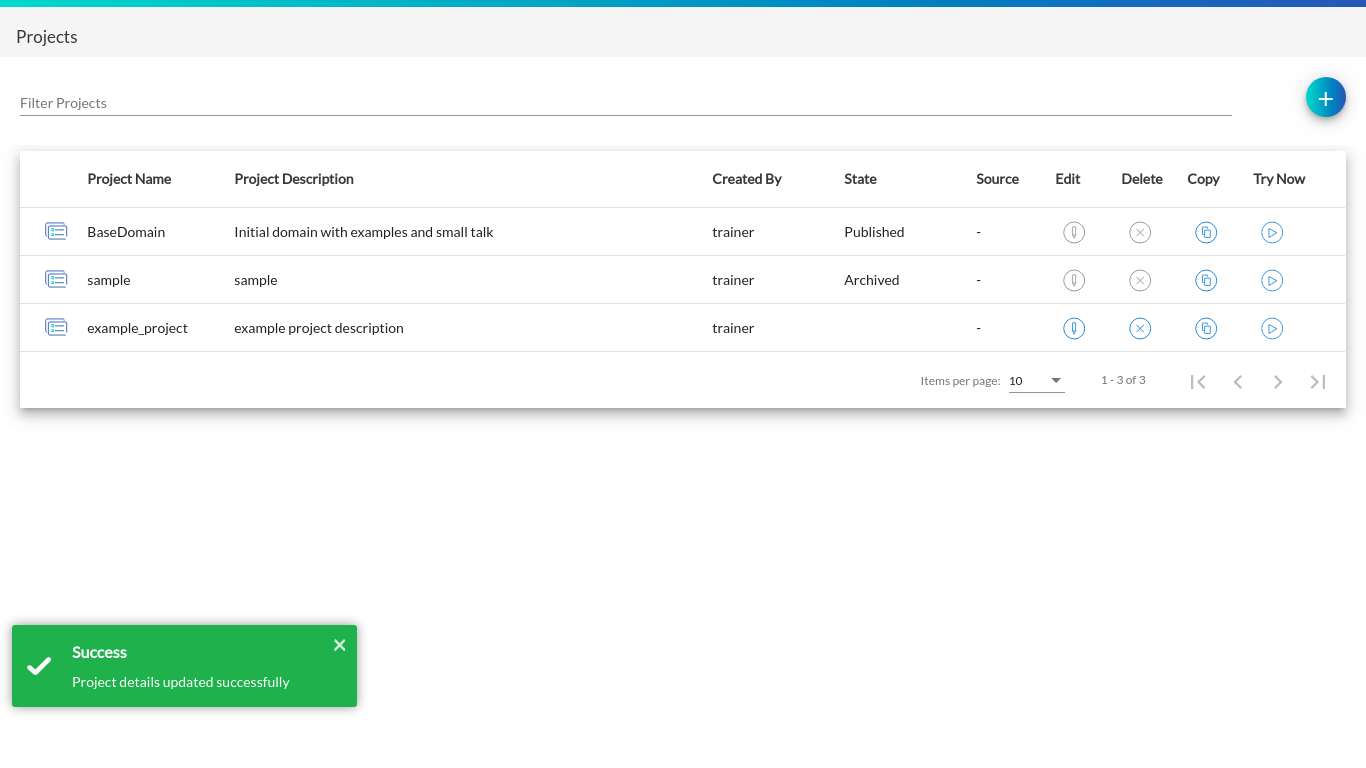
After hitting the confirm button, you can see the updated description
3. Deleting Project
By clicking on the delete project button, a pop up appears where the user has to confirm his/her actions.
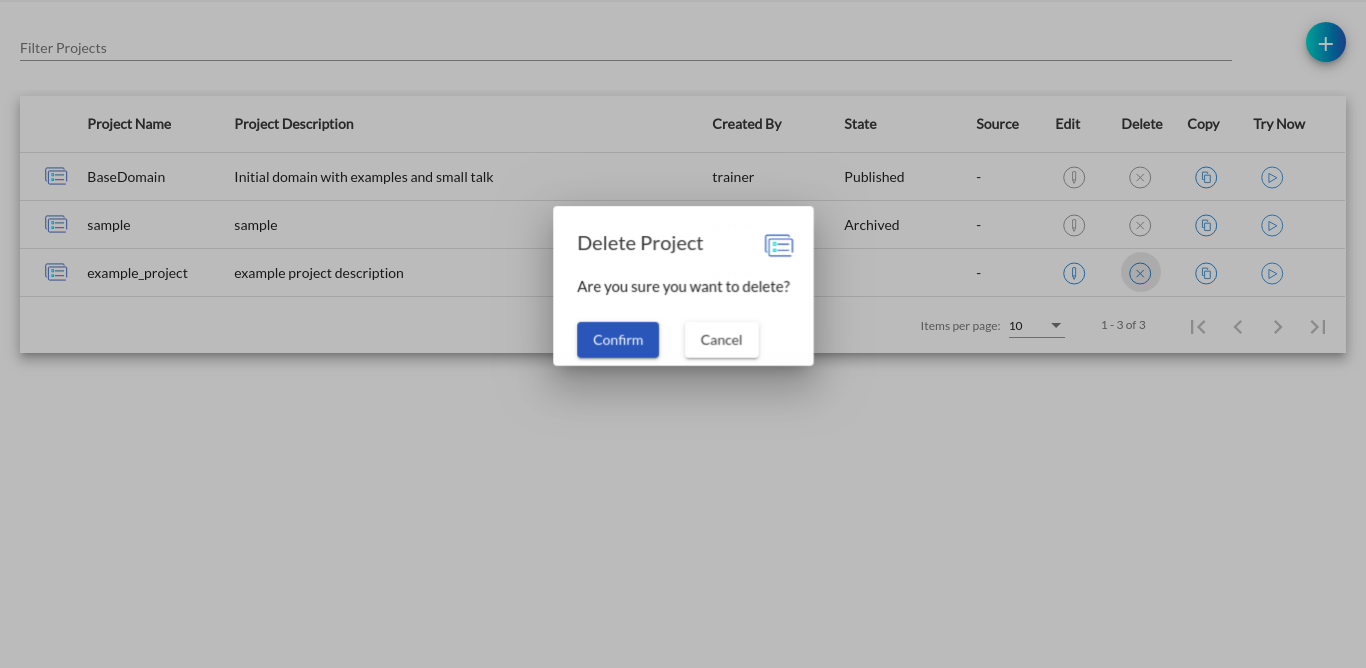

After hitting the confirm button, the project disappears from the projects list.
4. Copy Project
By clicking on the copy project button, a pop up appears where the user has to enter the project name & project description and hit the confirm button.
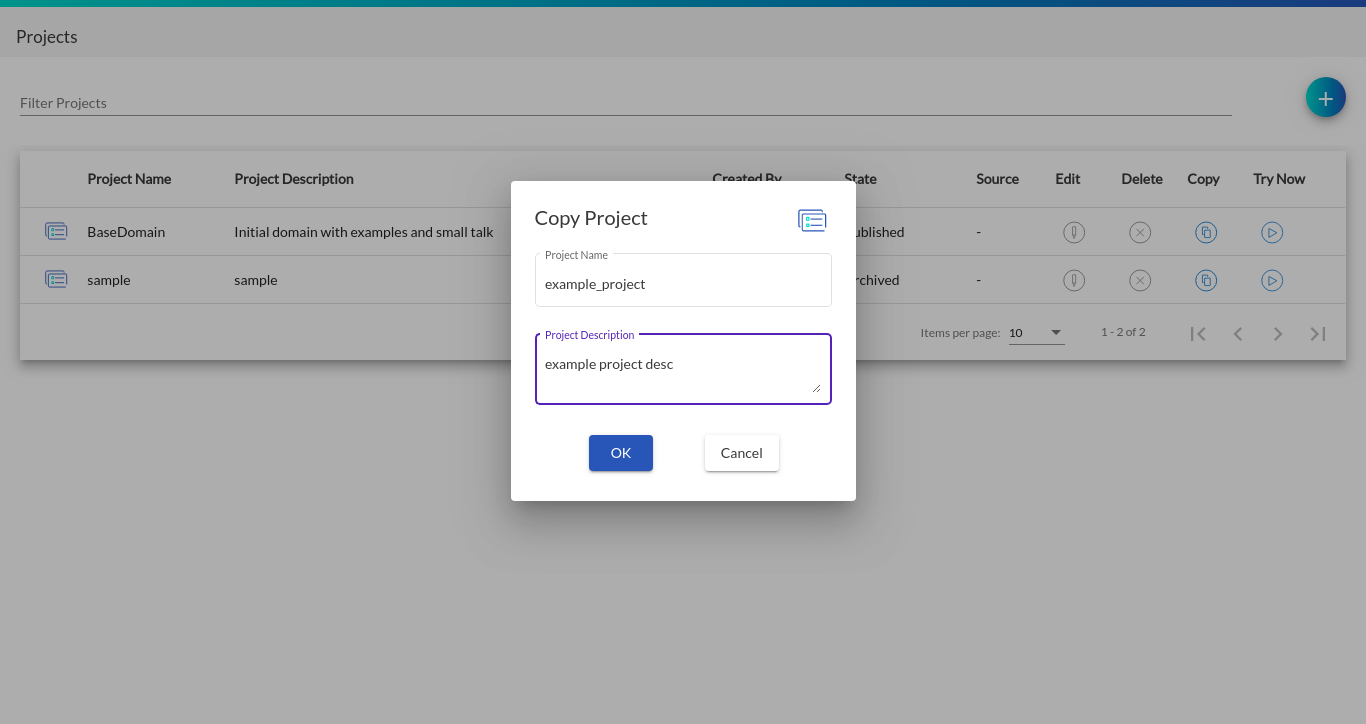

After hitting the confirm button, a new project gets created with the source column of the new project getting updated with the name of the source project’s name. Also the copied project will have the domains, intents, responses, stories and entities present in the source project.
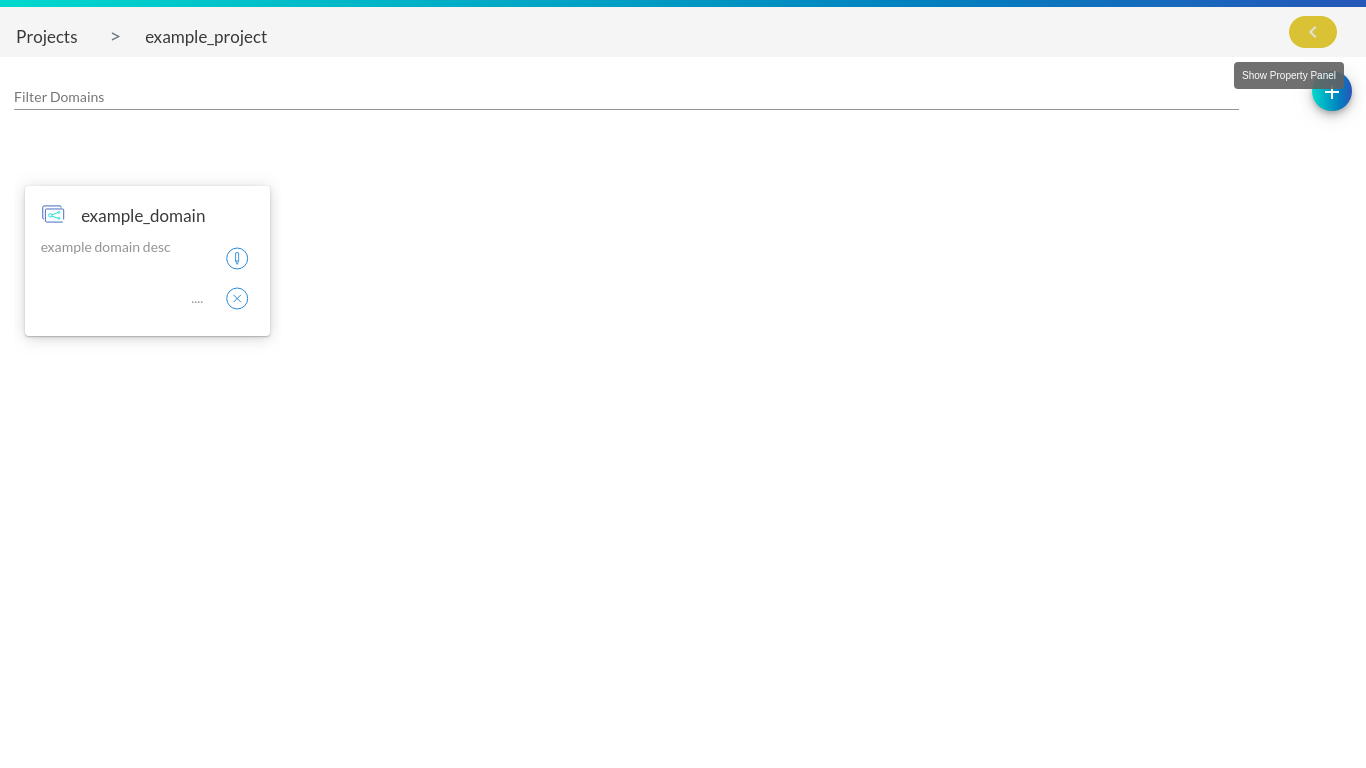
Domains
Domains come into picture when you click on any one project in the projects list. Domain defines the universe in which your assistant operates. It specifies the intents, entities, slots, and actions your bot should know about. Listing below the tasks associated with a domain:
Note: User cannot add space in the domain’s name while performing any of the operations mentioned below
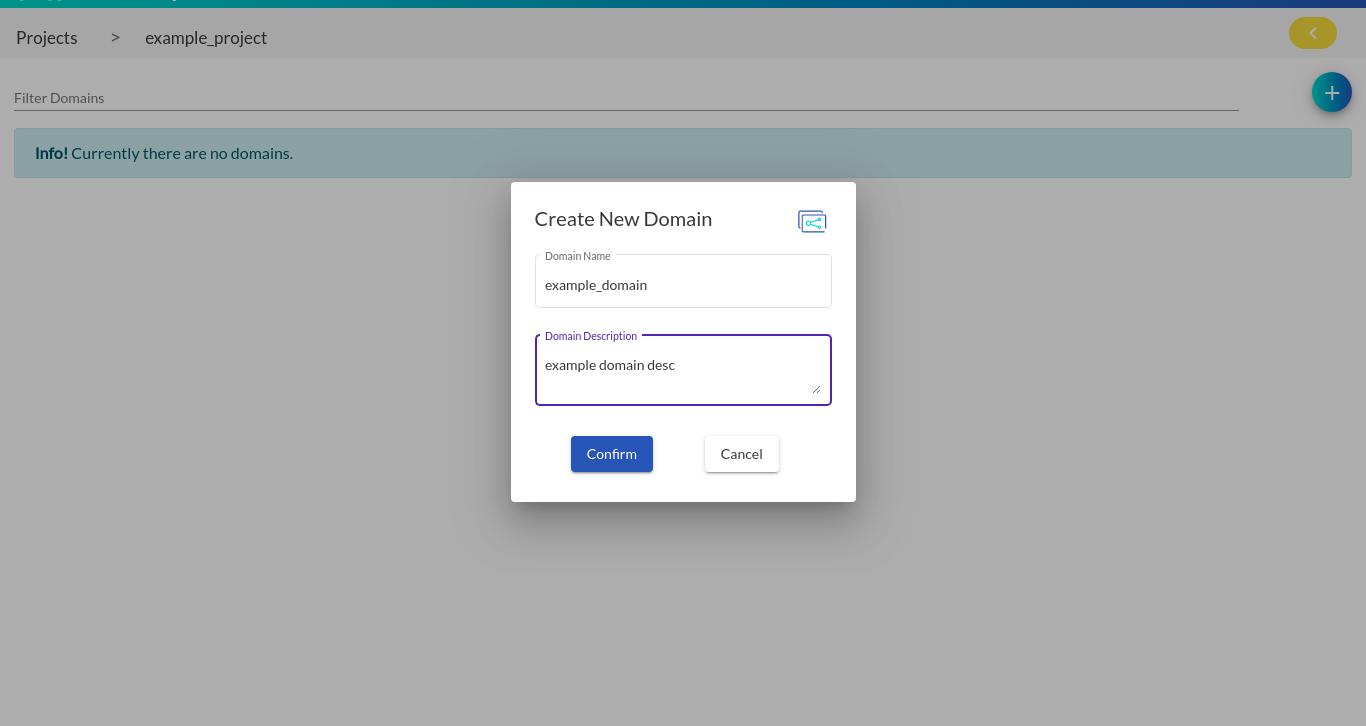
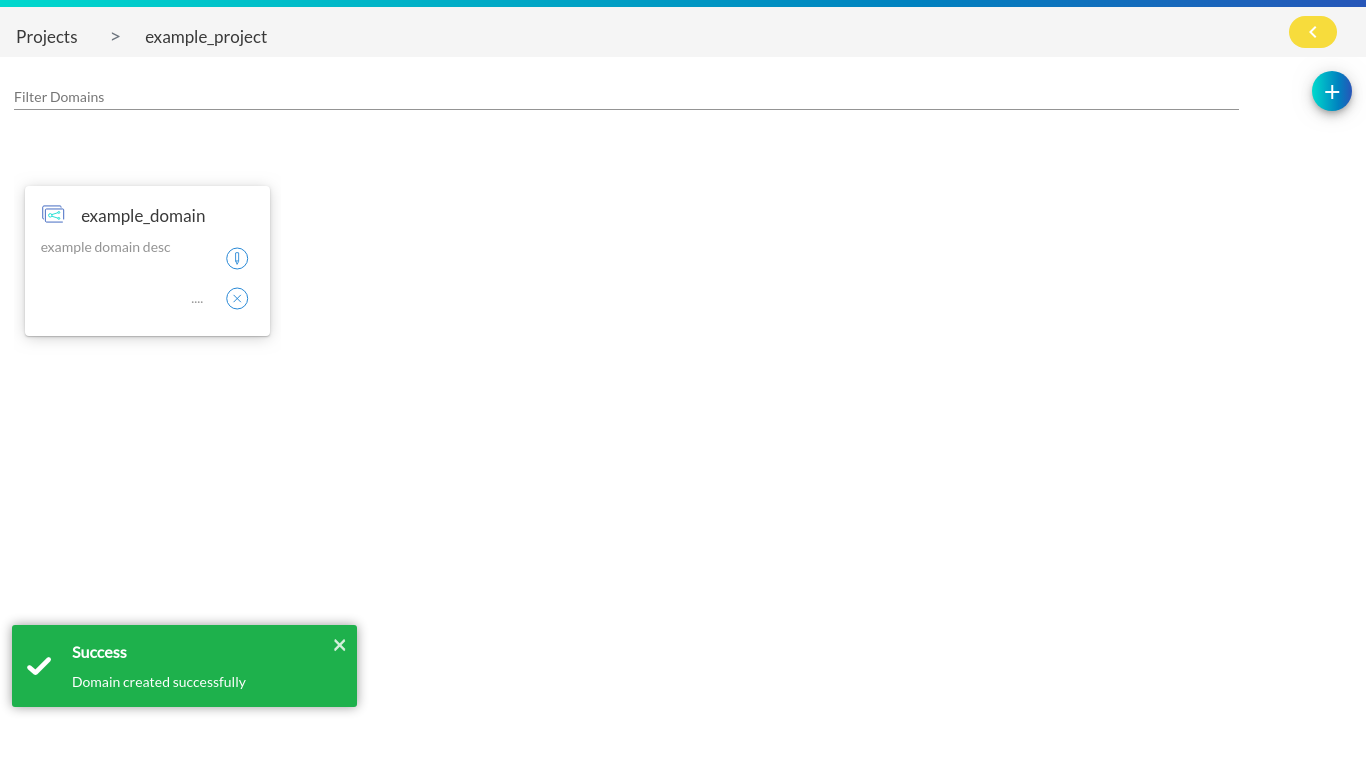
1. Creating Domain
By clicking on the add domain button, a pop up appears where the user has to enter the domain name & domain description and hit the confirm button.
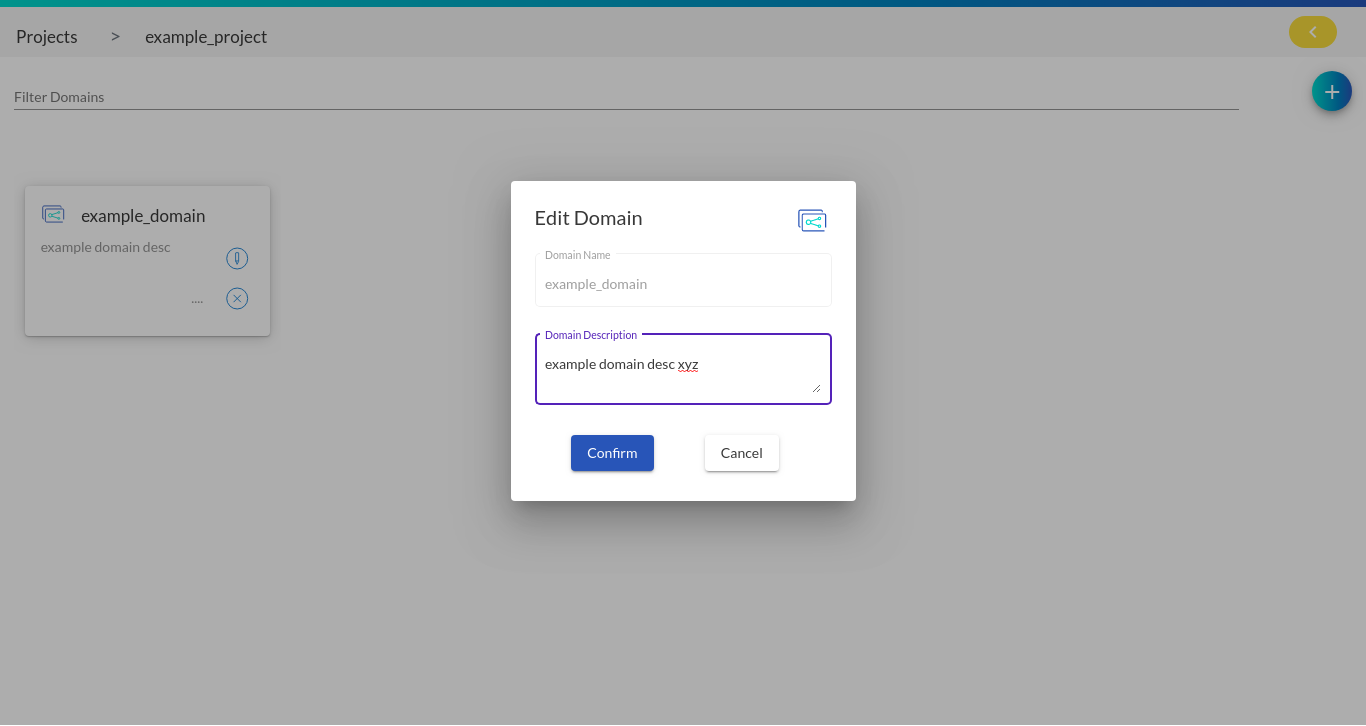
2. Editing Domain
By clicking on the edit domain button, a pop up appears where the user can only edit the domain description and not domain name.

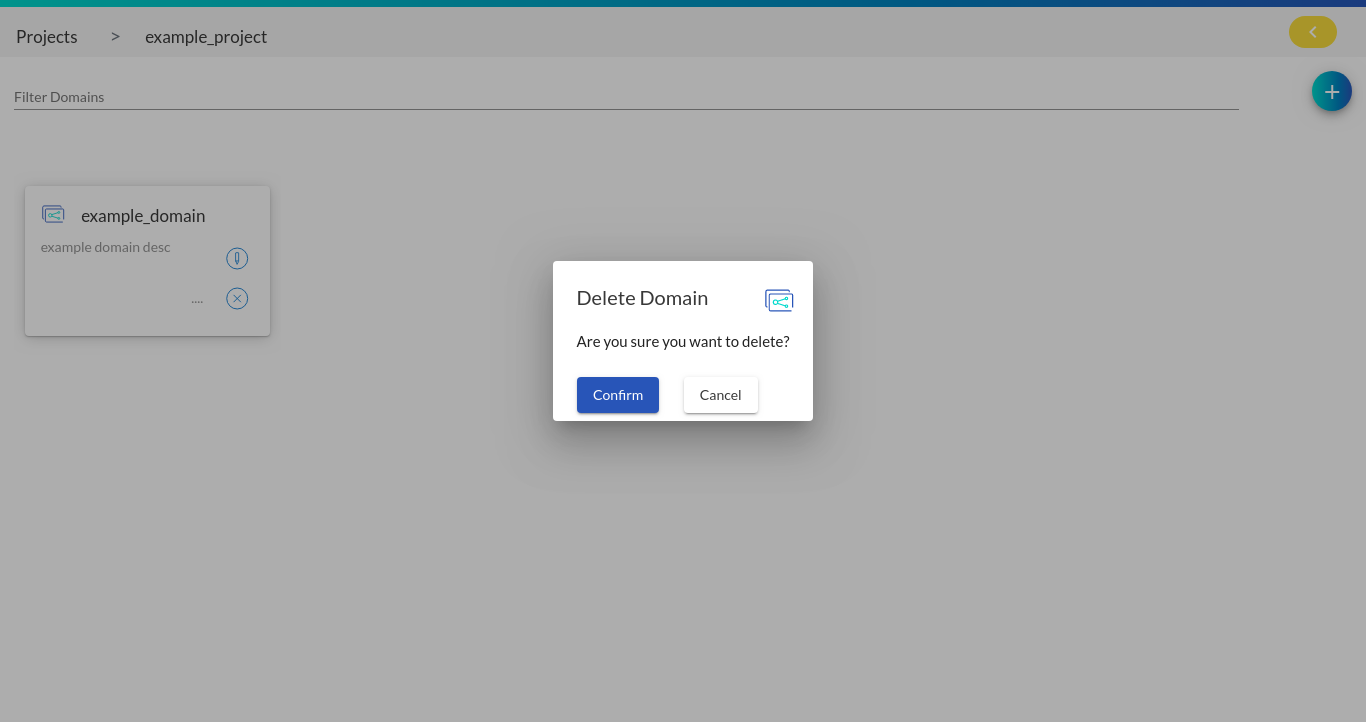
3. Deleting Domain
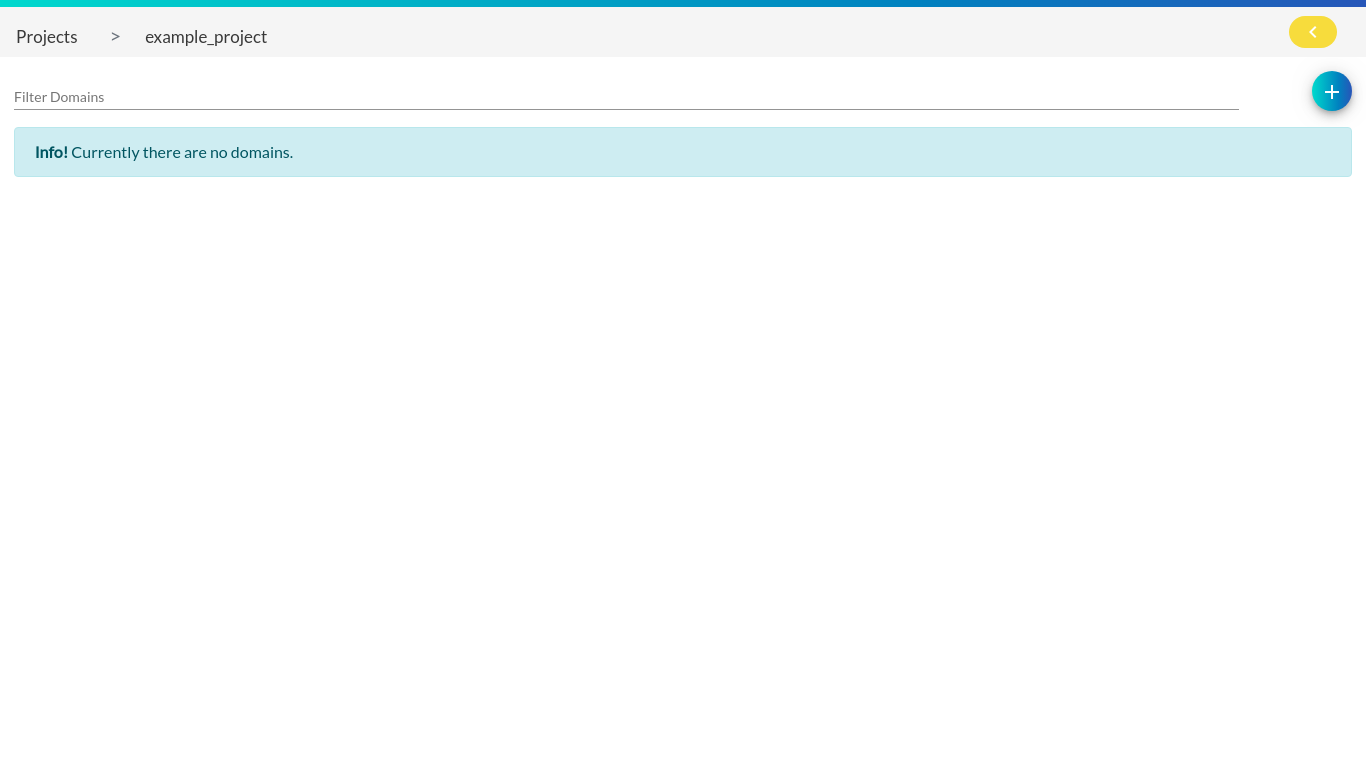
By clicking on the delete domain button, a pop up appears where the user has to confirm his/her actions.
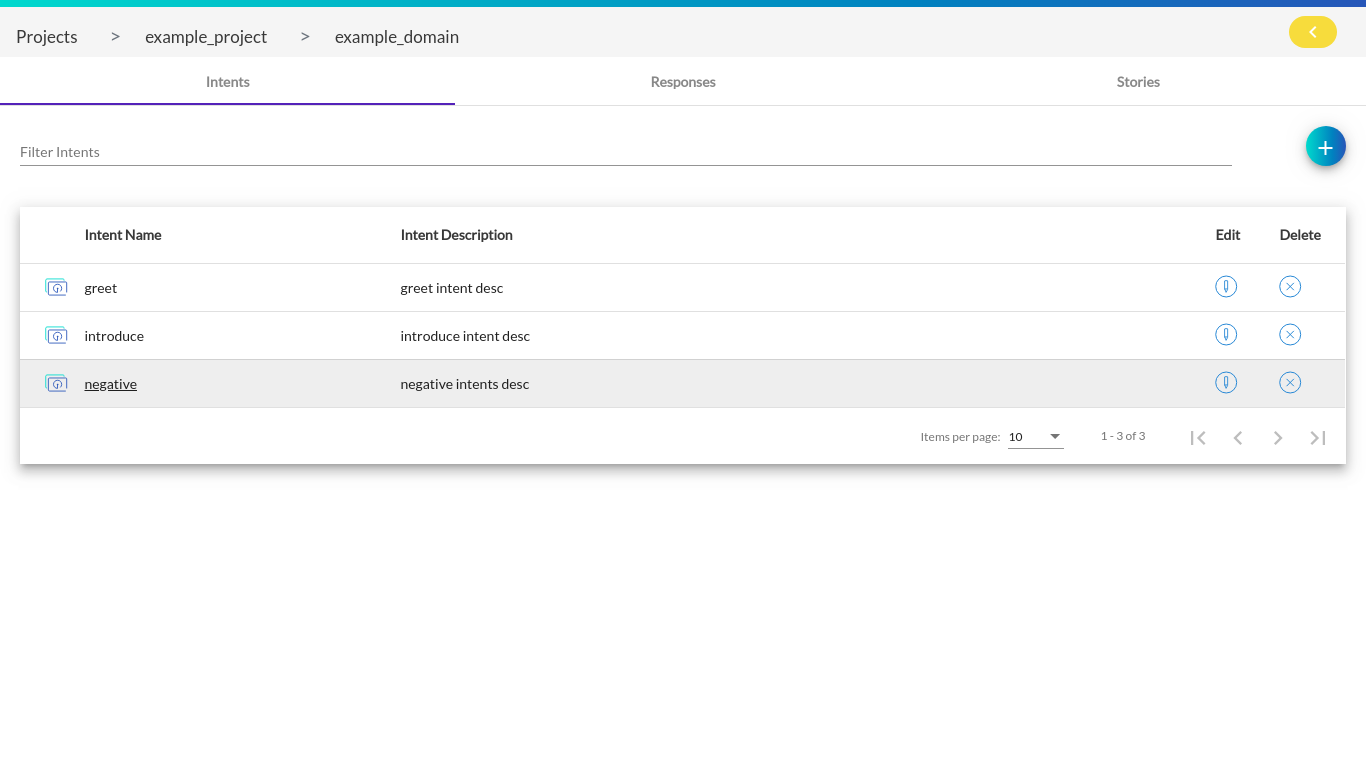
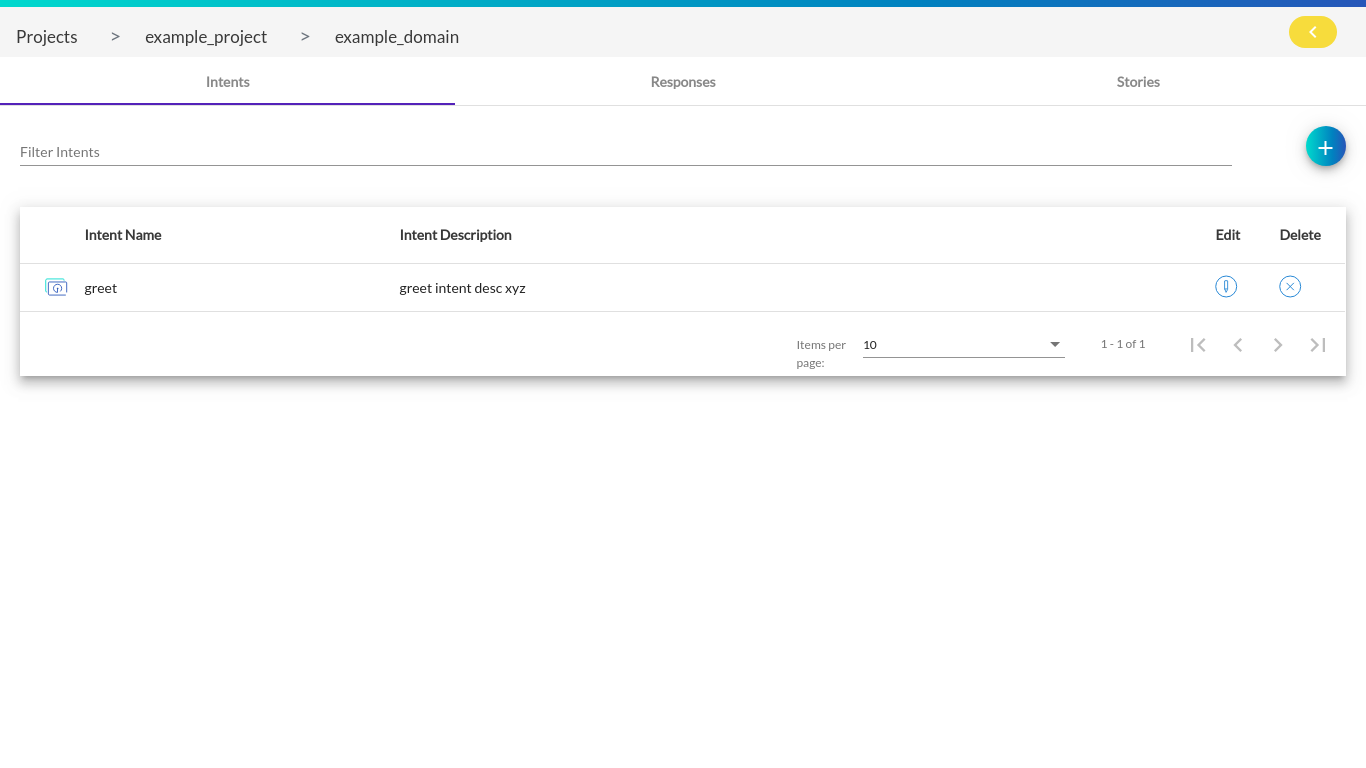
Intents
An intent represents the purpose of a user’s input. You define an intent for each type of user request you want your application to support. Listing below the tasks associated with an intent:
Note: User cannot add space in the intent’s name while performing any of the operations mentioned below
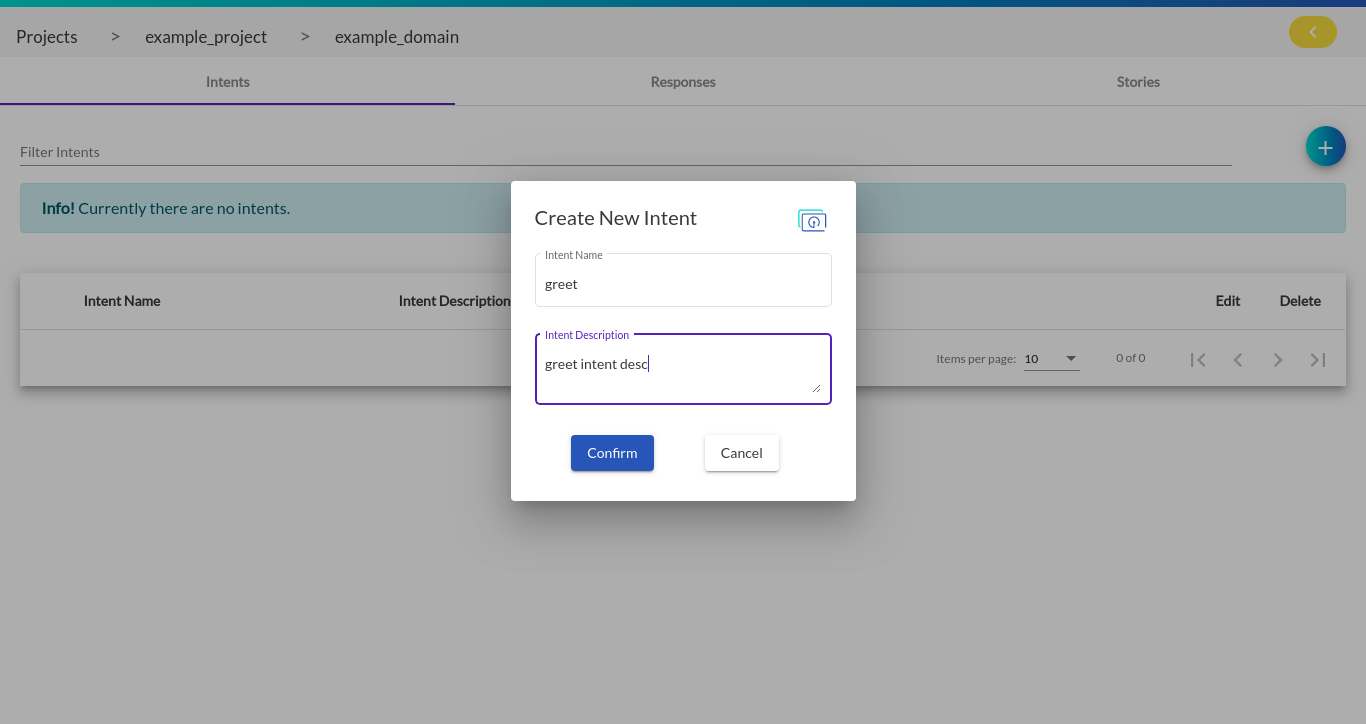
1. Creating Intent
By clicking on the add intent button, a pop up appears where the user has to enter the intent name & intent description and hit the confirm button.

Note: It is mandatory to create an intent called ‘negative’ that holds all the negative intents i.e. ‘No’, ‘Nope’, etc.

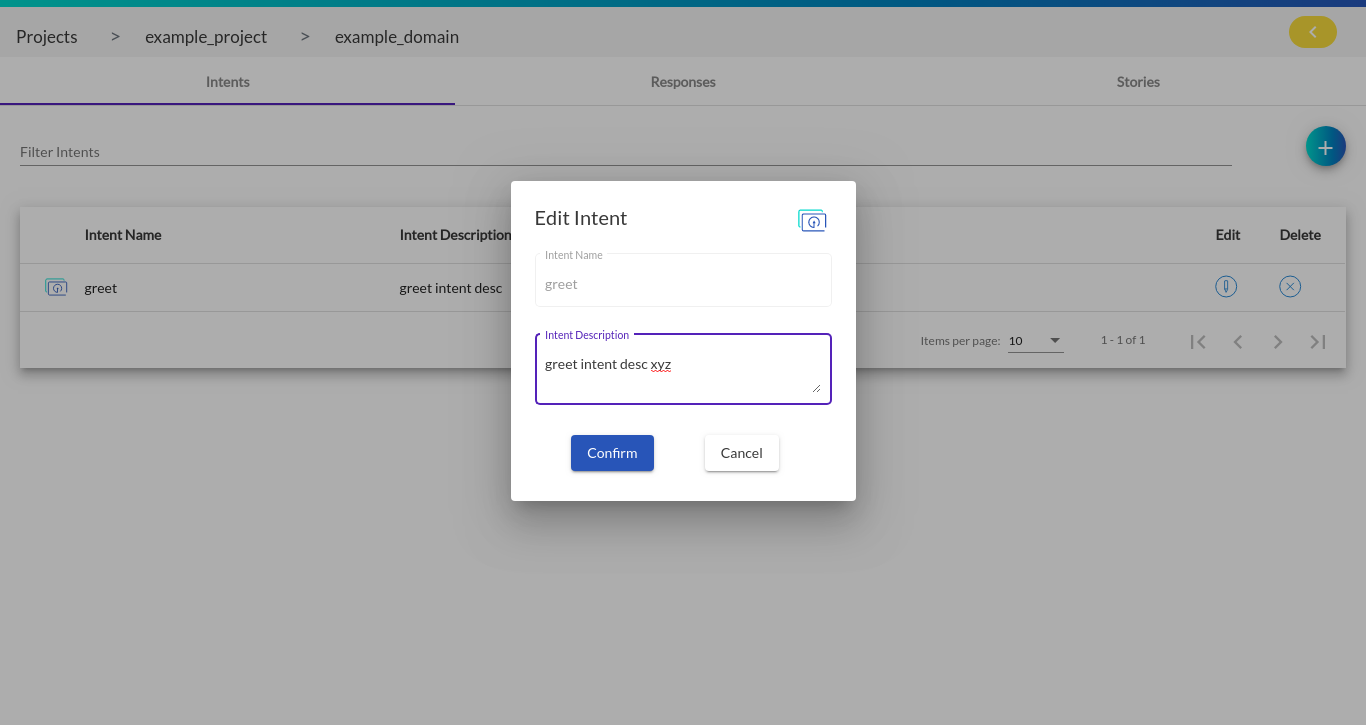
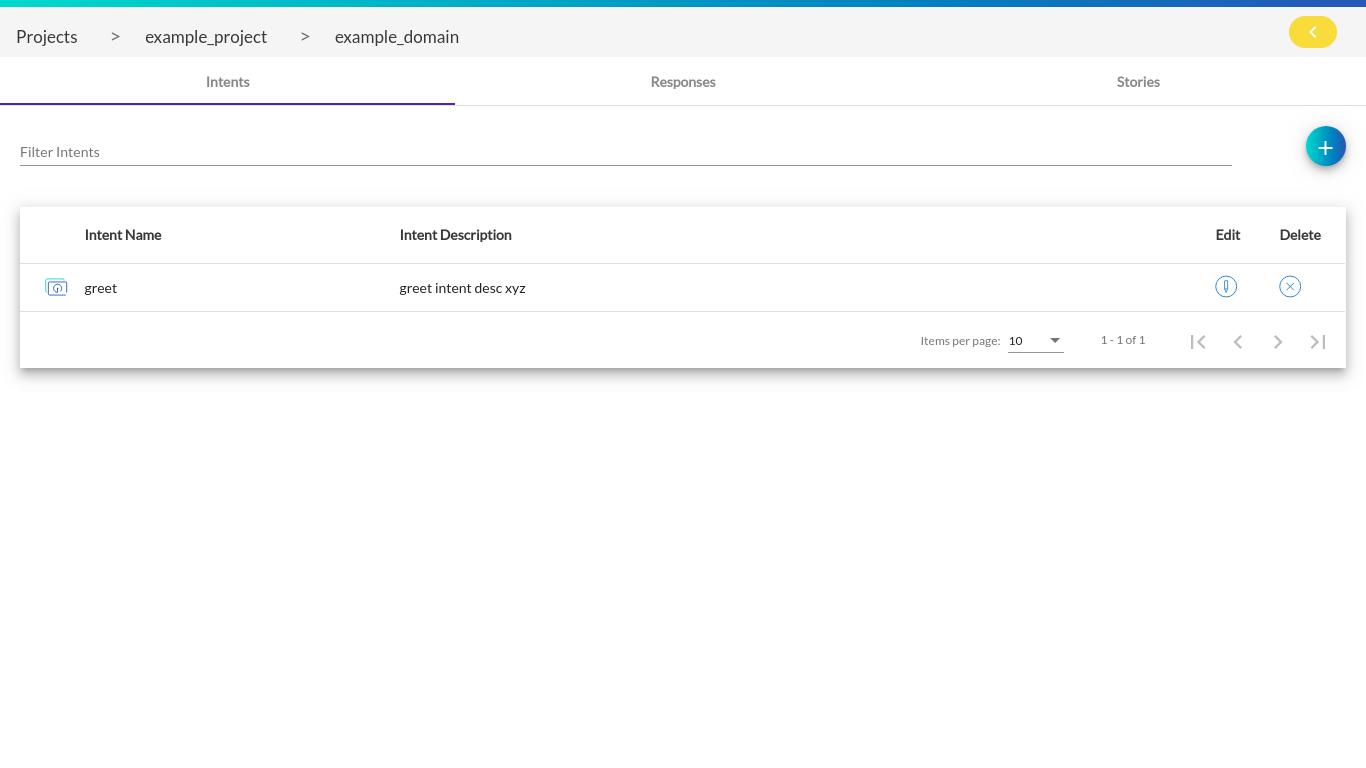
2. Editing Intent
By clicking on the edit intent button, a pop up appears where the user can only edit the intent description and not intent name.
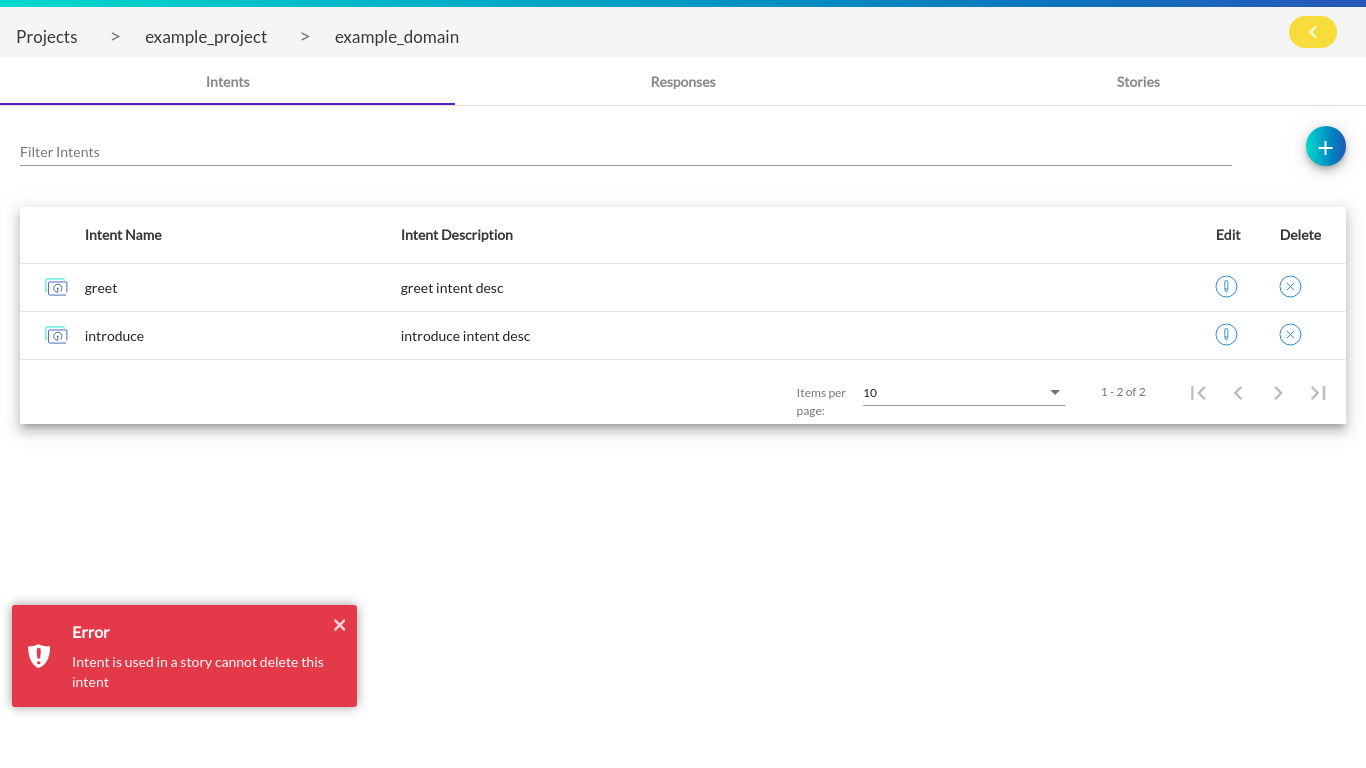
3. Deleting Intent
By clicking on the delete intent button, a pop up appears where the user has to confirm his/her actions.
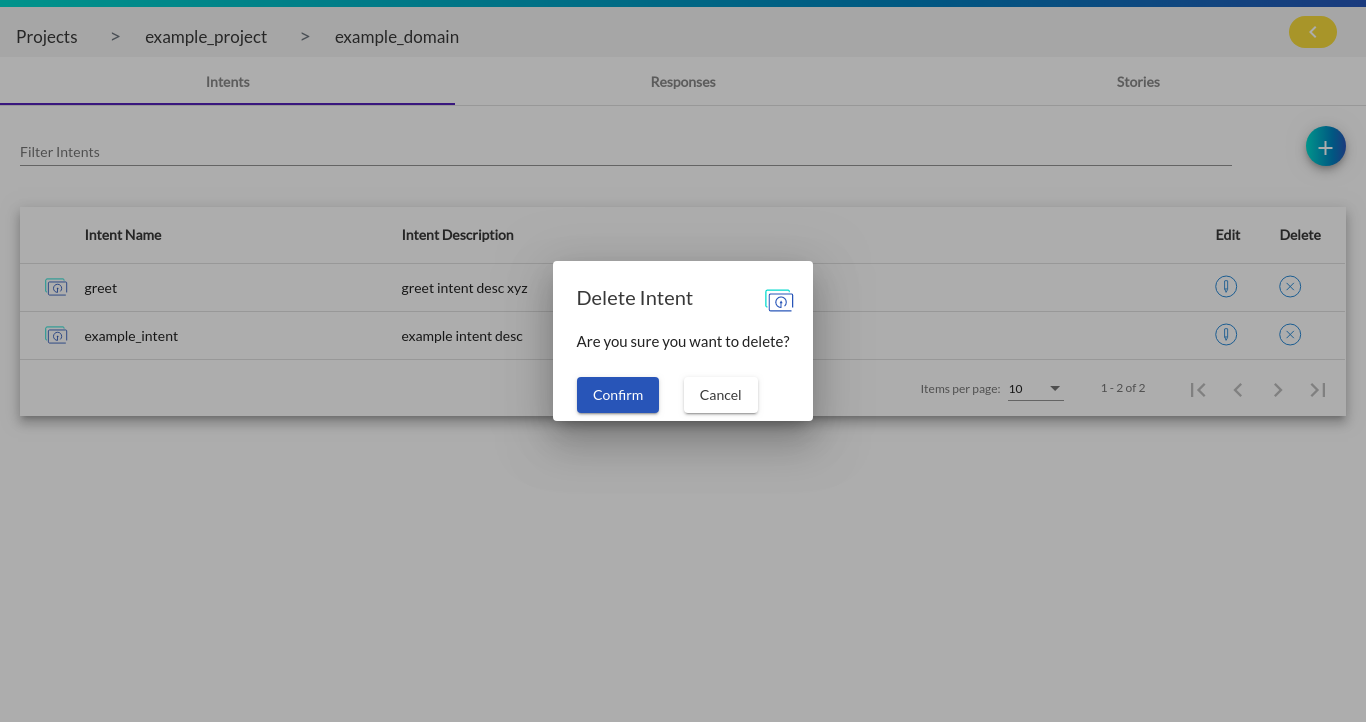
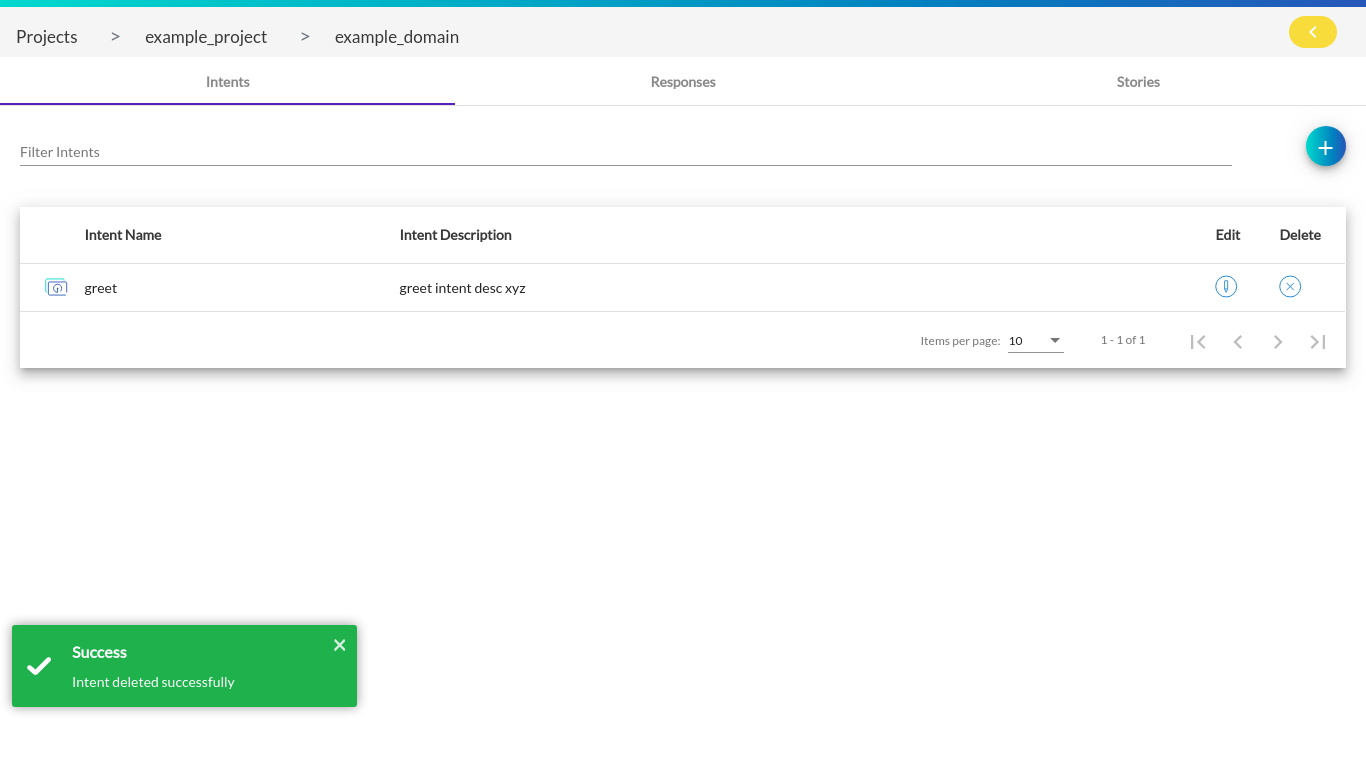
Note: You wont be able to delete those intents which are used in stories
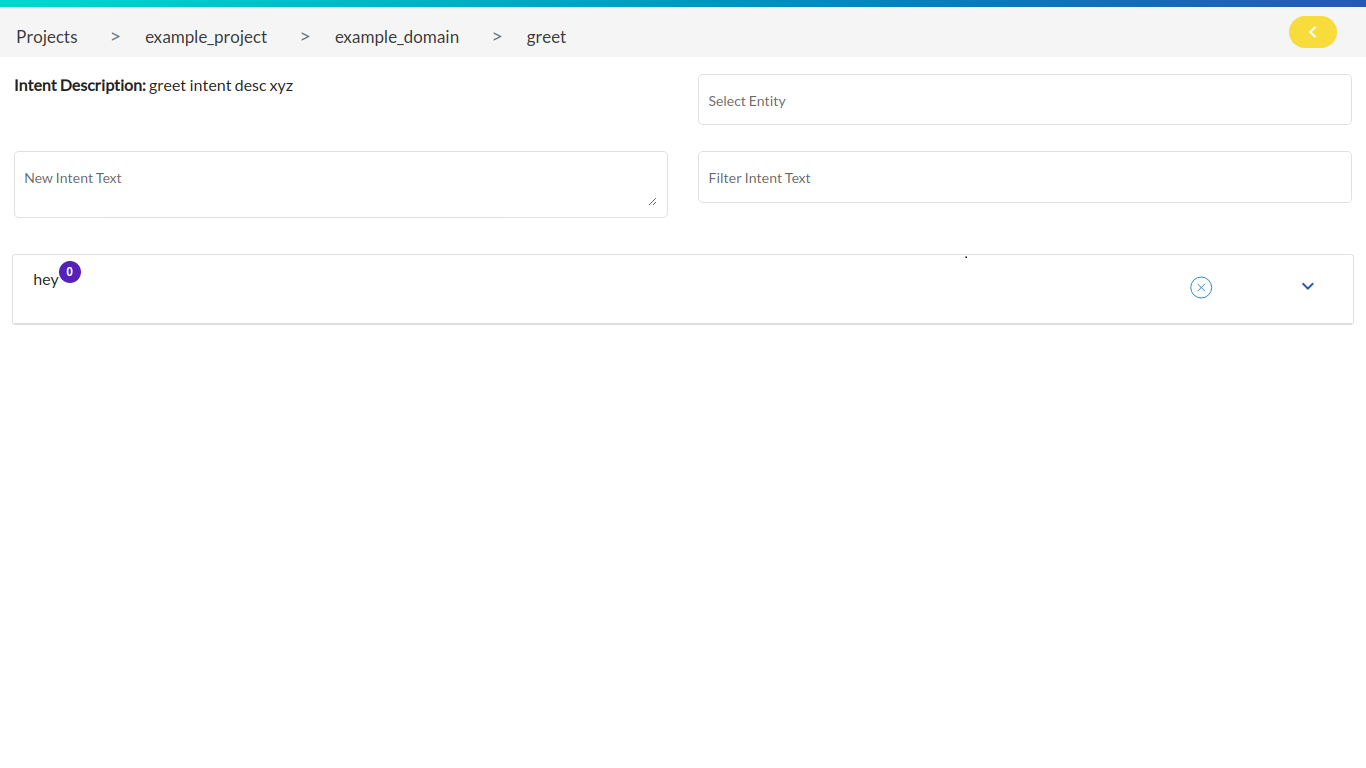
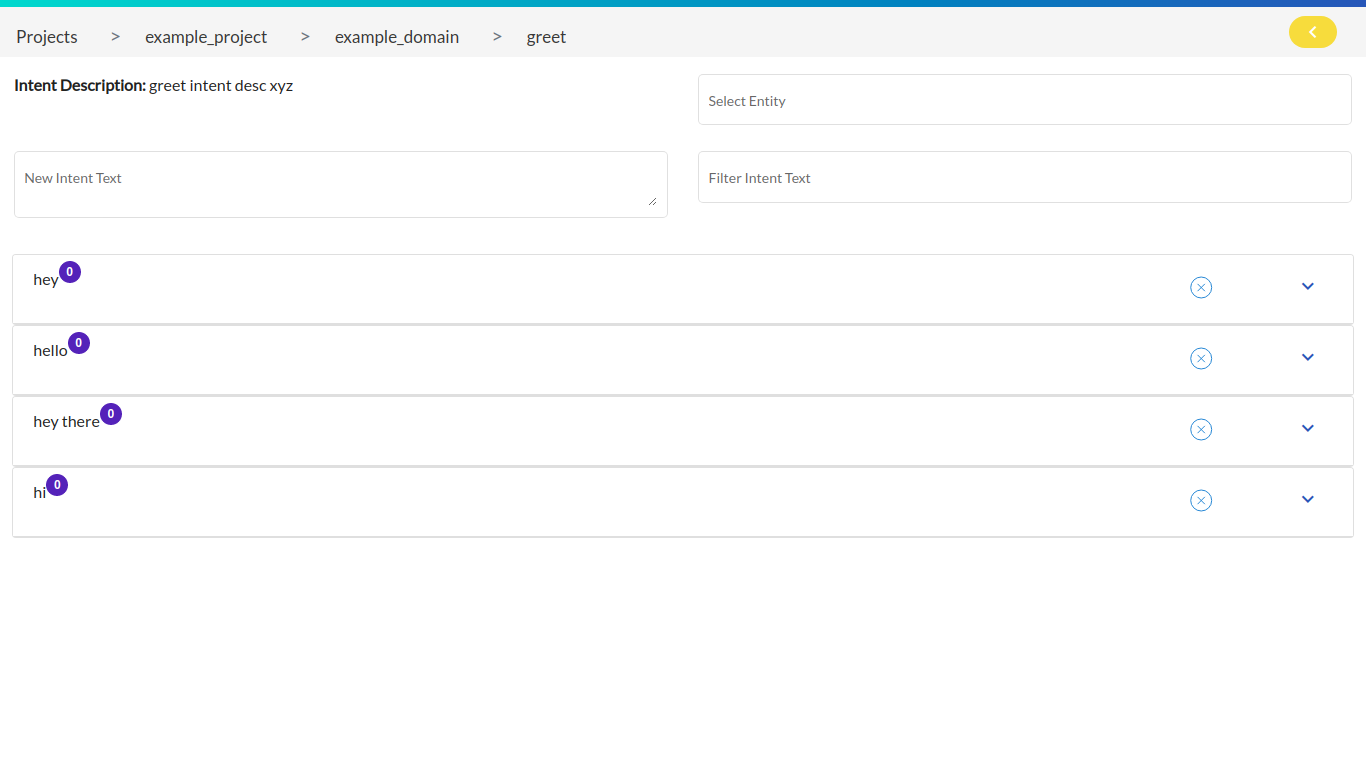
4. Adding Intent Text Samples
User can add the text samples to any intent. In our case we will take the ‘greet’ intent and add some text samples to it. Just click on that particular intent to perform the task. Type in the text in the new intent text textbox and hit enter.
Some samples of ‘greet’ intent would be ‘Hi’, ‘Hey’, ‘Hey There’, ‘Hello’, etc.
5. Mapping entities to intent text Samples
Before moving forward, check the Entities section to get familiar with enities concept and the tasks associated with it.
In this case, we will create another intent called ‘introduce’ where we will use the newly created entity (from the Entities section i.e. ‘users_name’) in our text samples to make the bot store and eventually understand the variety of name that we are feeding in.
So in our case we will be feeding a variety of names to the bot so that the bot stores it and when it has sufficient names, it can process it, work on it and learn it. In the end it will create its own pattern through its learning and try to identify the similar future intents.
Note: Here is where Machine Learning plays a very significant role, so read it thouroghly.
So let’s start with adding the intent samples and mapping entities to it.
Step 1: Add a variety of text samples
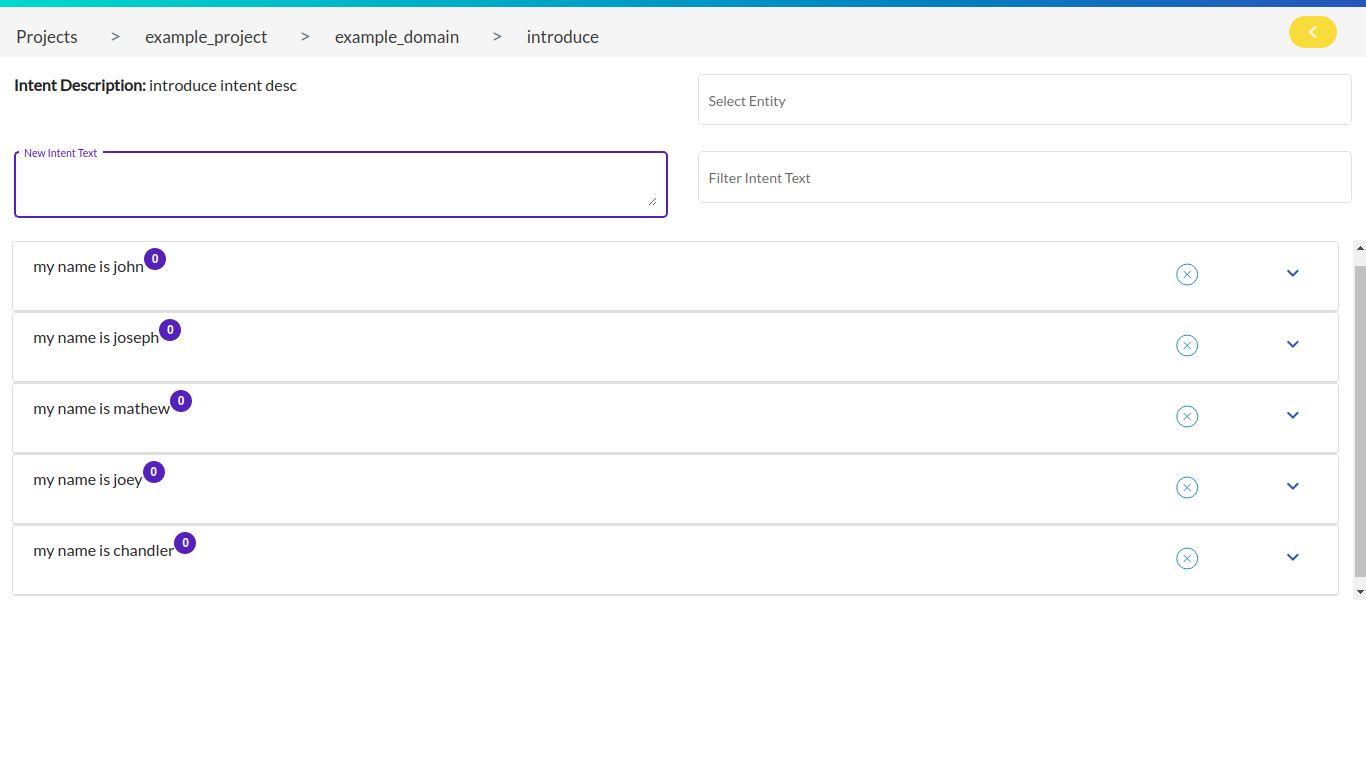
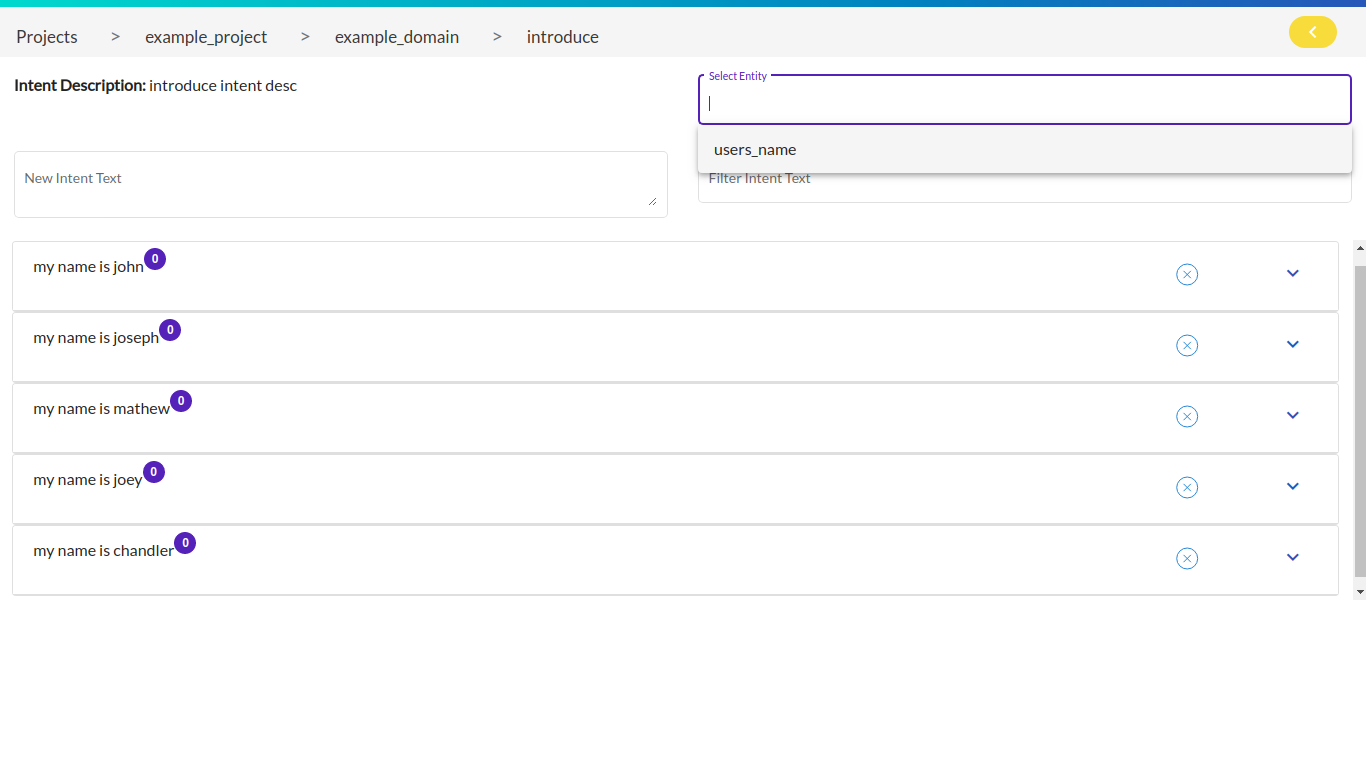
Step 2: Select the entity from the Select Entity dropdown
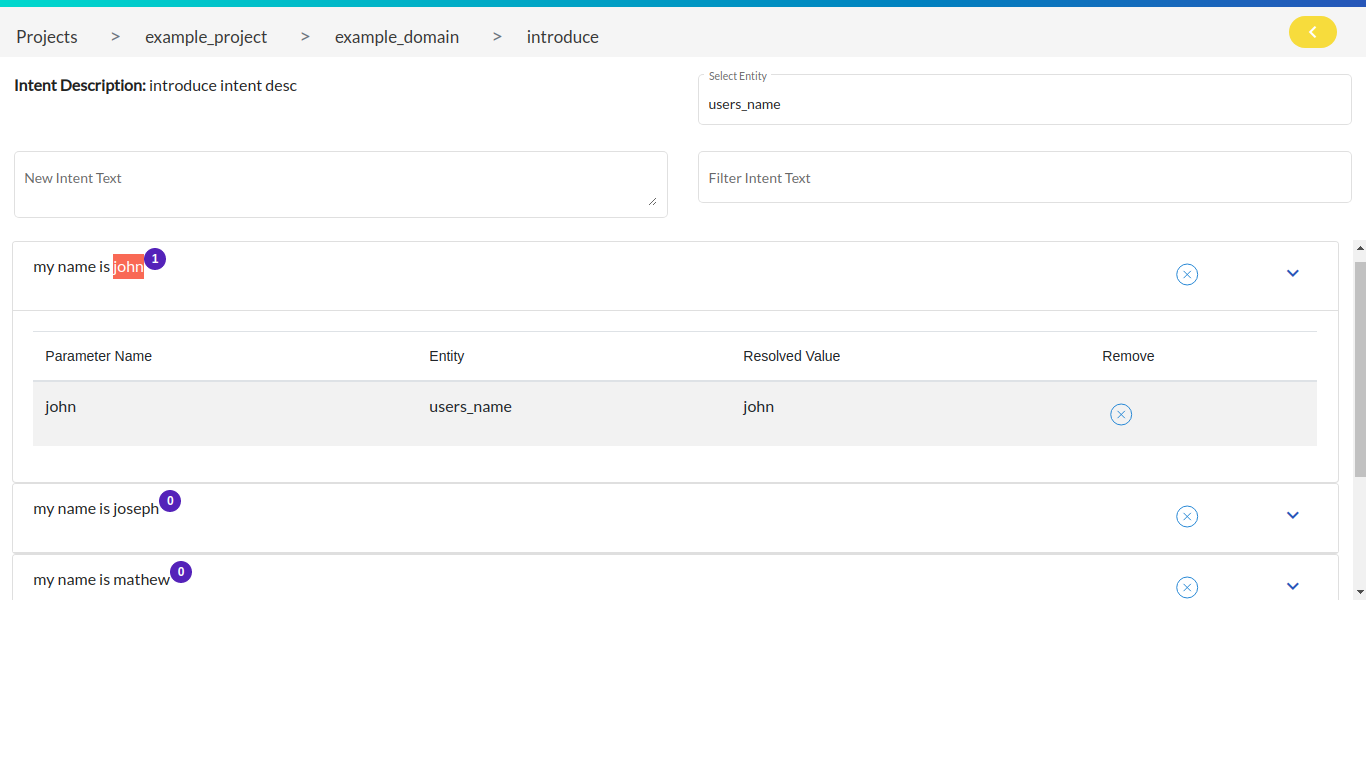
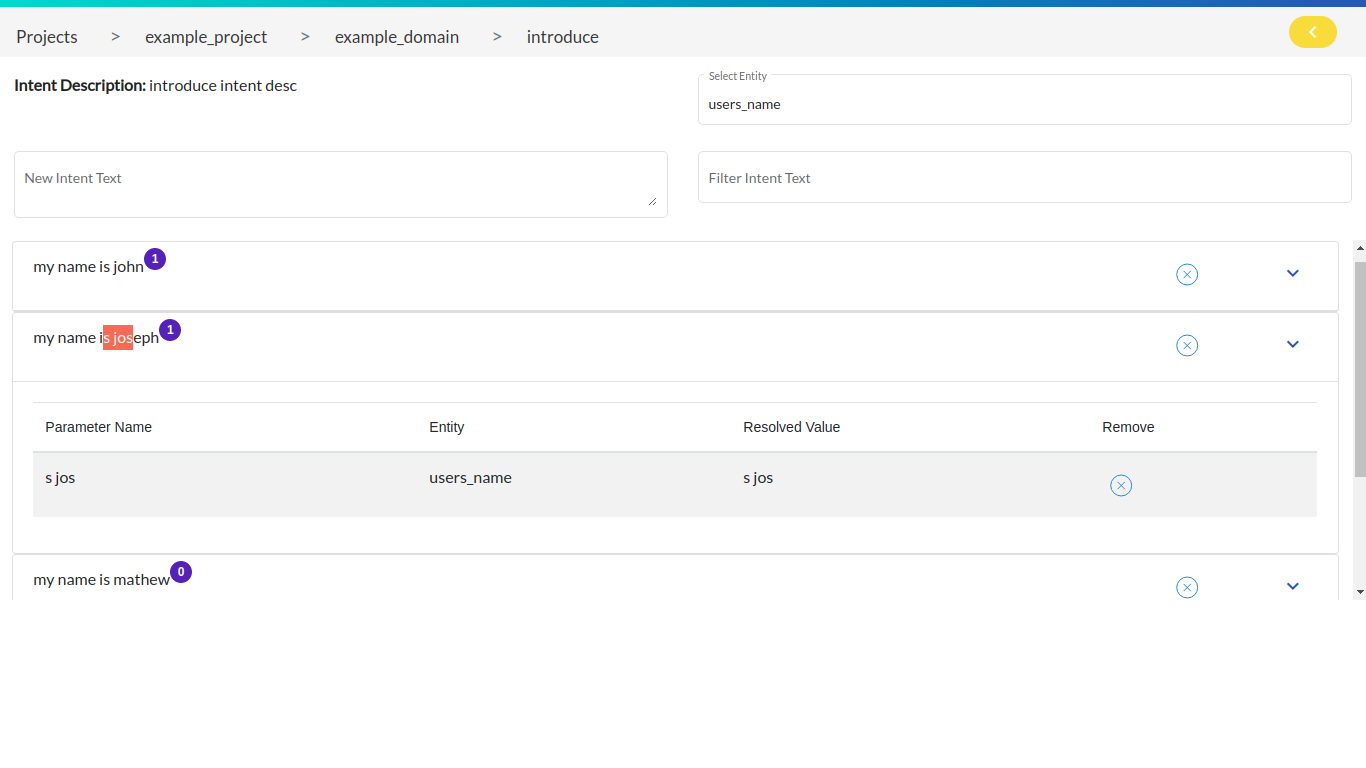
Step 3: Highlight the names (Mapping)
Step 4: Delete the unwanted mappings using the delete button
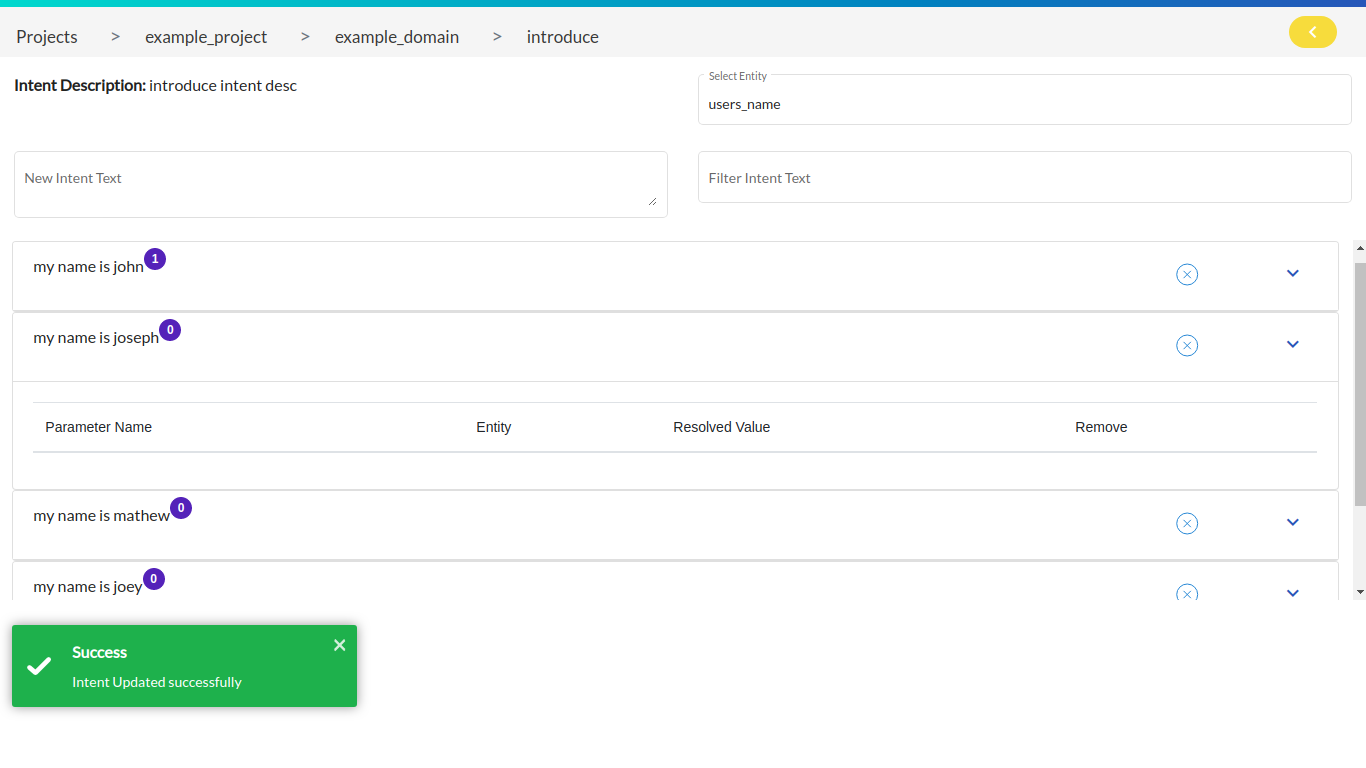
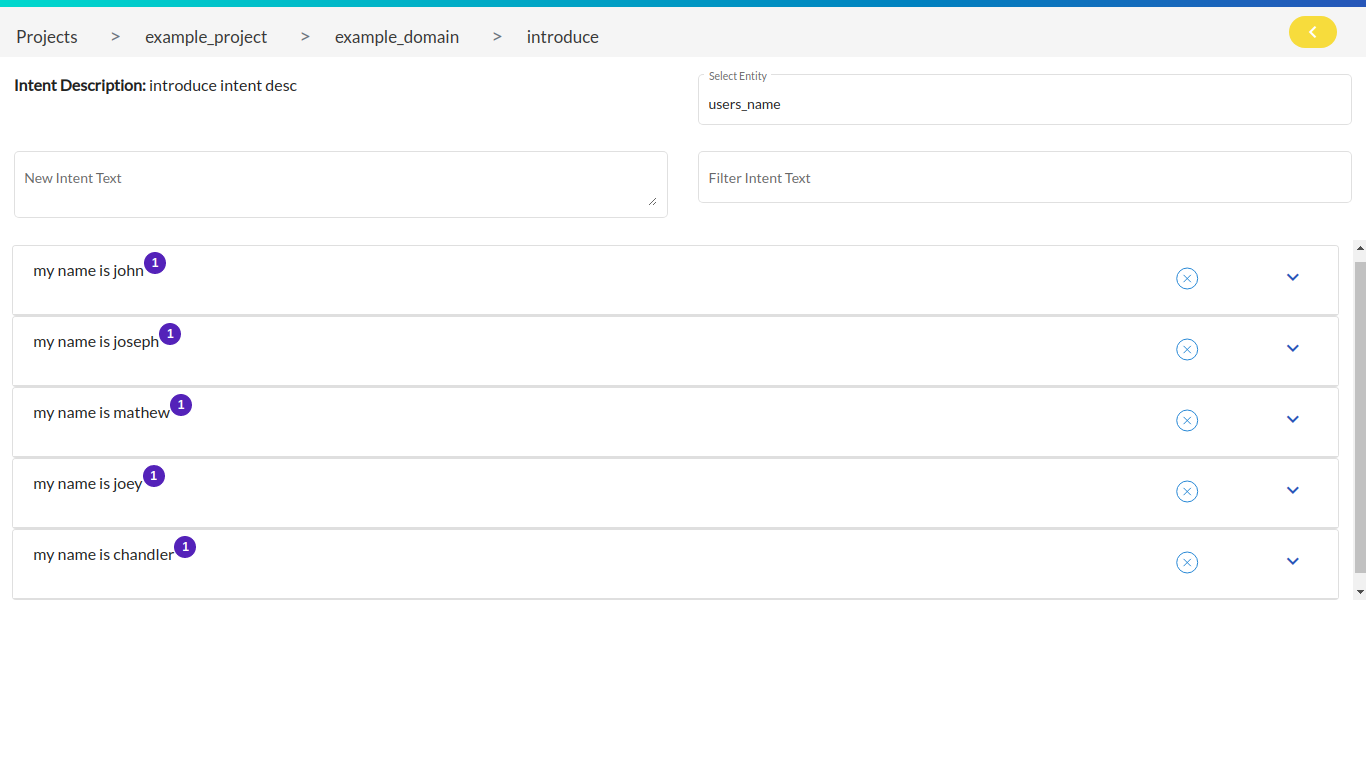
Final Screen
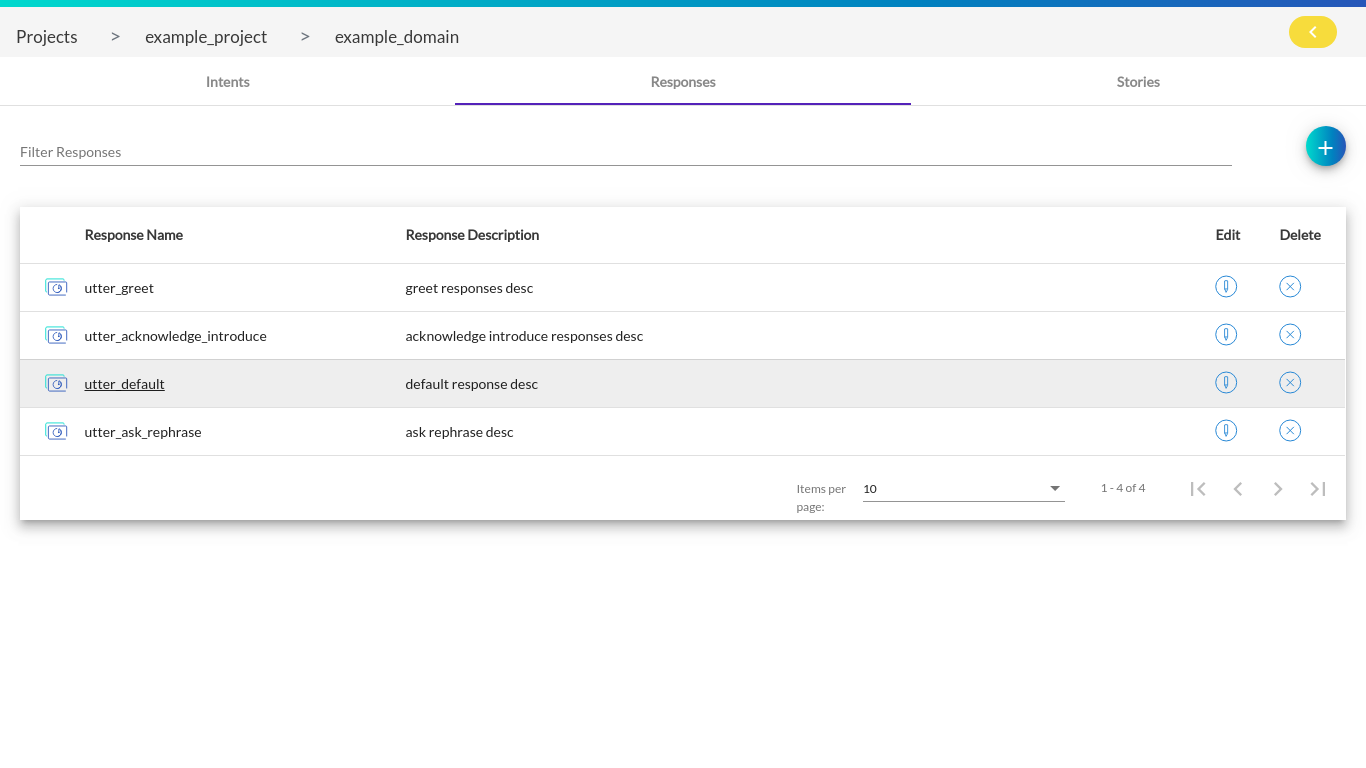
Responses
If you want your assistant to respond to user messages, you need to manage these responses. In the training data for your bot, your stories, you specify the actions your bot should execute. These actions can use utterances to send messages back to the user. Listing below the tasks associated with a response:
Note: User cannot add space in the response’s name while performing any of the operations mentioned below.
1. Creating Response
By clicking on the add response button, a pop up appears where the user has to enter the response name & response description and hit the confirm button.
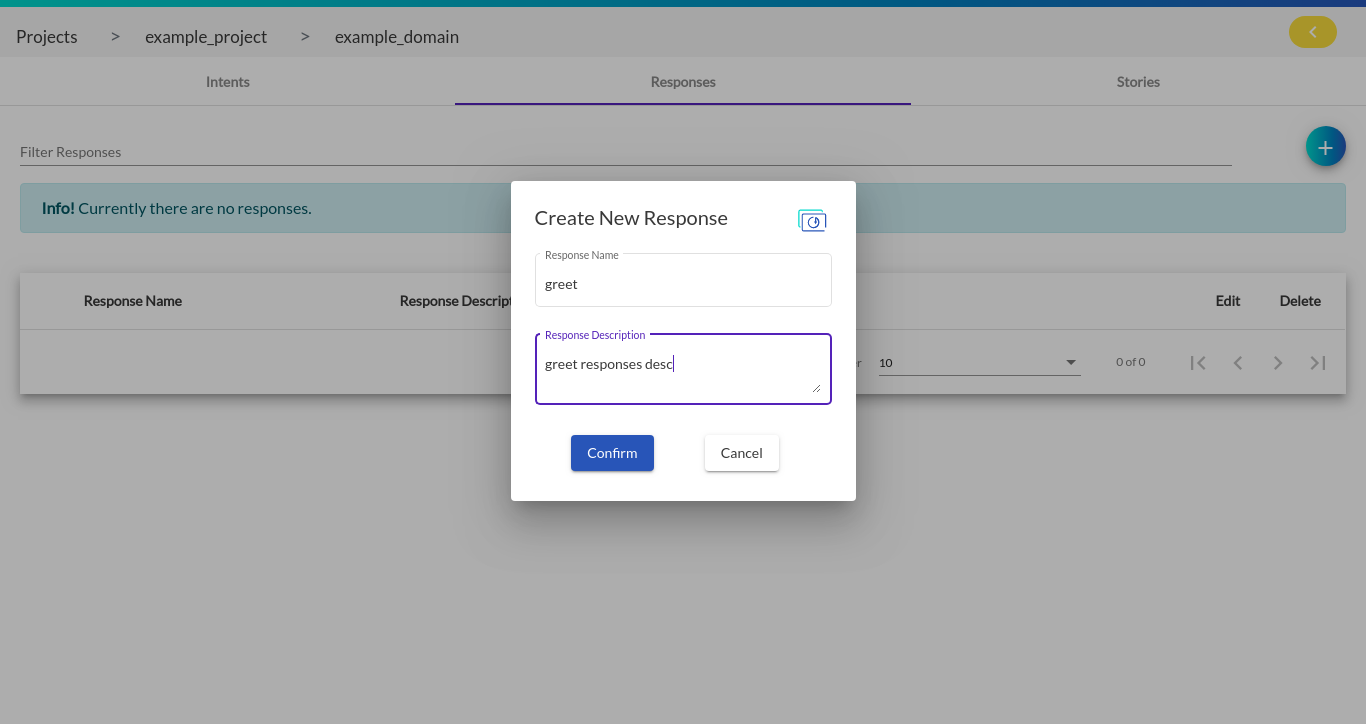
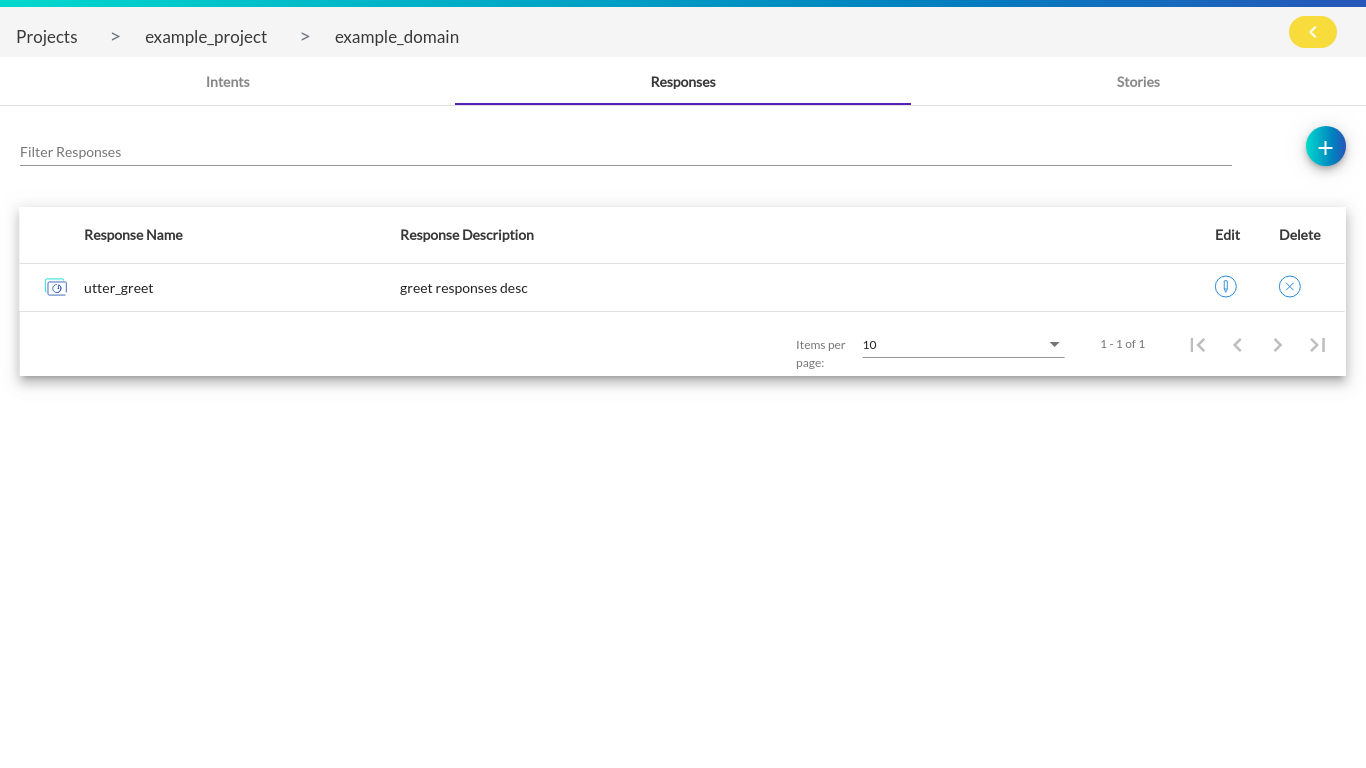
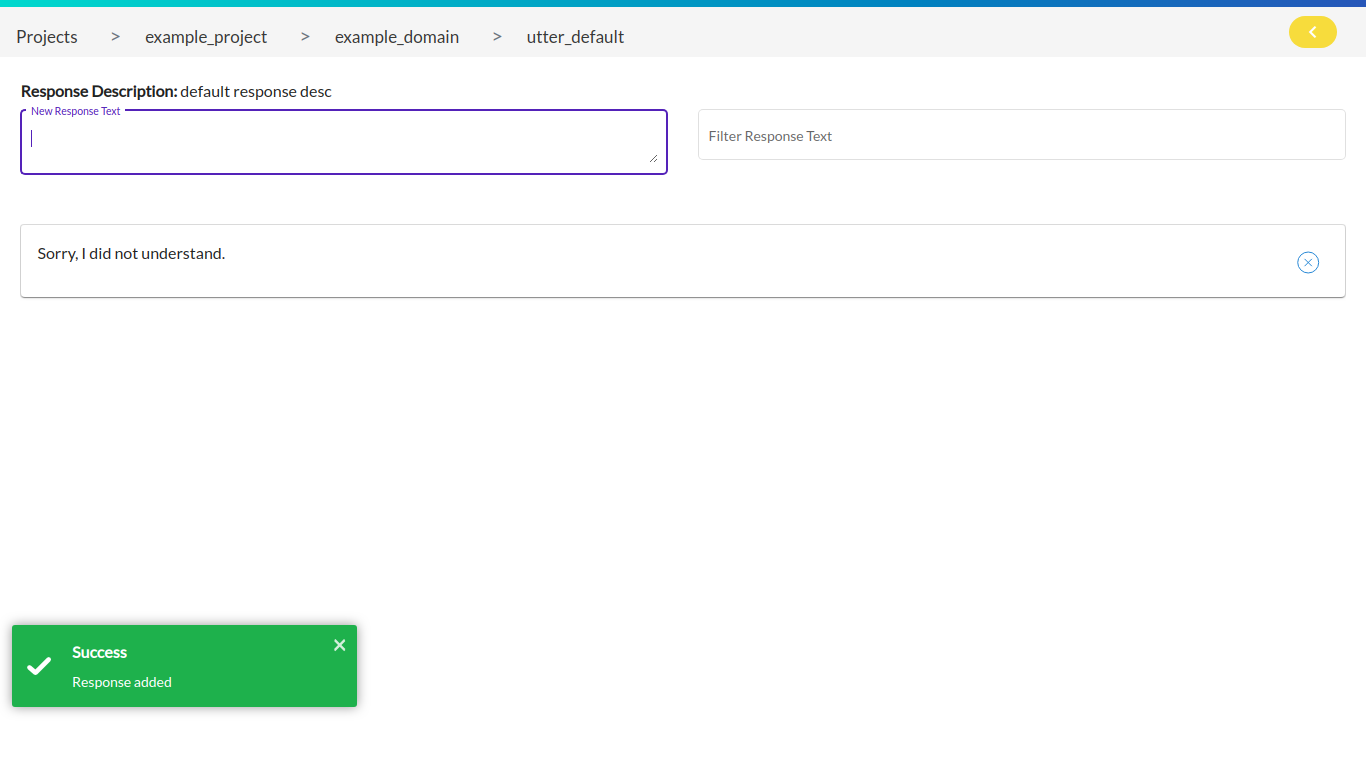
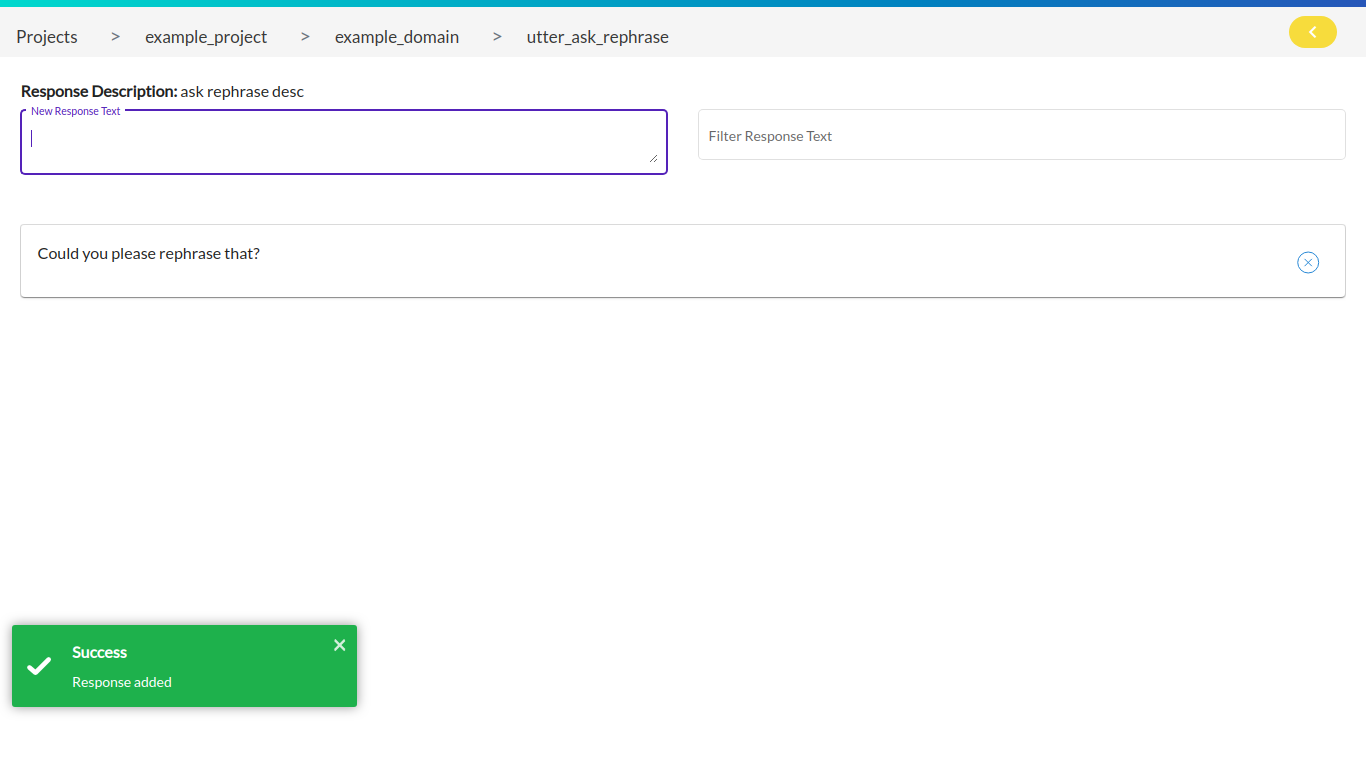
Note 1: ‘utter_’ gets appended to each and every response you create.
Note 2: It is mandatory to create a ‘default’ response & ‘ask_rephrase’ response.
‘default’ - Its is triggered when bot is unable to identify / classify the user intent
‘ask_rephrase’ - If the classification of the rephrased intent was confident, the story continues as if the user had this intent from the beginning, but if the rephrased intent was not classified with high confidence, the user is asked to affirm the classified intent.

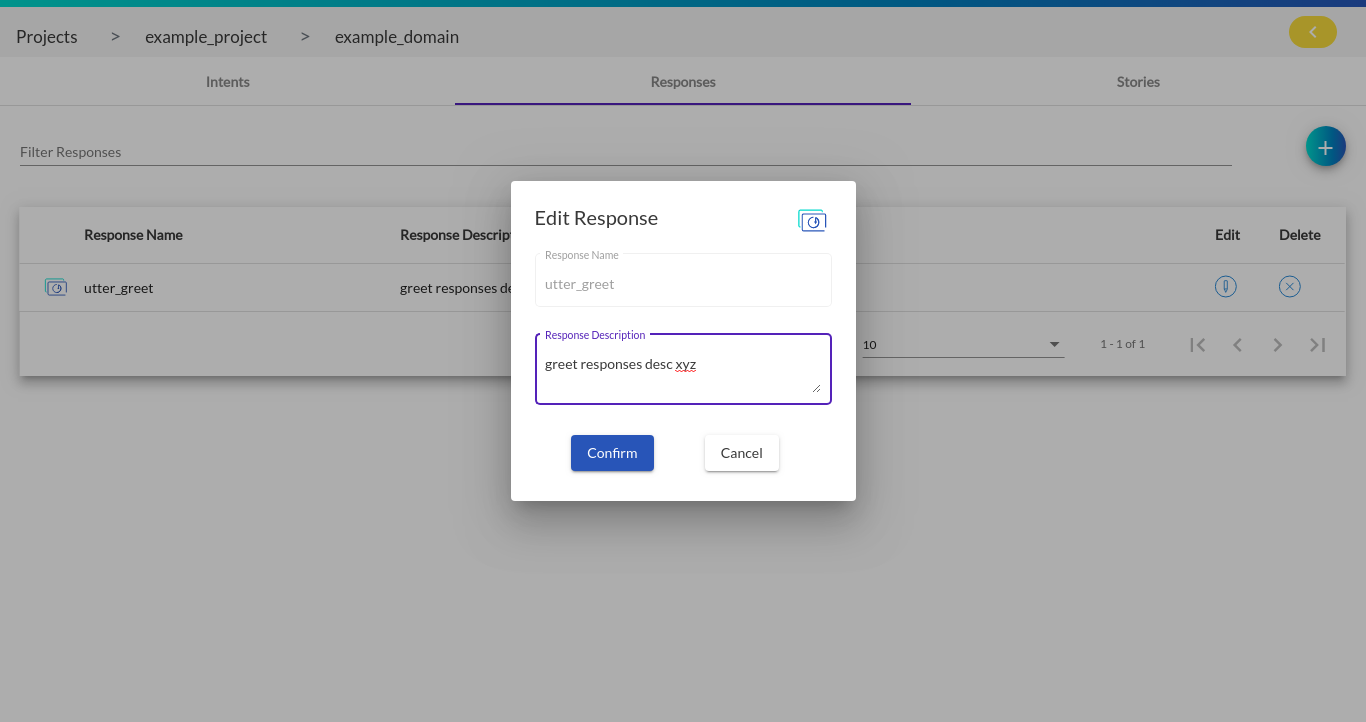
2. Editing Response
By clicking on the edit response button, a pop up appears where the user can only edit the response description and not response name.
3. Deleting Response
By clicking on the delete response button, a pop up appears where the user has to confirm his/her actions.
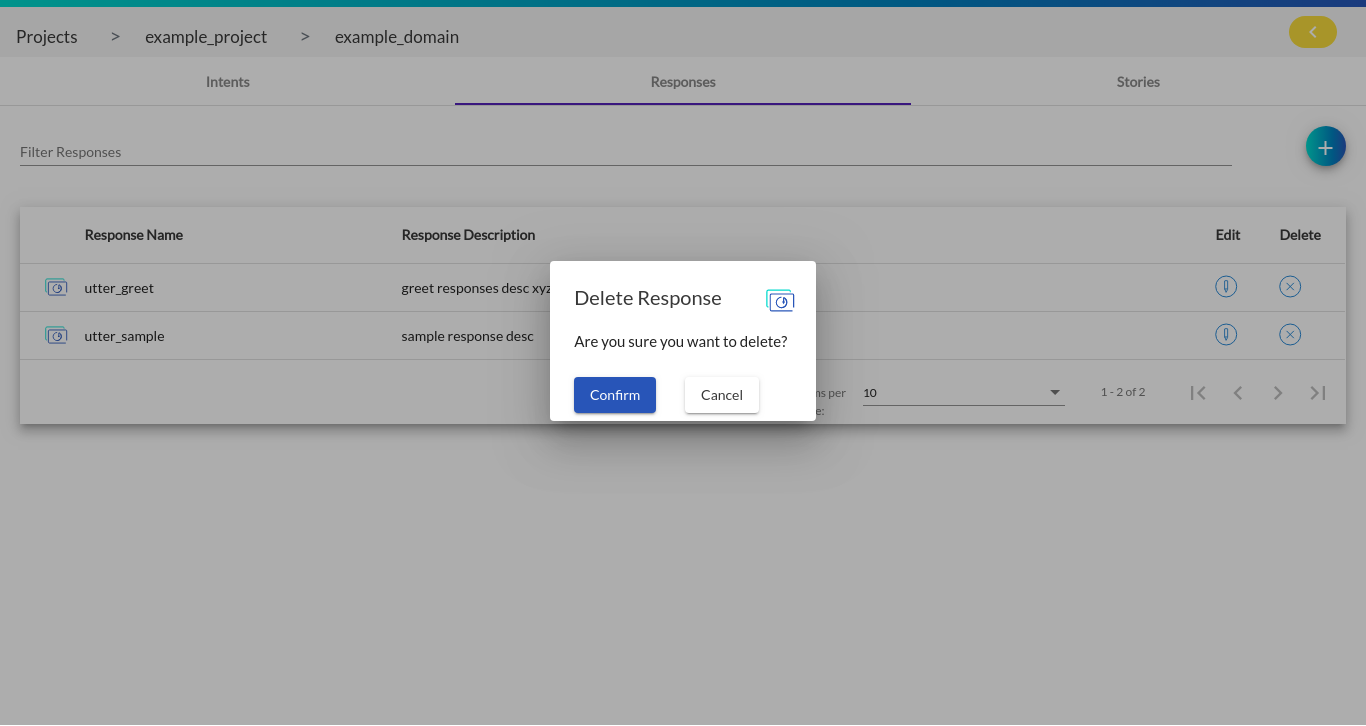

Note: You wont be able to delete those responses which are used in stories

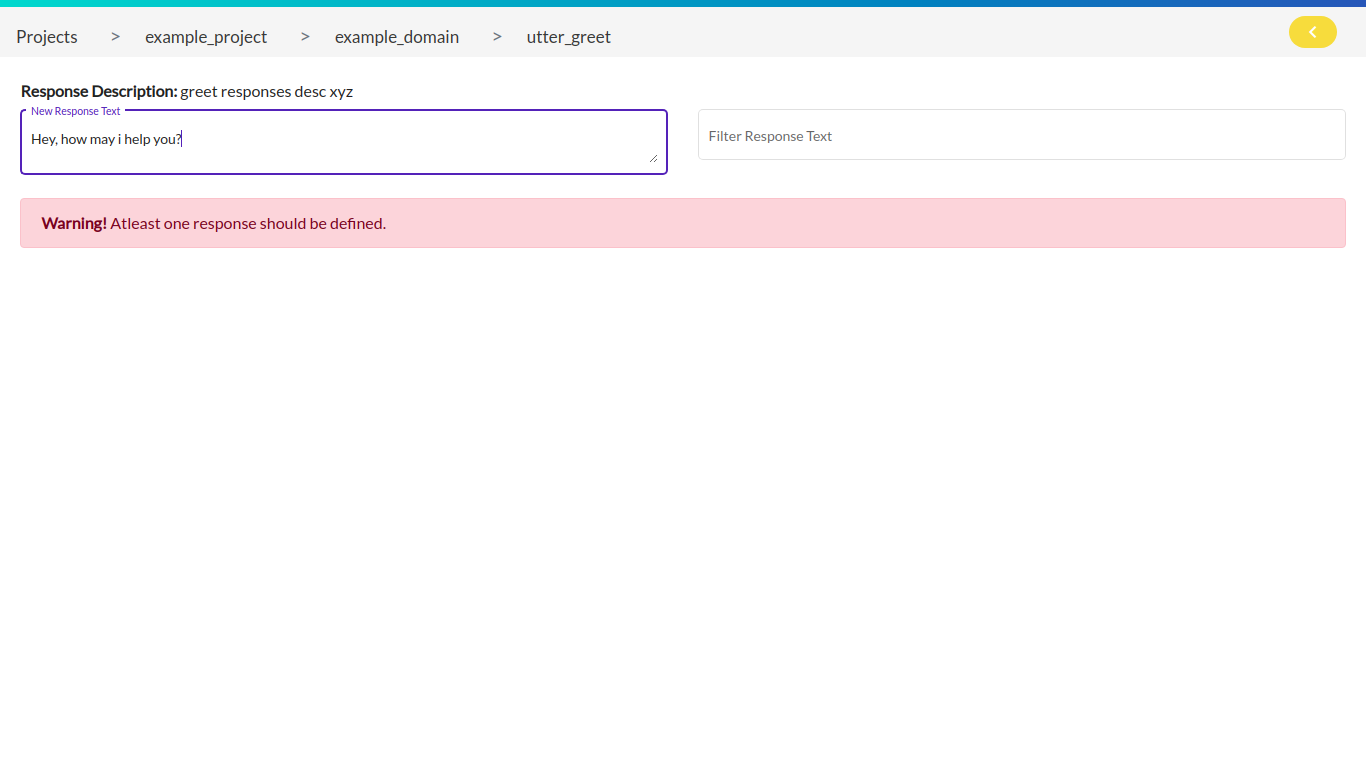
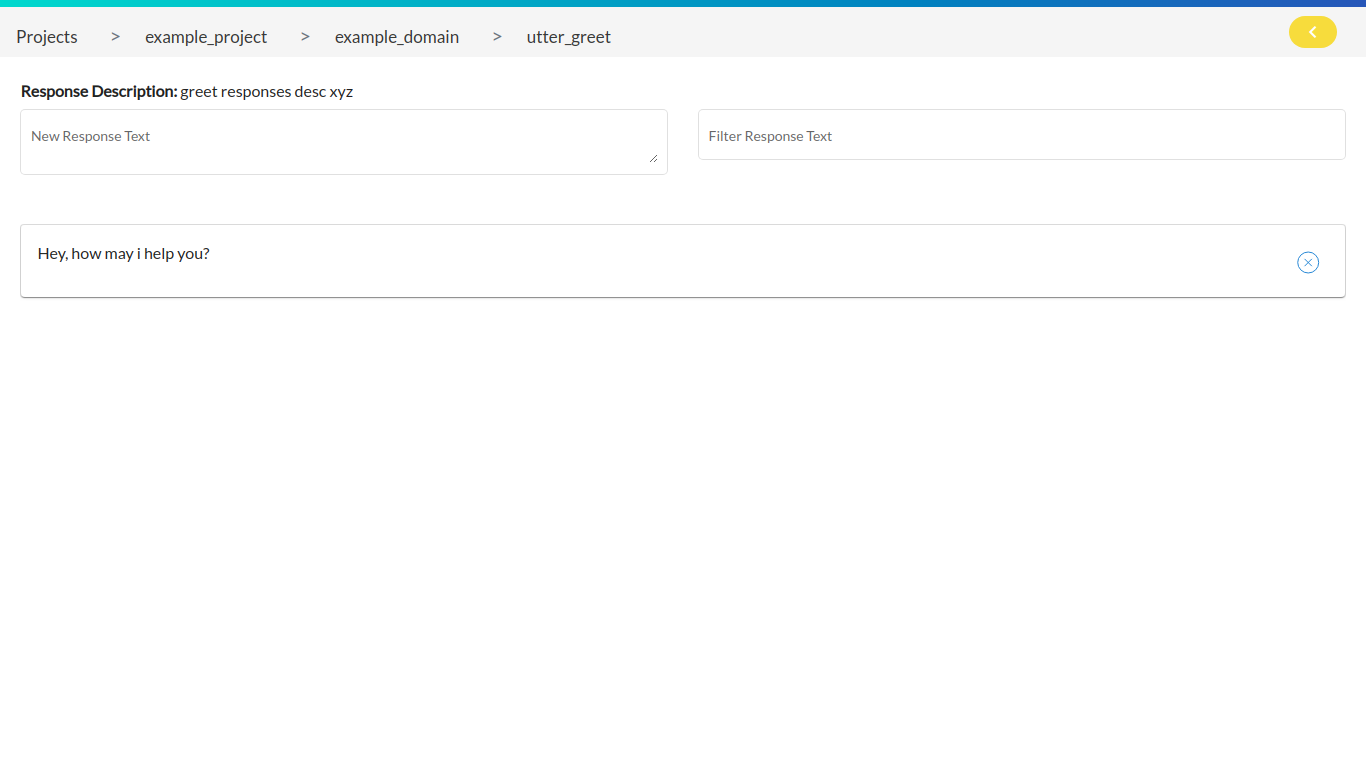
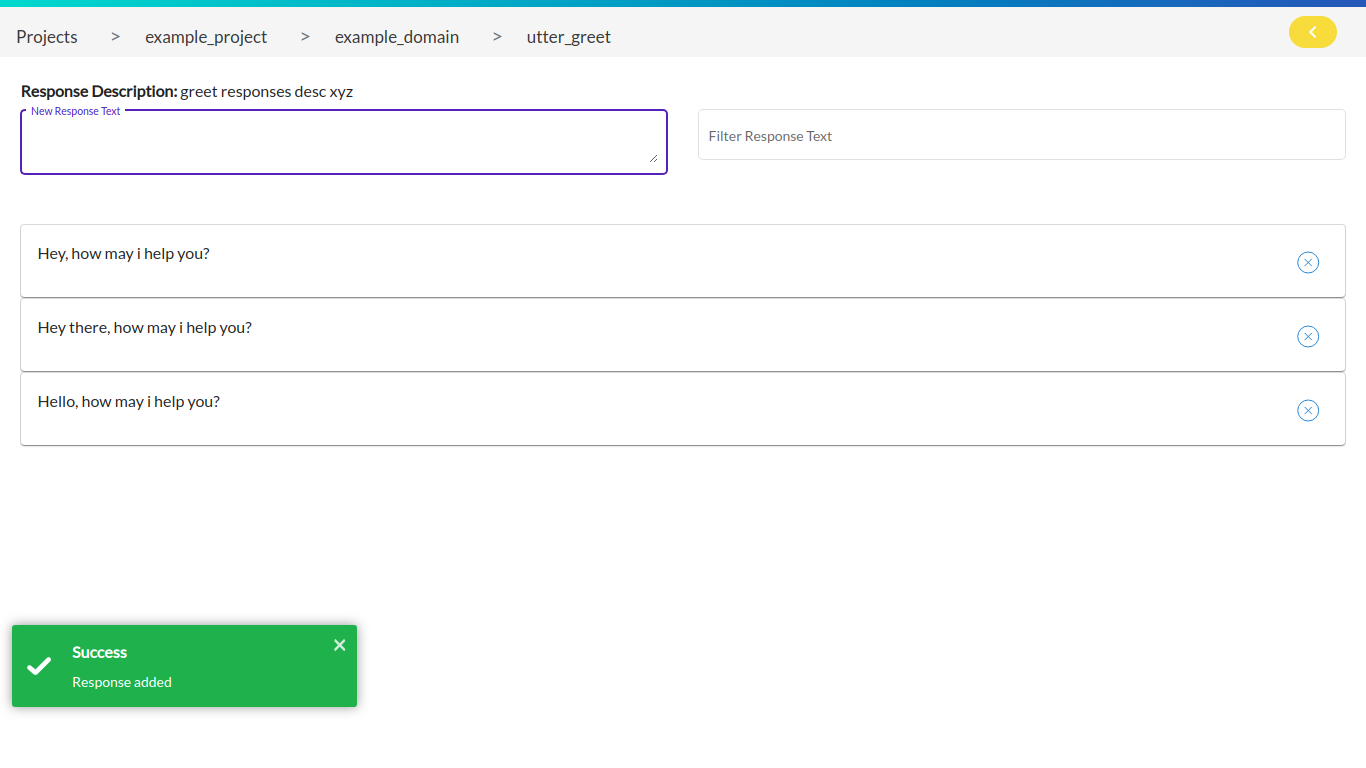
4. Adding Response Text Samples
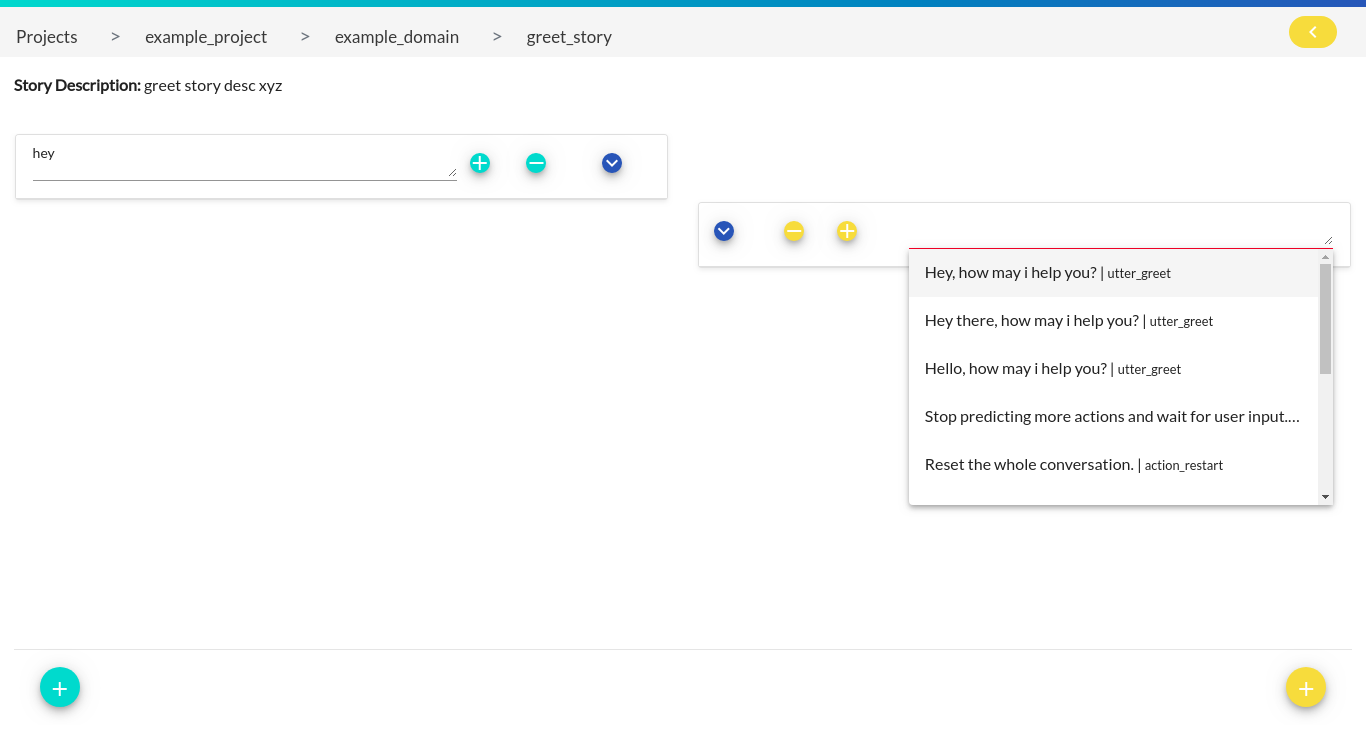
User can add the text samples to any response. In our case we will take the ‘utter_greet’ response and add some text samples to it. Just click on that particular response to perform the task. Type in the text in the new response text textbox and hit enter.
Some samples of ‘utter_greet’ intent would be ‘Hi, how may i help you?’, ‘Hey There, how may i help you?’, etc.
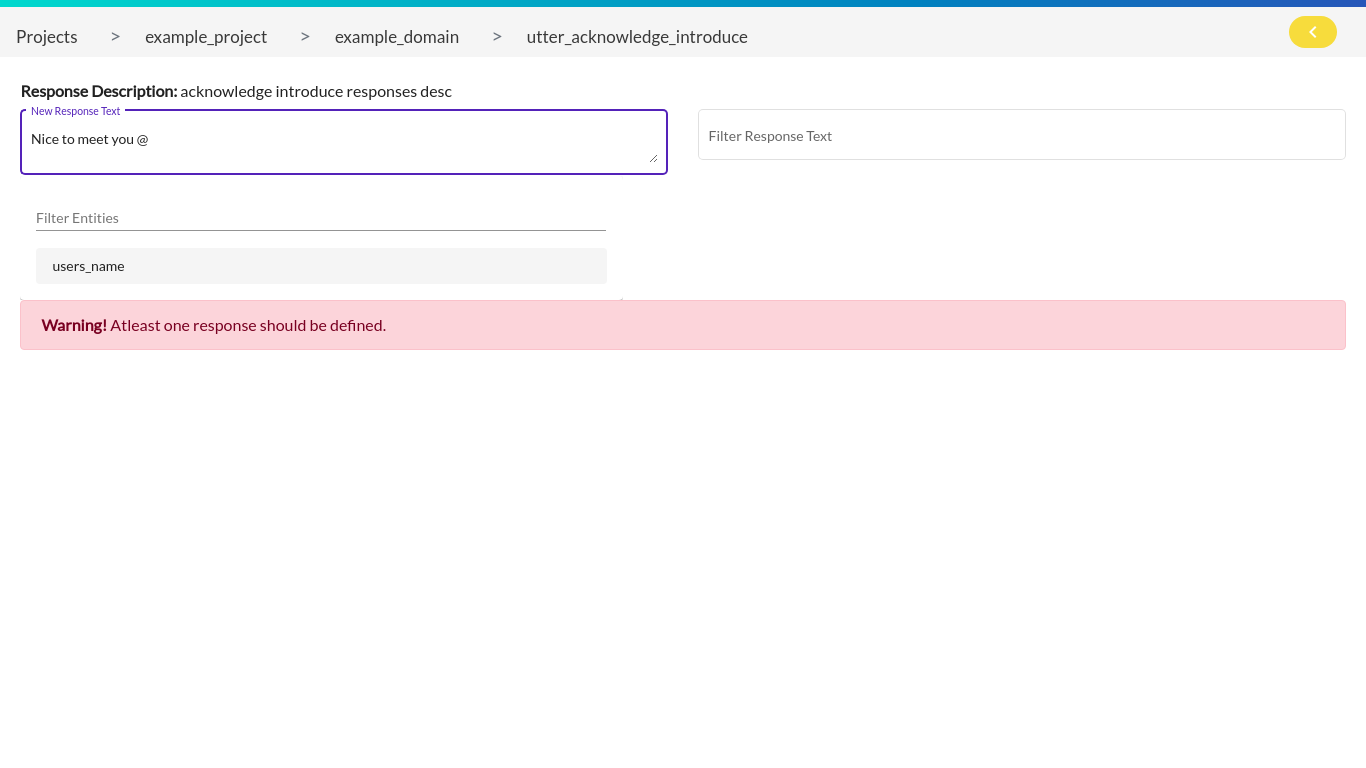
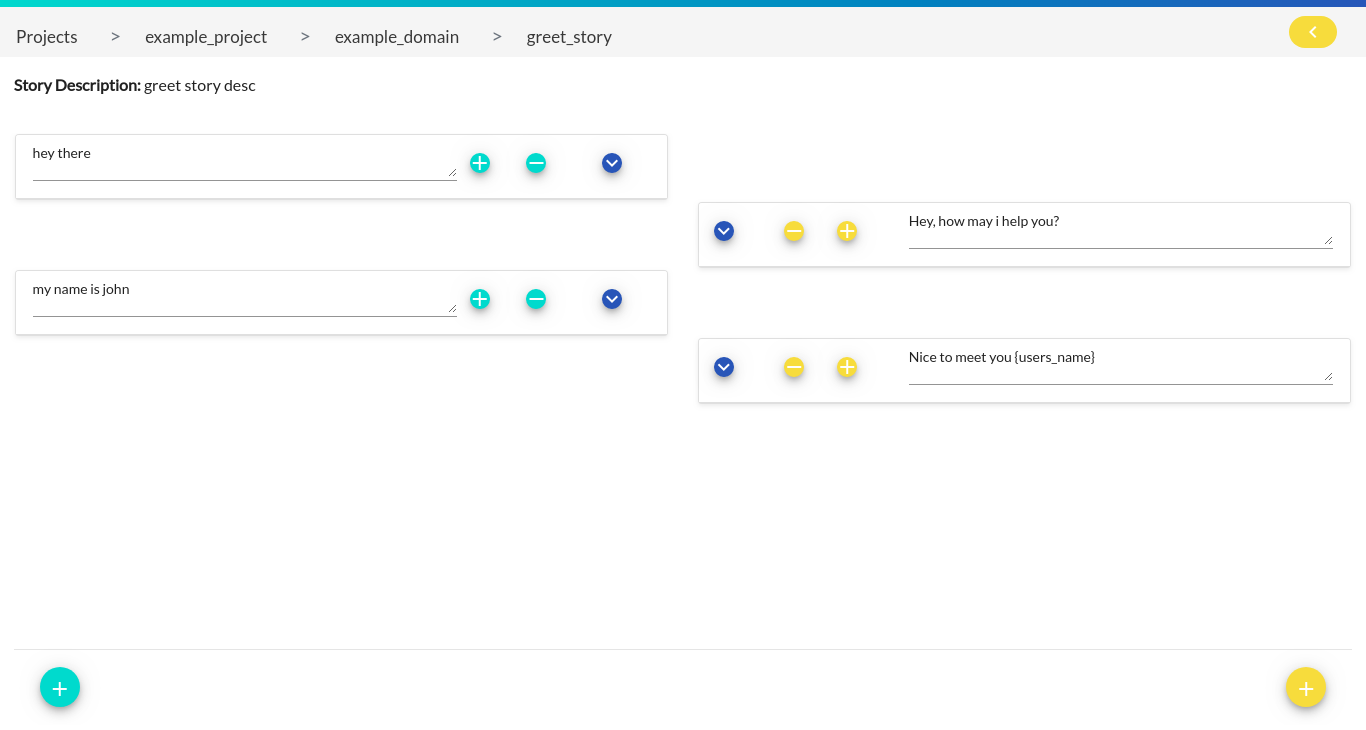
5. Placing entities in response text samples
Before moving forward, kindly check the Entities section to get familiar with enities and the tasks associated with it.
Once the bot has learned the data, it needs a medium to showcase its learning. Since our bot is a chatbot, response could be a perfect fit to implement this. In this case, we will create another response called ‘acknowledge_introduce’ where the bot will showcase its learned value.
So let’s start with adding the response samples and place entities in it.
Step 1: Start writing your response, the moment you wish to place an entity, hit the ‘{‘ key to render the entities list, select the appropriate entity and hit enter.

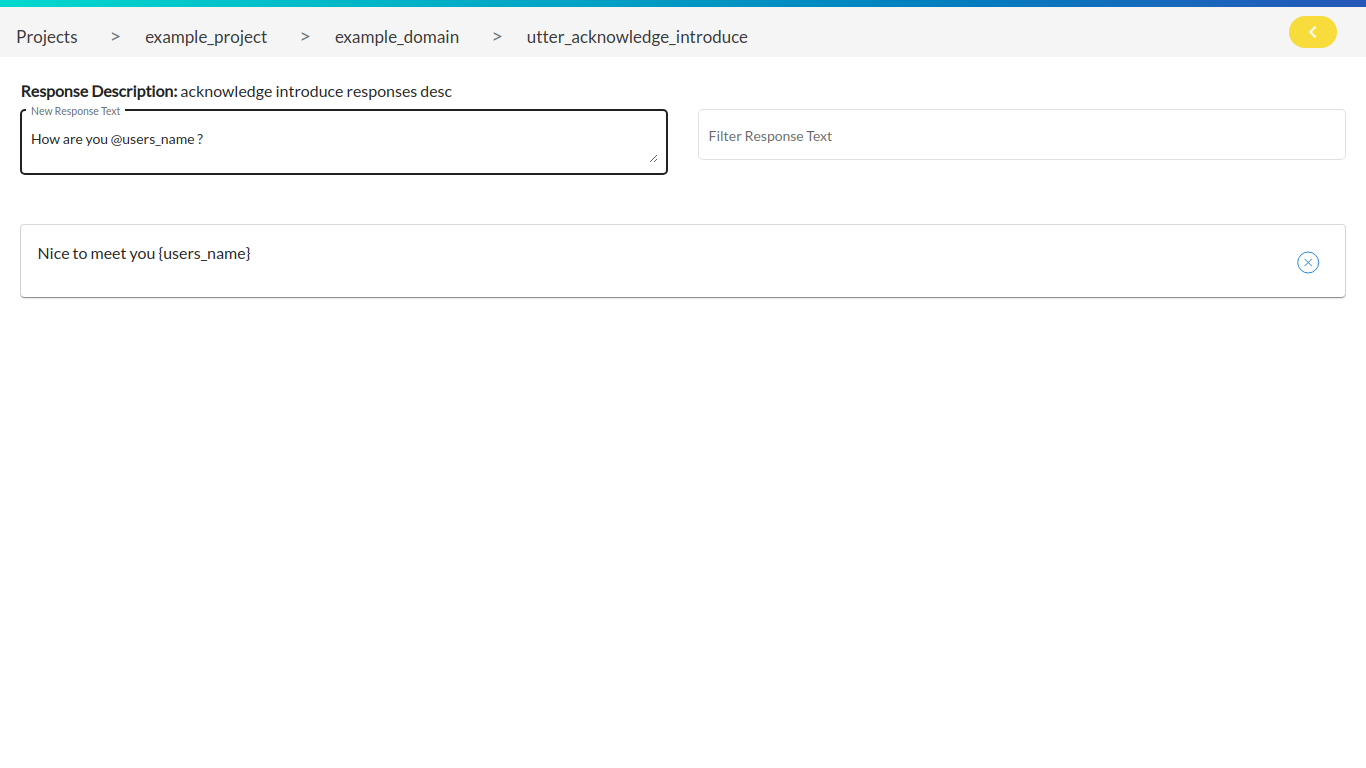

Step 2: Delete unwanted text samples by clicking on the delete button.
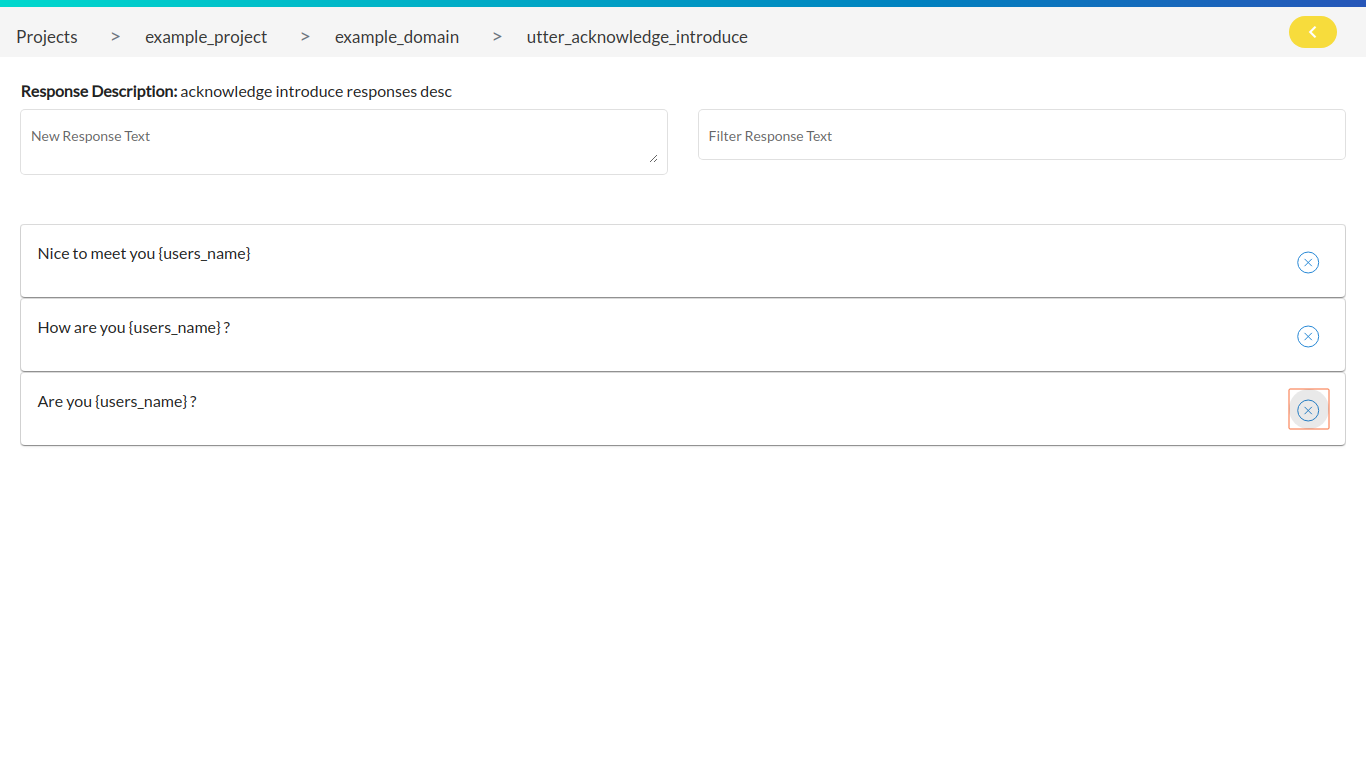

Final screen
Stories
A story is a representation of a conversation between a user and the bot, converted into a specific format where user inputs are expressed as corresponding intents (and entities where necessary) while the responses of an assistant are expressed as corresponding action names. Listing below the tasks associated with a story:
Note: User cannot add space in the story’s name while performing any of the operations mentioned below.
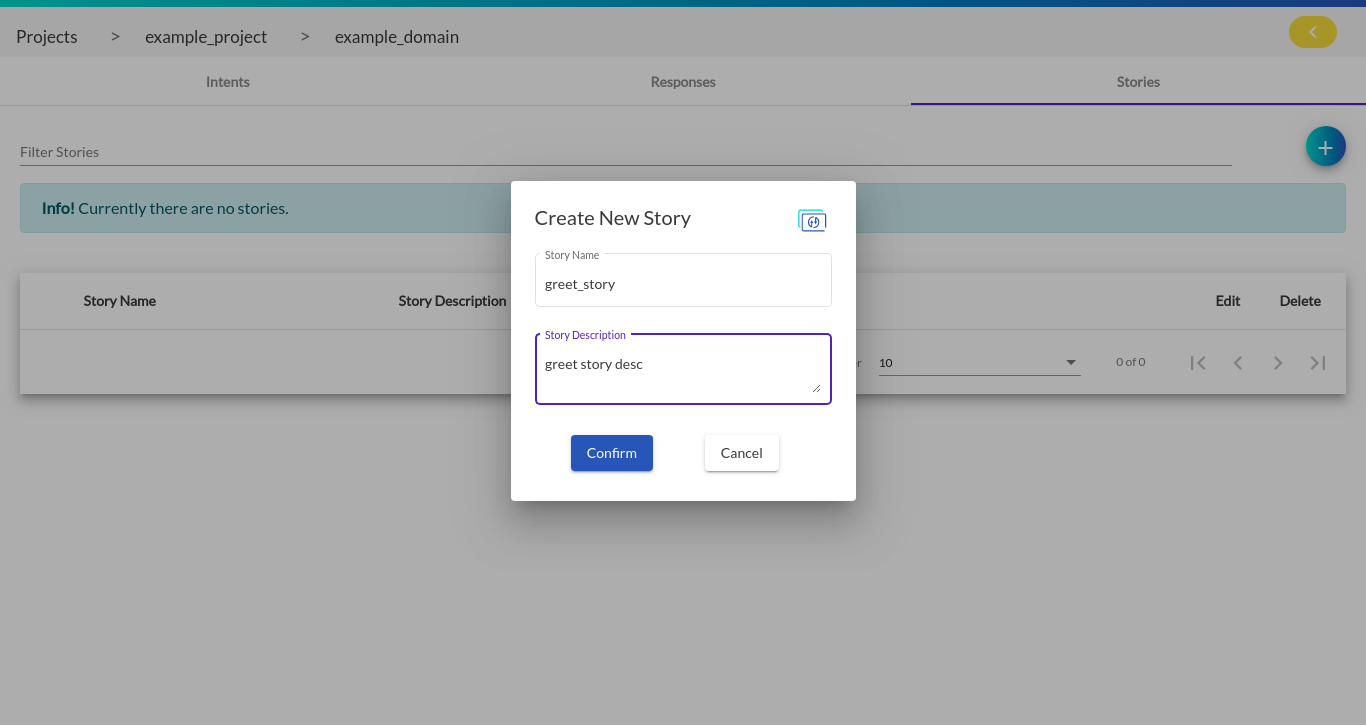
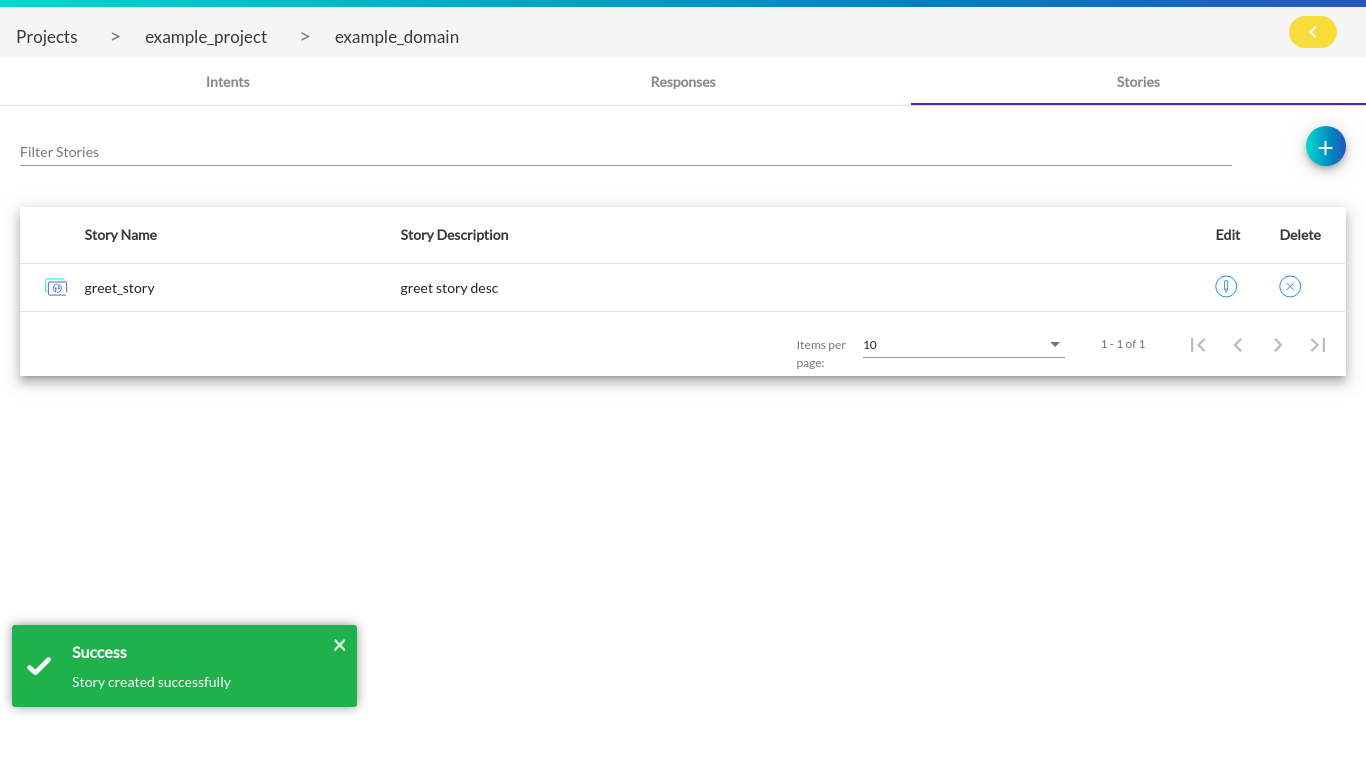
1. Creating Story
By clicking on the add story button, a pop up appears where the user has to enter the story name & story description and hit the confirm button.
Note: ‘utter_’ gets appended to each and every response you create.
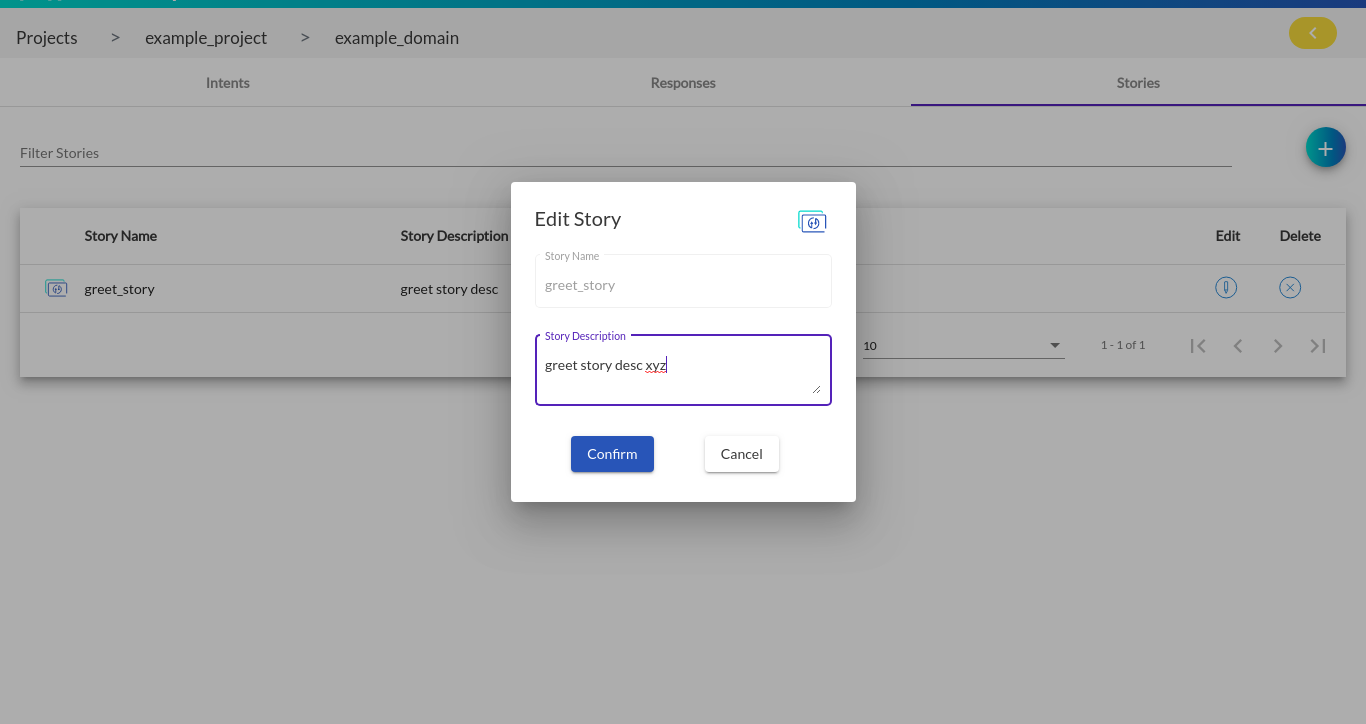
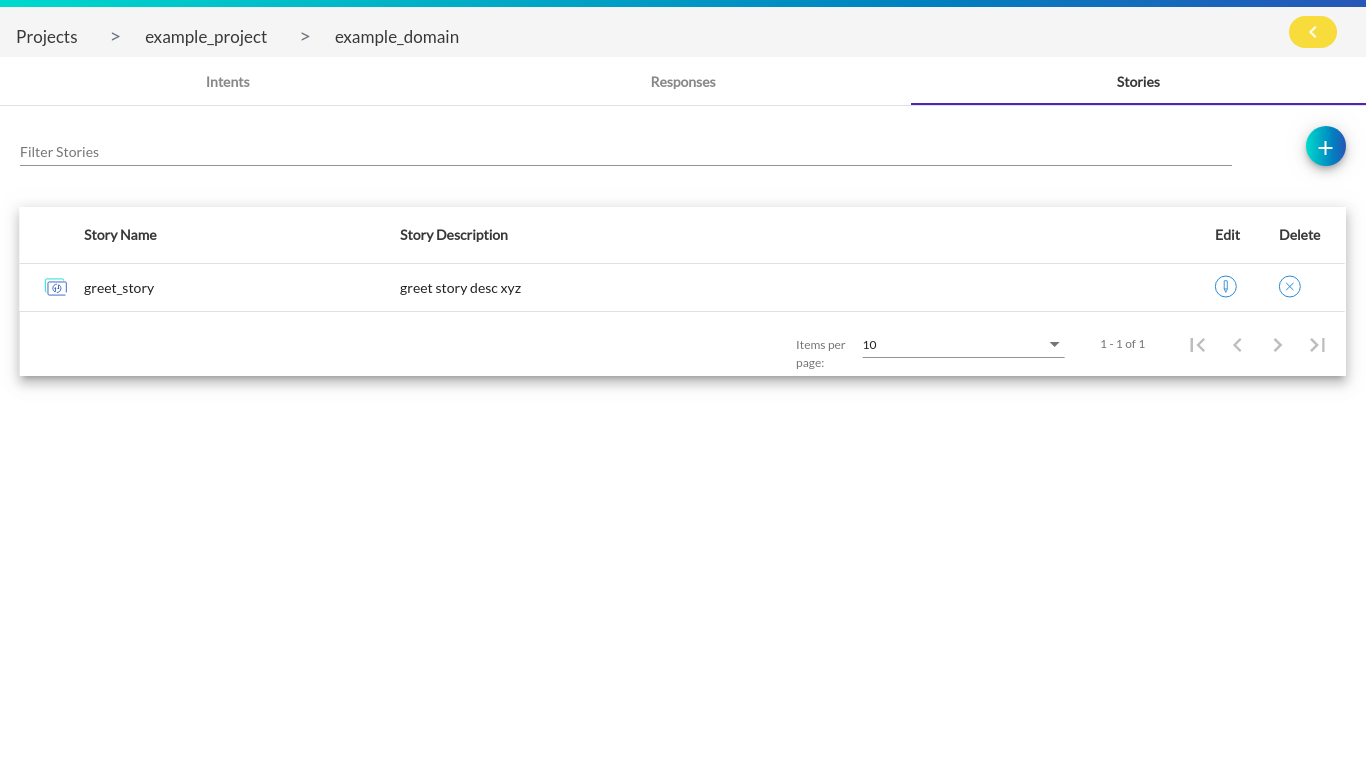
2. Editing Story
By clicking on the edit story button, a pop up appears where the user can only edit the story description and not story name.
3. Deleting Story
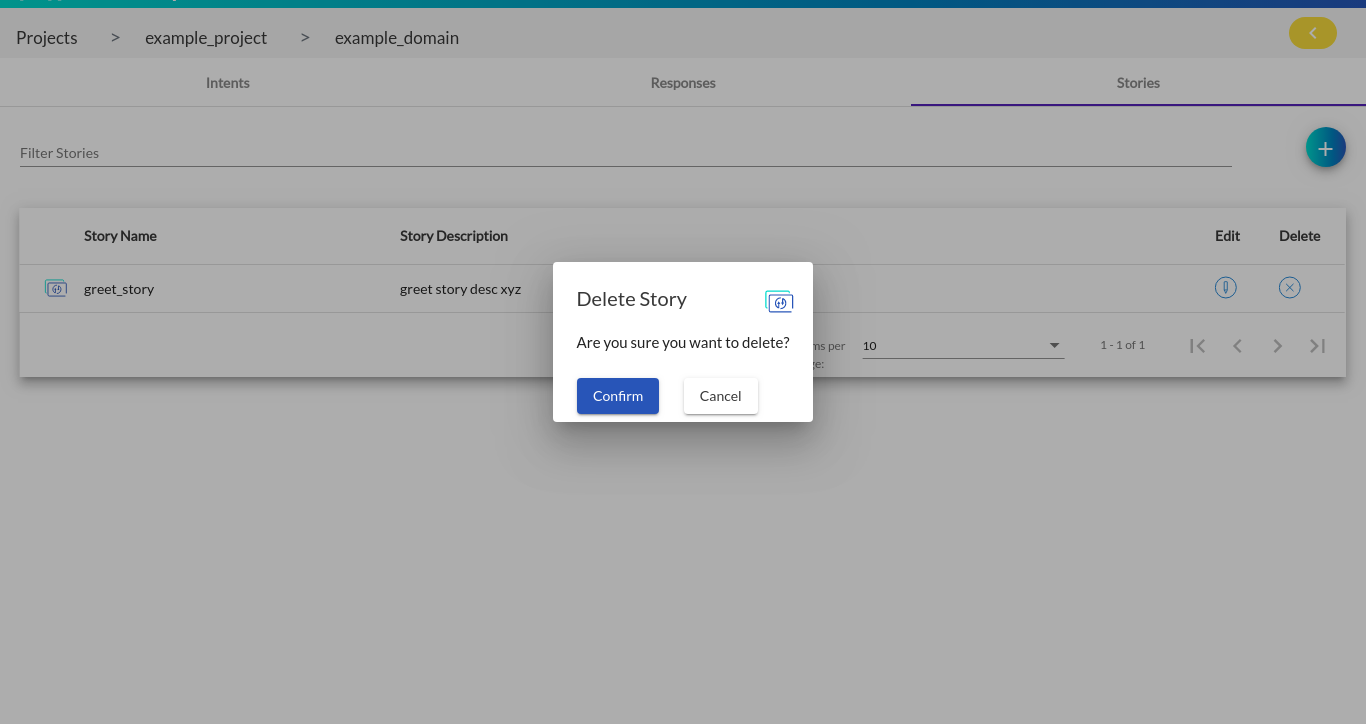
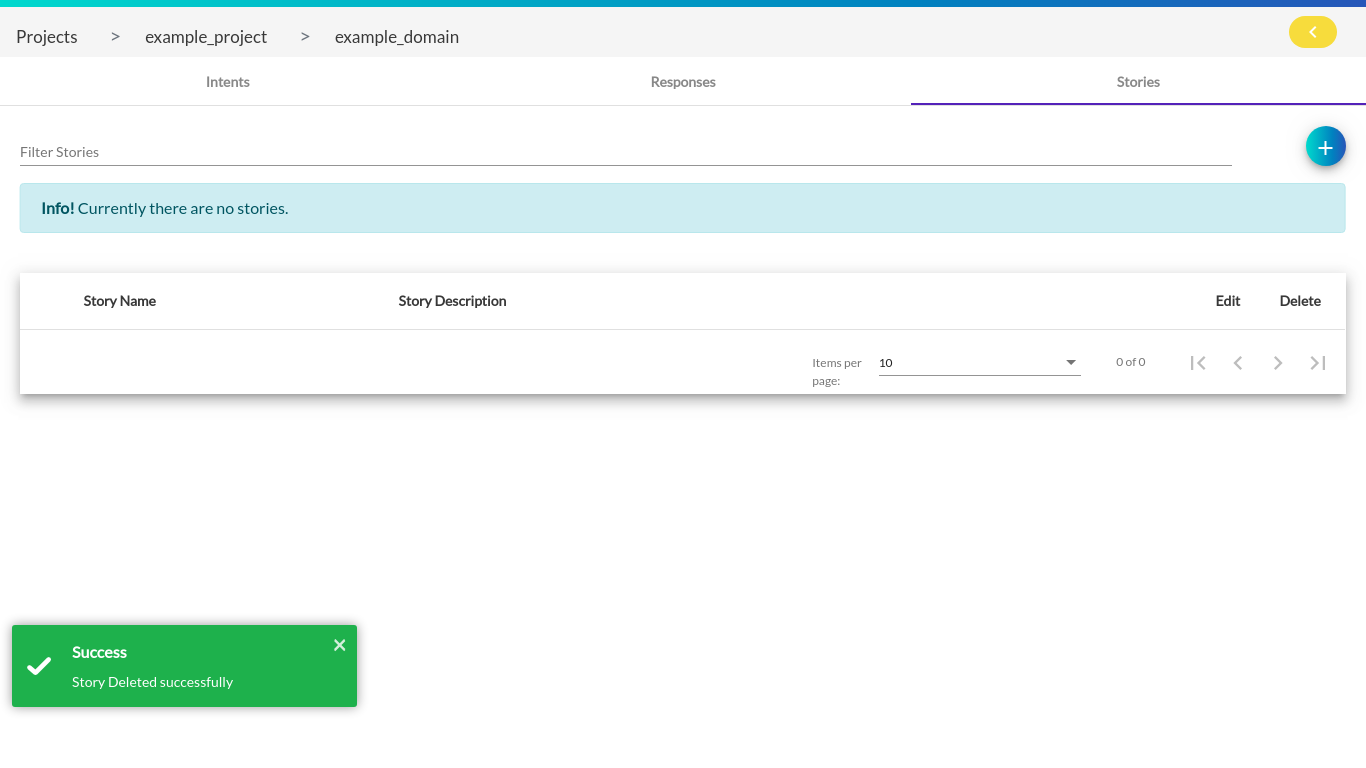
By clicking on the delete story button, a pop up appears where the user has to confirm his/her actions.
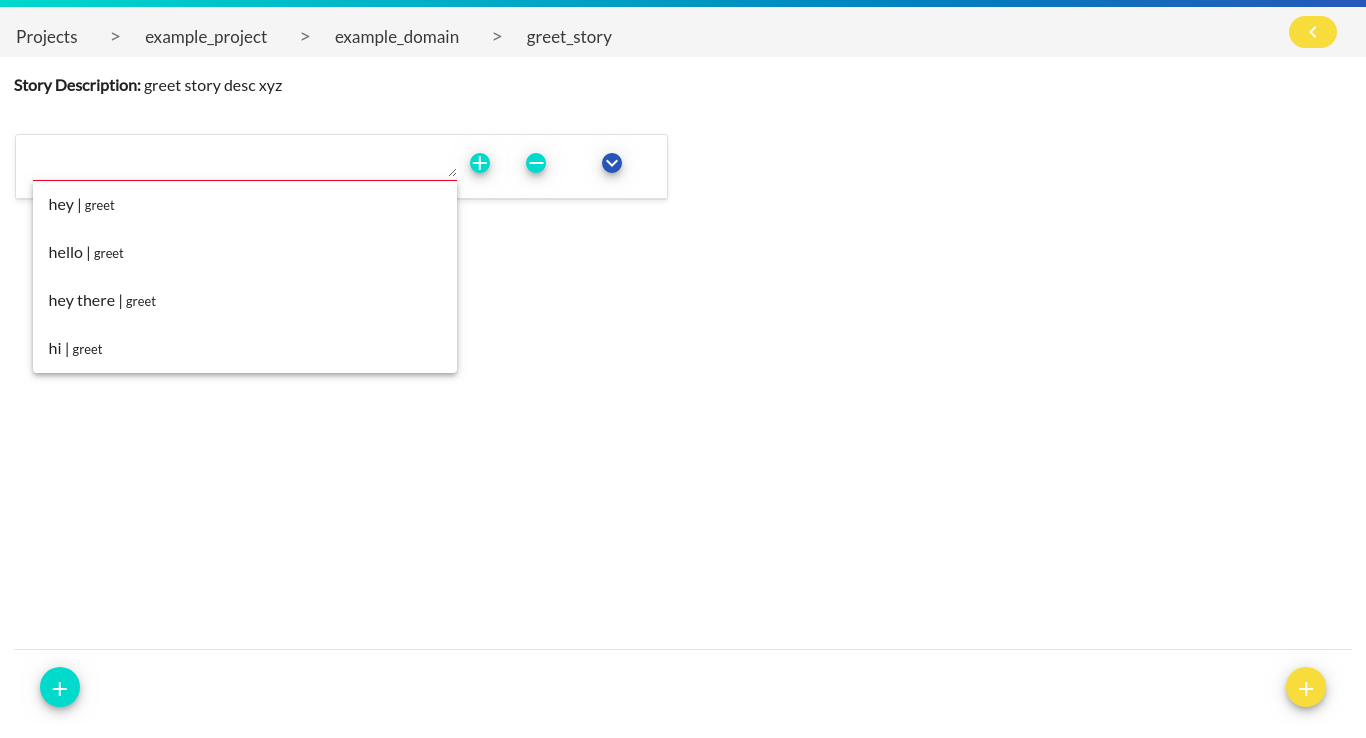
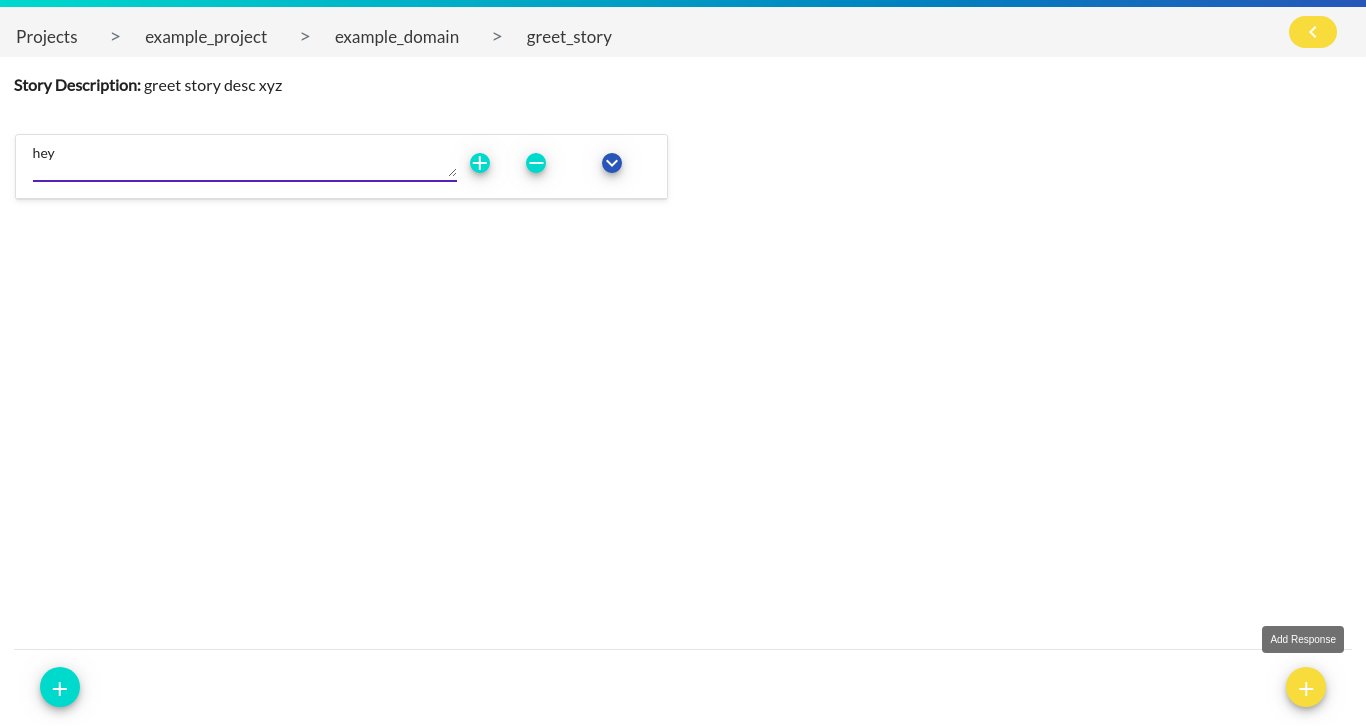
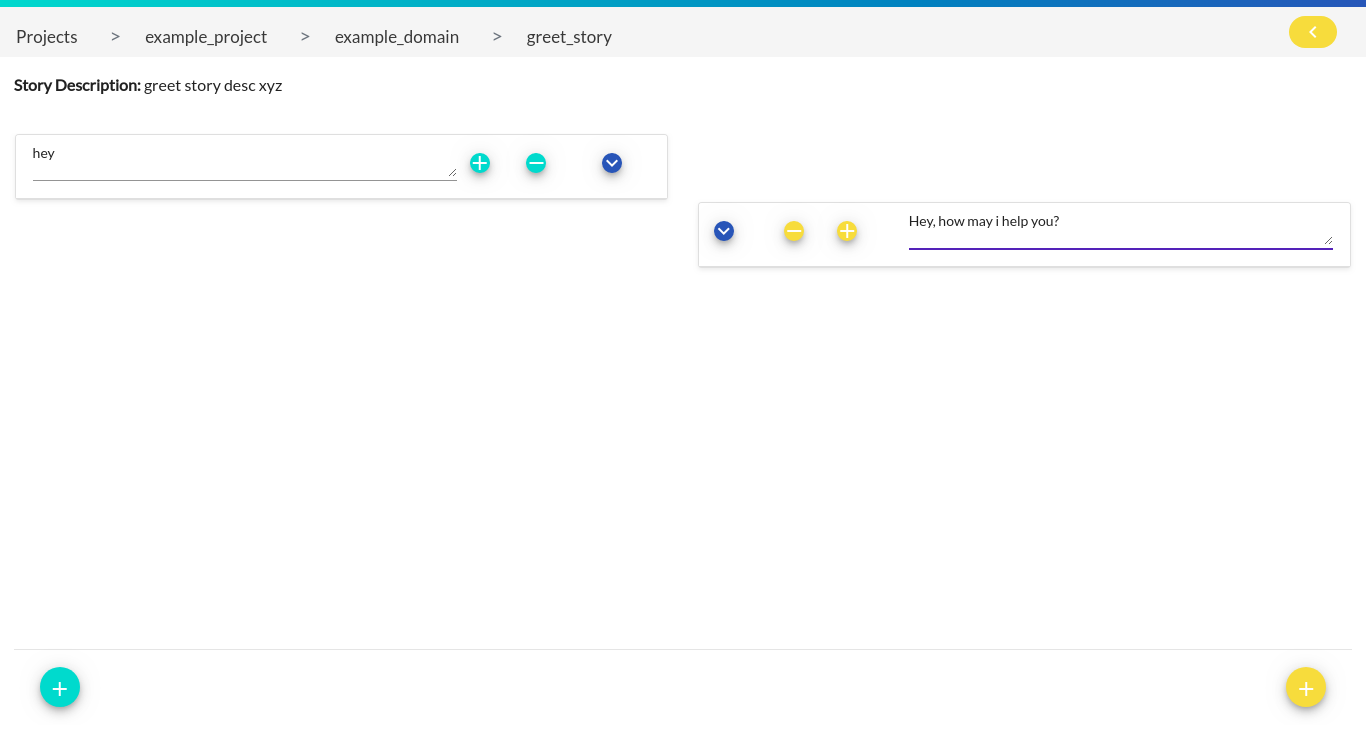
4. Creating Greet Story
We will now be creating a dialogue system with the available intents & responses created in the above steps. The left part of the screen displays the user dialogues and the right part displays the bot dialogues.
Final story
Entities
Entities are your bot’s memory. They act as a key-value store which can be used to store information the user provided (e.g their home city) as well as information gathered about the outside world (e.g. the result of a database query).
Most of the time, you want entities to influence how the dialogue progresses. There are different entity slot types for different behaviors.
For example, if your user has provided their home city, you might have a text slot type called home_city. If the user asks for the weather, and you don’t know their home city, you will have to ask them for it. A text slot type only tells whether the slot has a value. The specific value of a text slot (e.g. Bangalore or New York or Hong Kong) doesn’t make any difference.
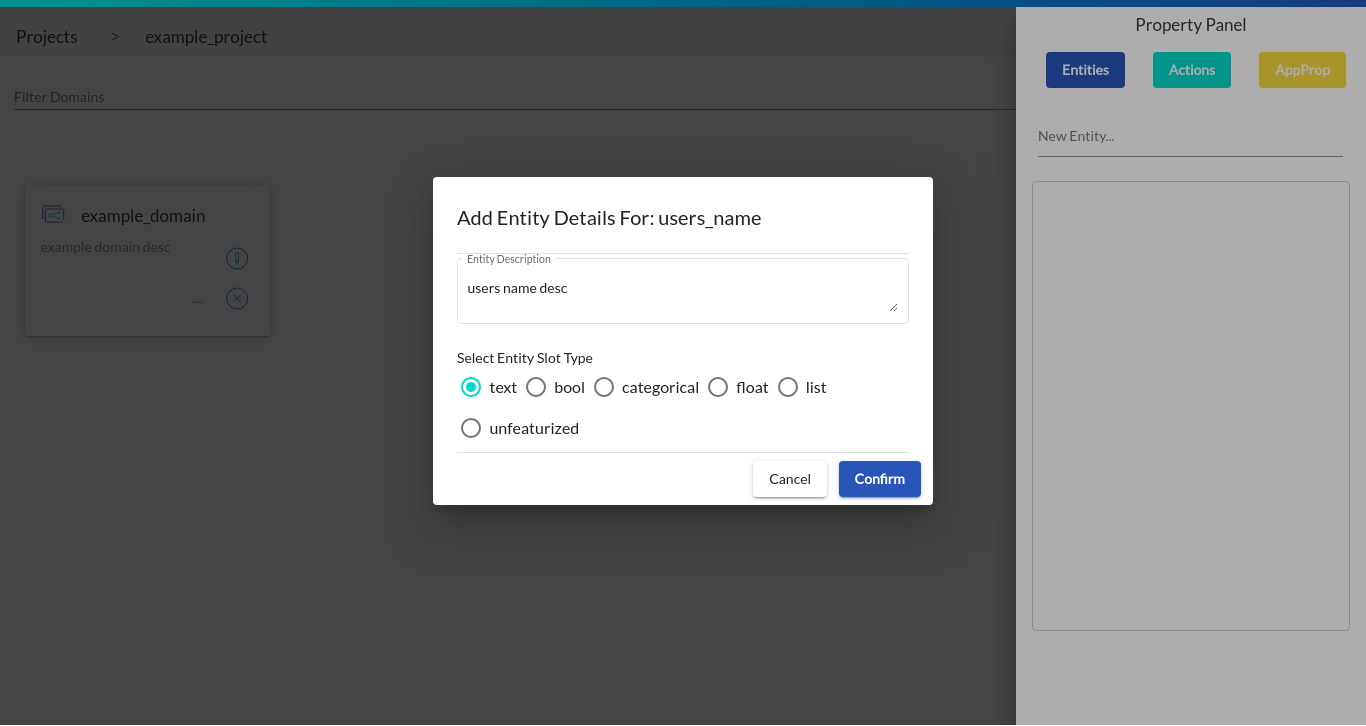
If the value itself is important, use a categorical or a bool slot type. There are also float, and list slots type. If you just want to store some data, but don’t want it to affect the flow of the conversation, use an unfeaturized slot. Listing below the tasks associated with an entity:
Note: User cannot add space in the entity’s name while performing any of the operations mentioned below.
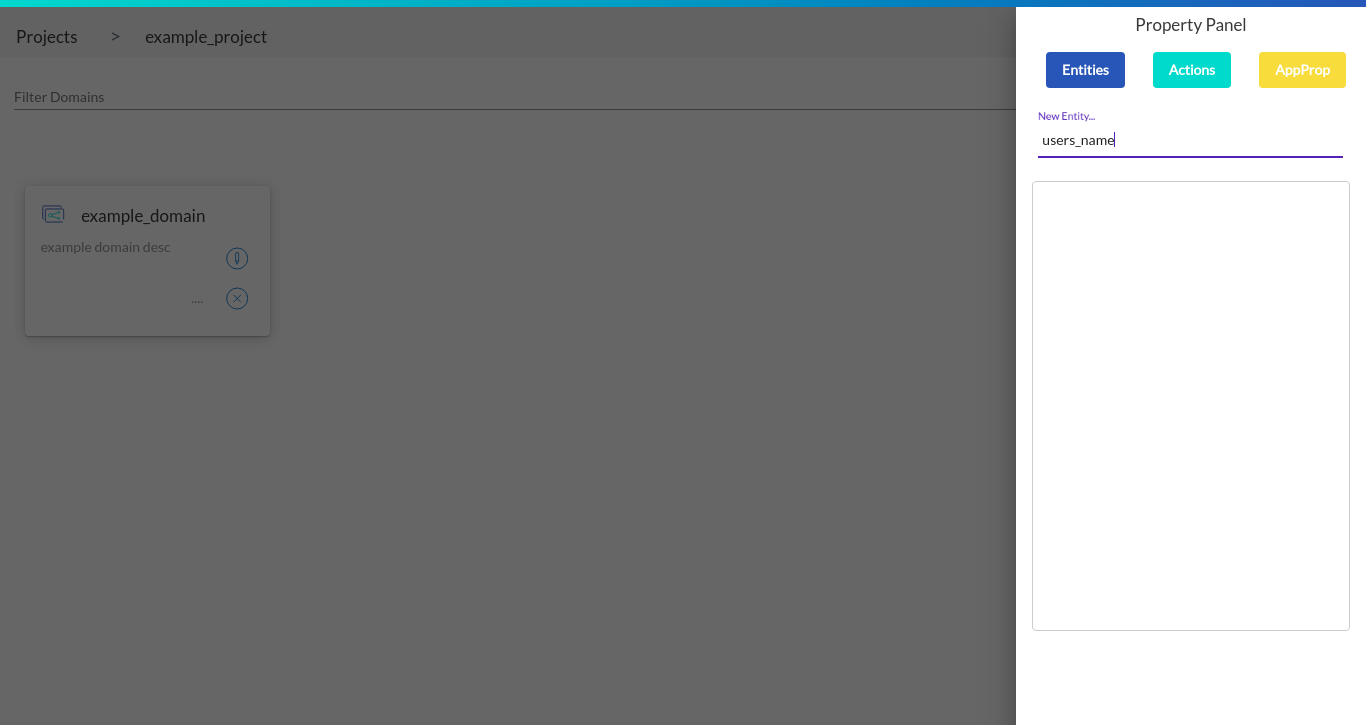
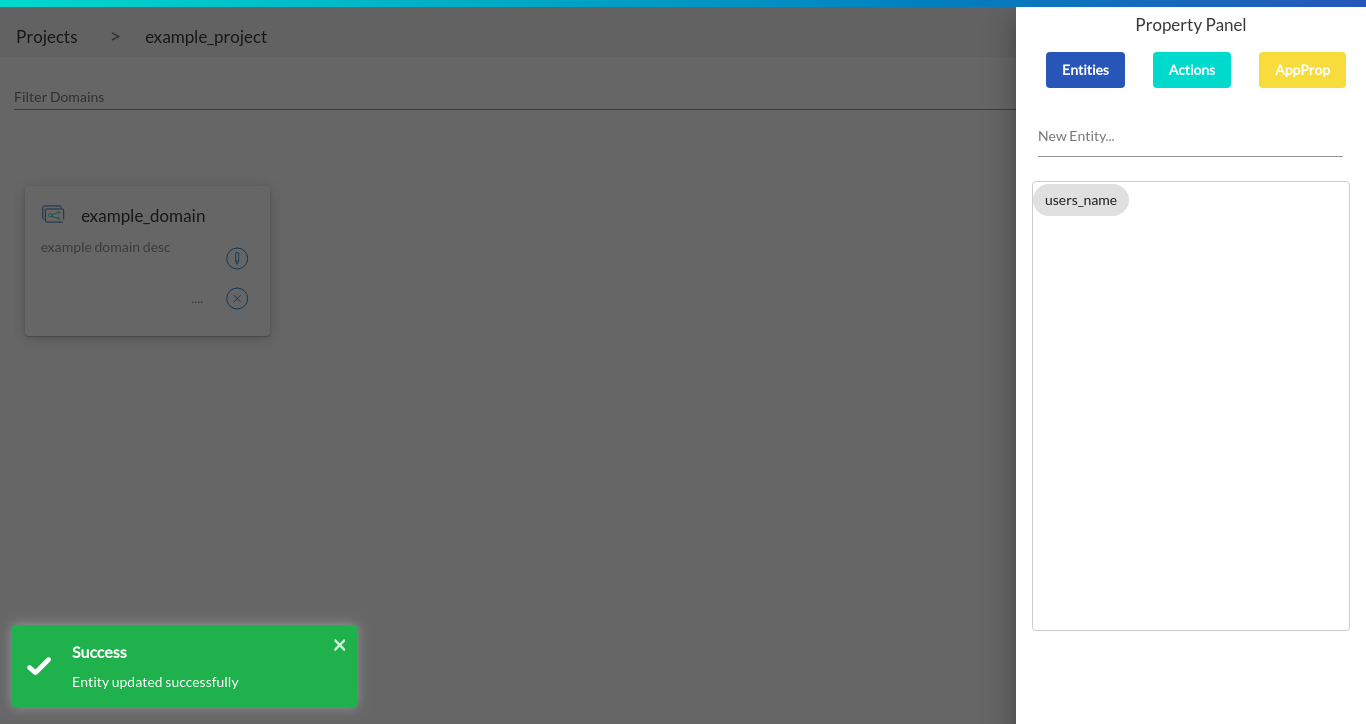
1. Creating Entity
Click on the show property panel button to create/edit/delete Entities
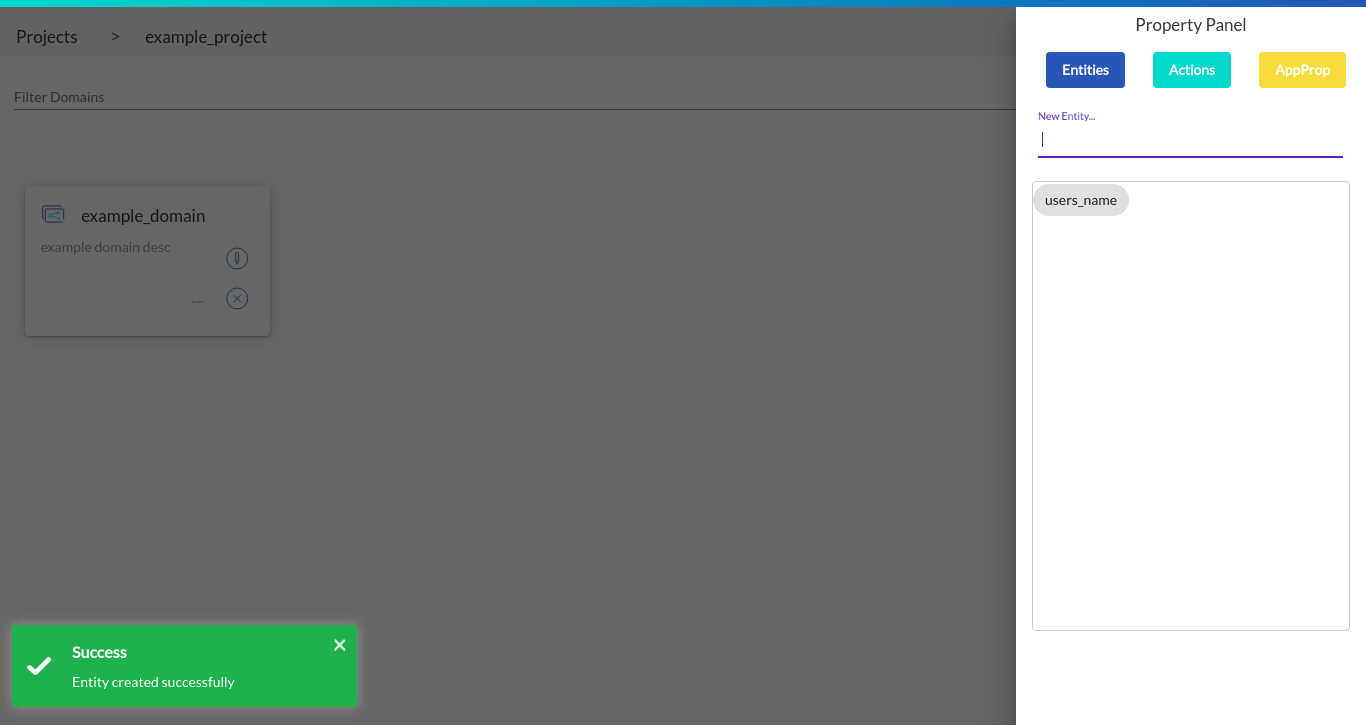
Once the panel is open, you can create new entity by just typing the entity name and hitting enter. A pop up appears where the user has to enter the entity description and choose the entity slot type.
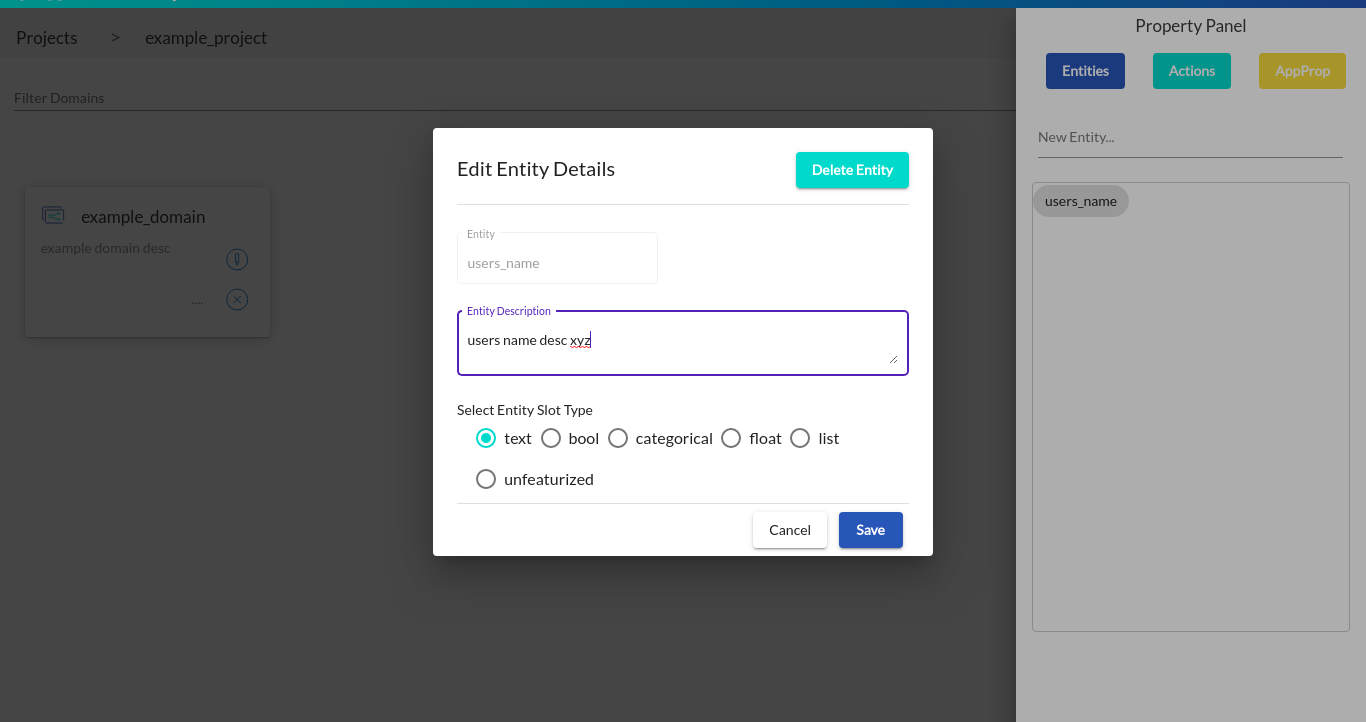
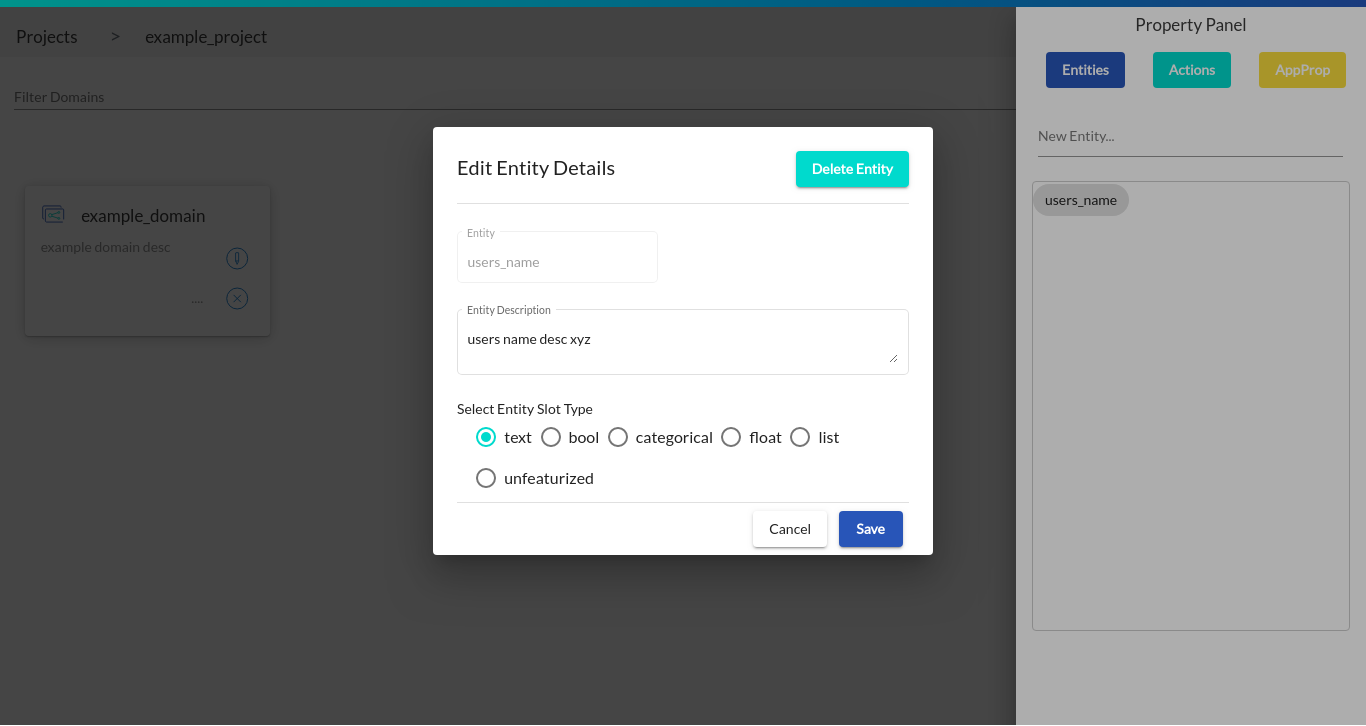
2. Editing Entity
You can edit an entity by clicking on any entity you intend to edit from the entities bucket. User can edit only the entity description and the entity slot type.
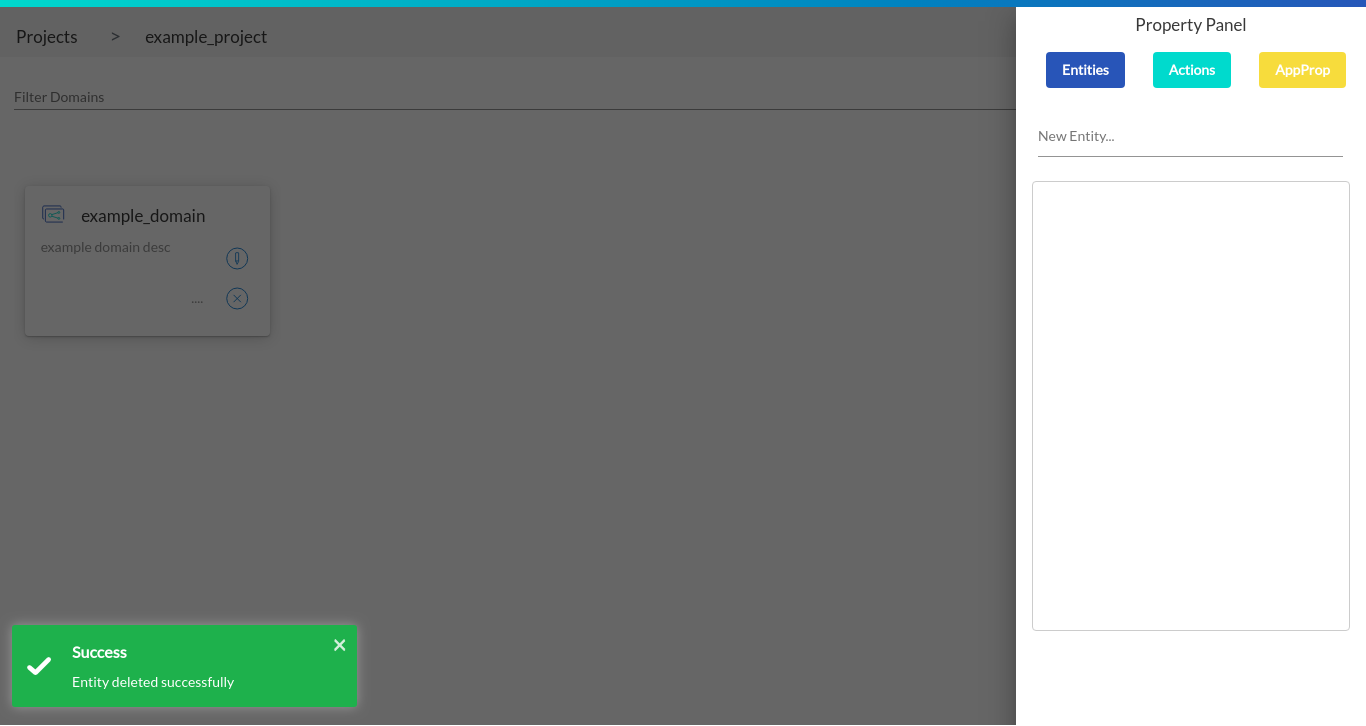
2. Deleting Entity
You can delete an entity by clicking on any entity you intend to delete from the entities bucket.
Try now
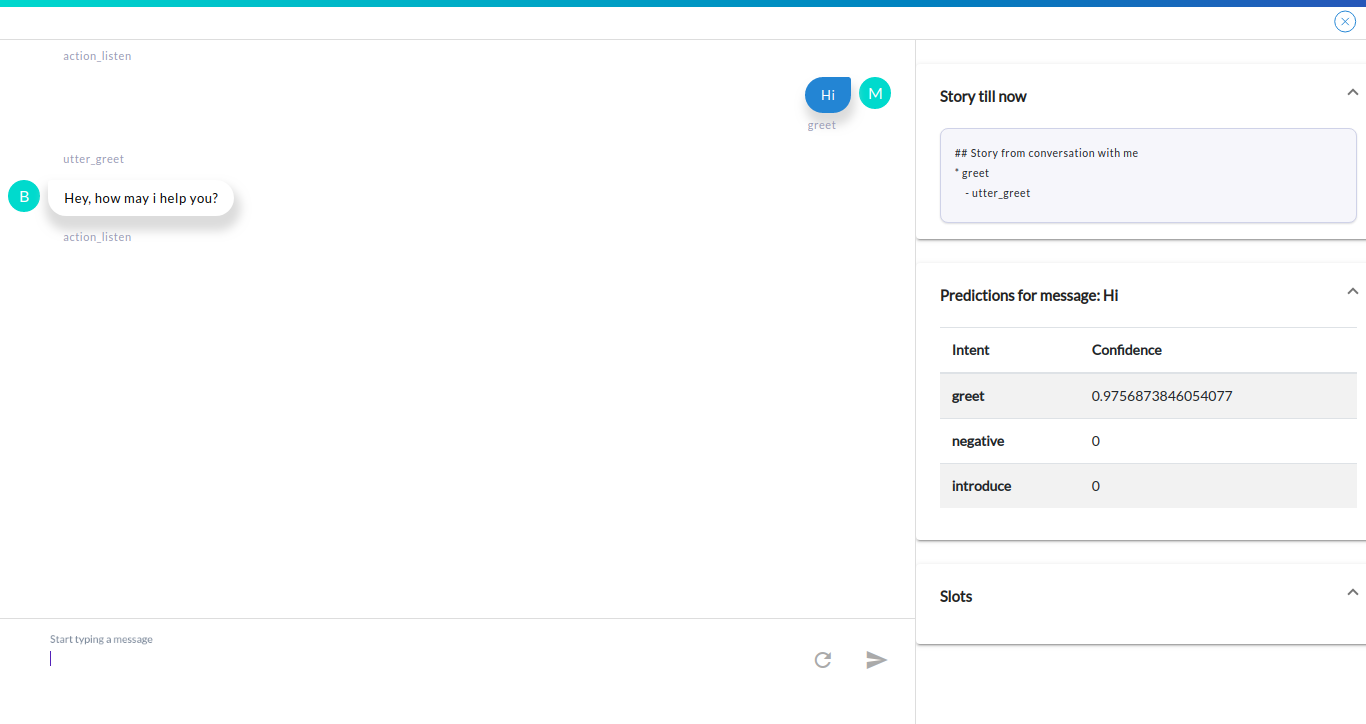
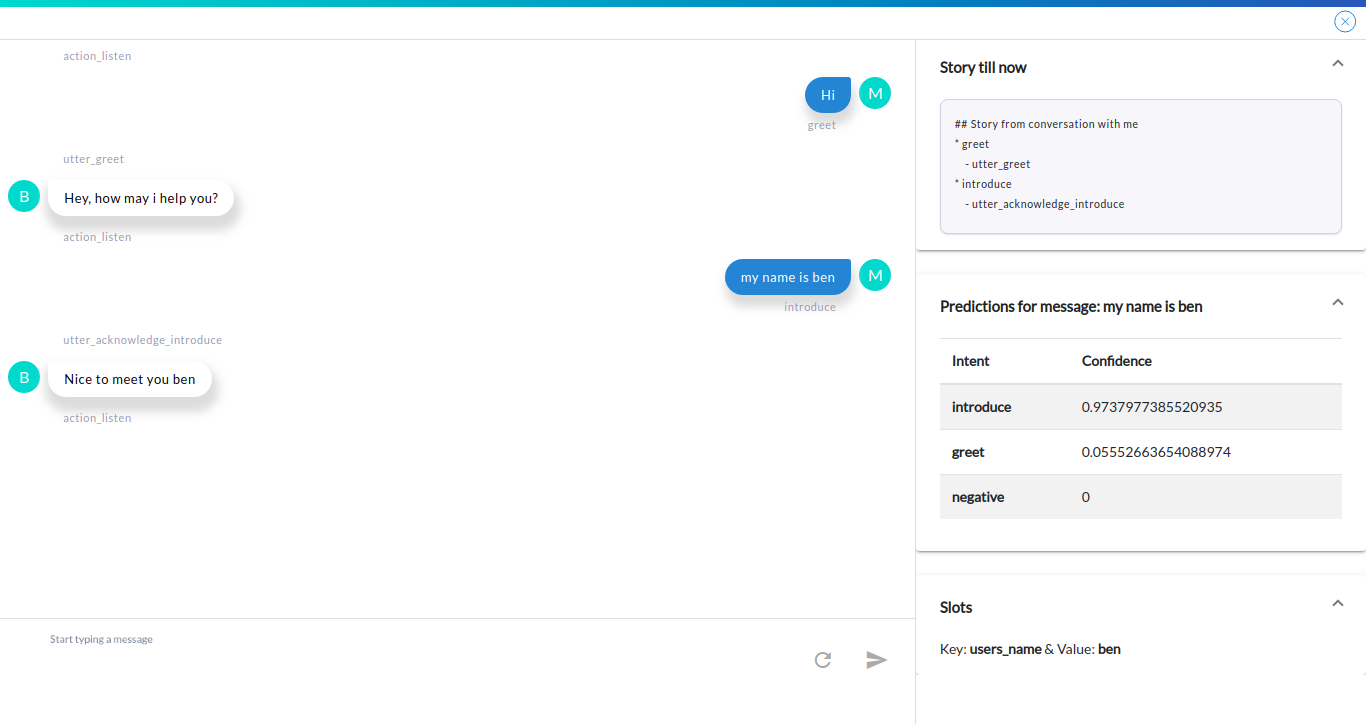
Try now is a feature where you are provided with an interface to interact with the bot and test your stories. In our case we will be testing the ‘greet_story’
Note: It is mandatory to create an entity of any type (text/categorical/bool etc) before trying out the project.
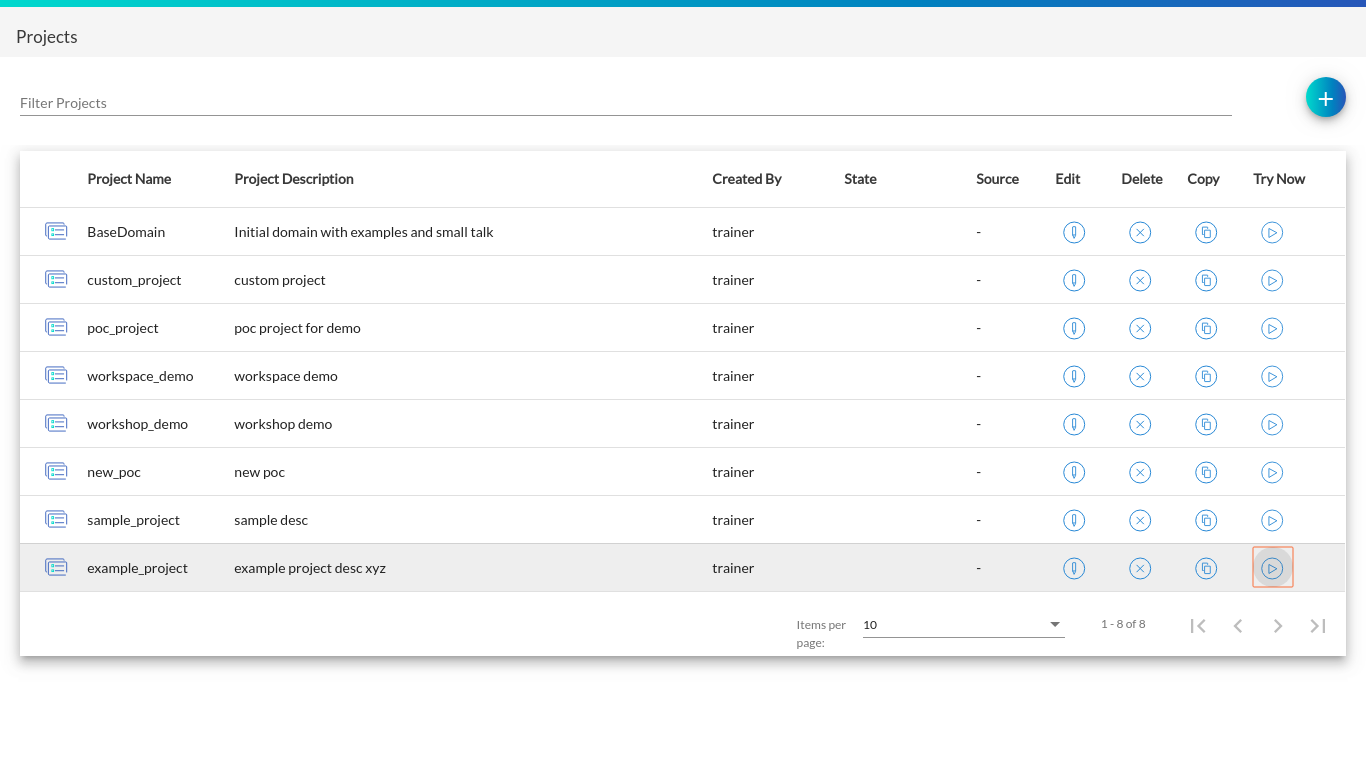
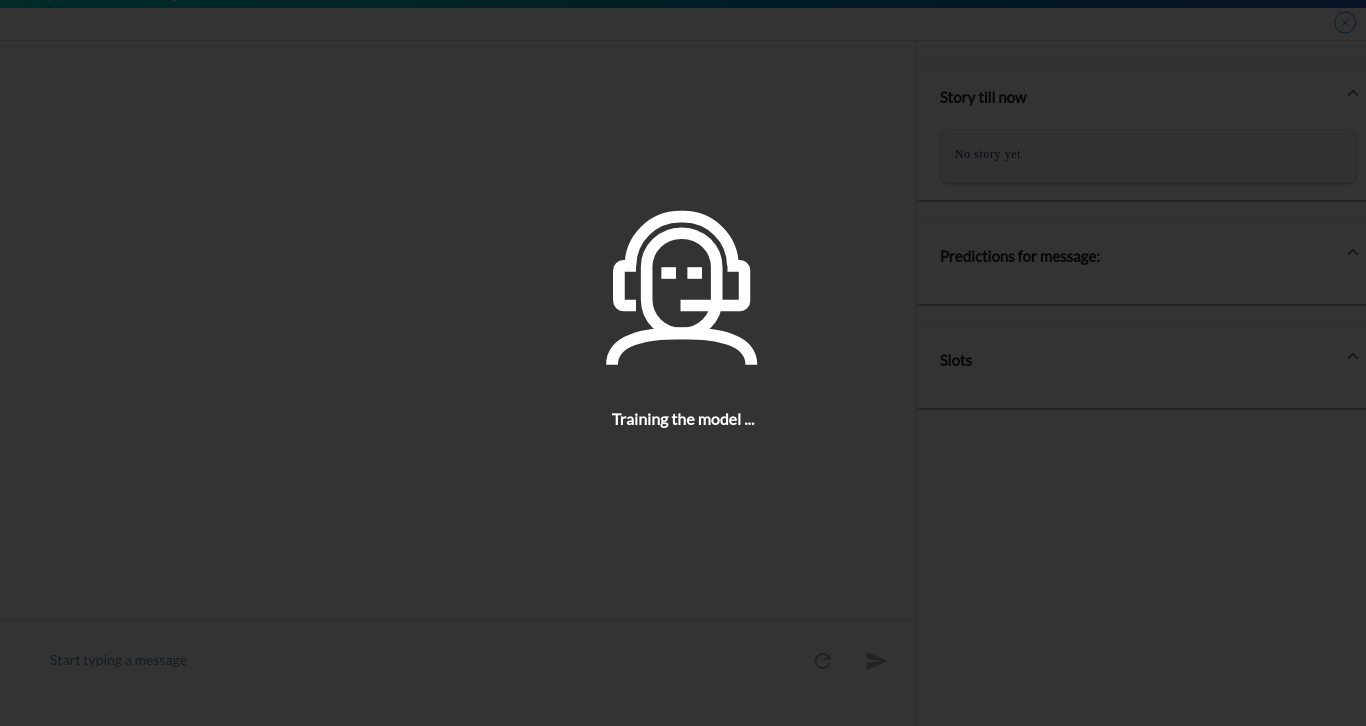
Step 1: Click on the try now button respective to the project you want to try out. In our case ‘example_project’
Step 2: Let the bot take time to train itself

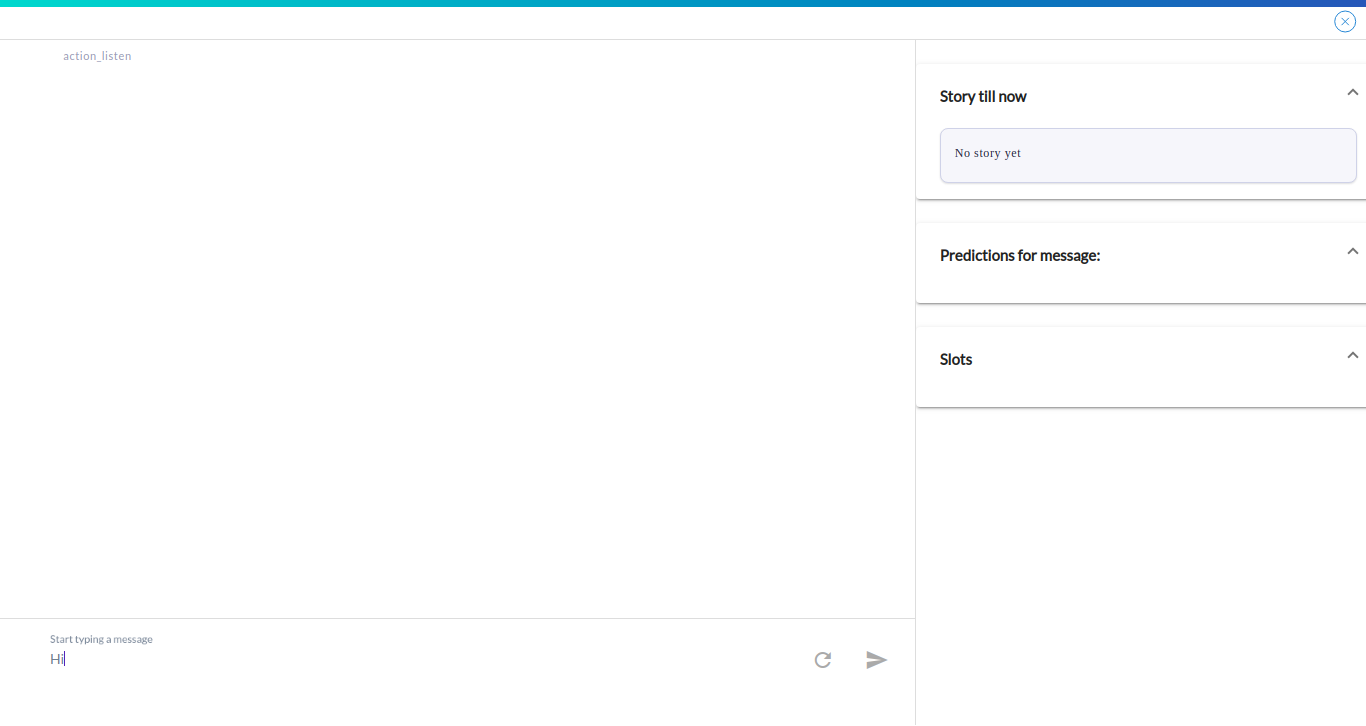
Step 3: Play with your bot by starting a conversation
Note: To improve your bot’s accuracy, try adding some more samples to your intent texts and try builing more stories. (both in terms of count & variety of input)
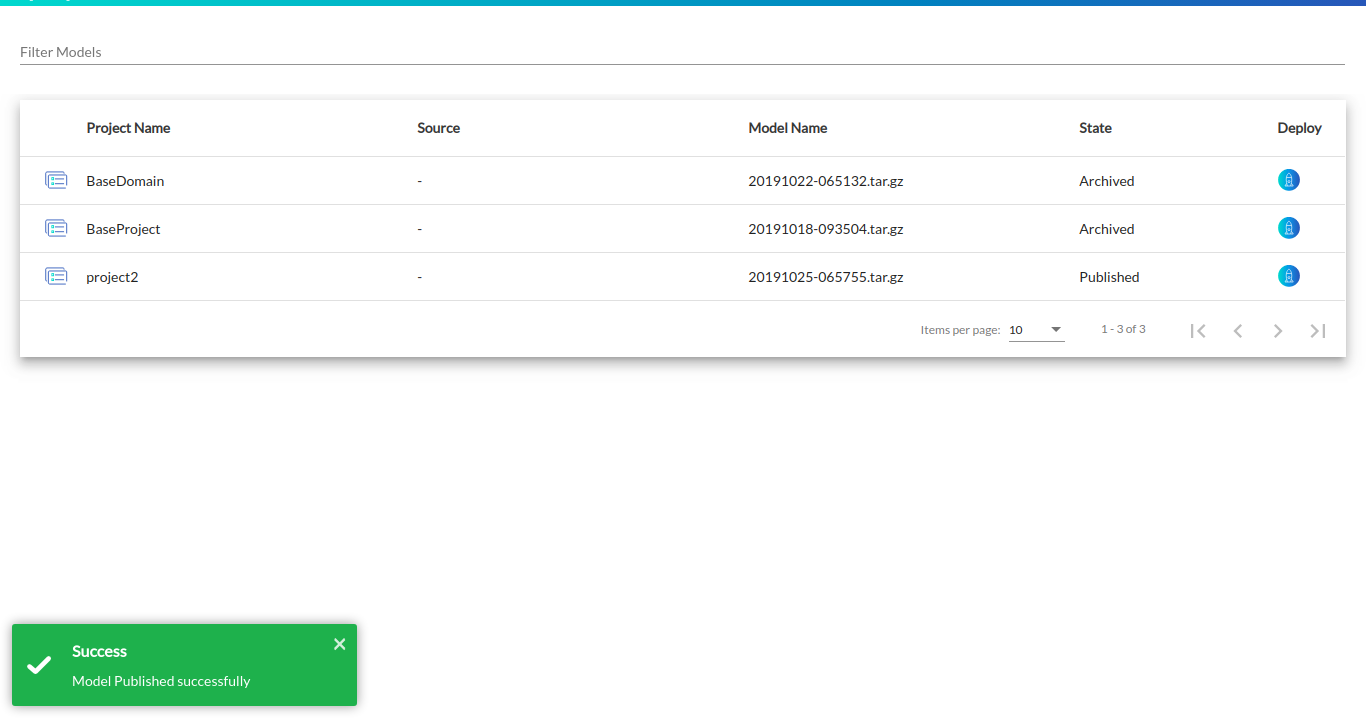
Deploy
Deploy is a feature where the user can leverage try now functionality of the project created using the trainer application, on any connector (Skype, Slack, etc) or web channel.
Note: Any of the above mentioned connector or web channel should be ready before deploying the project.
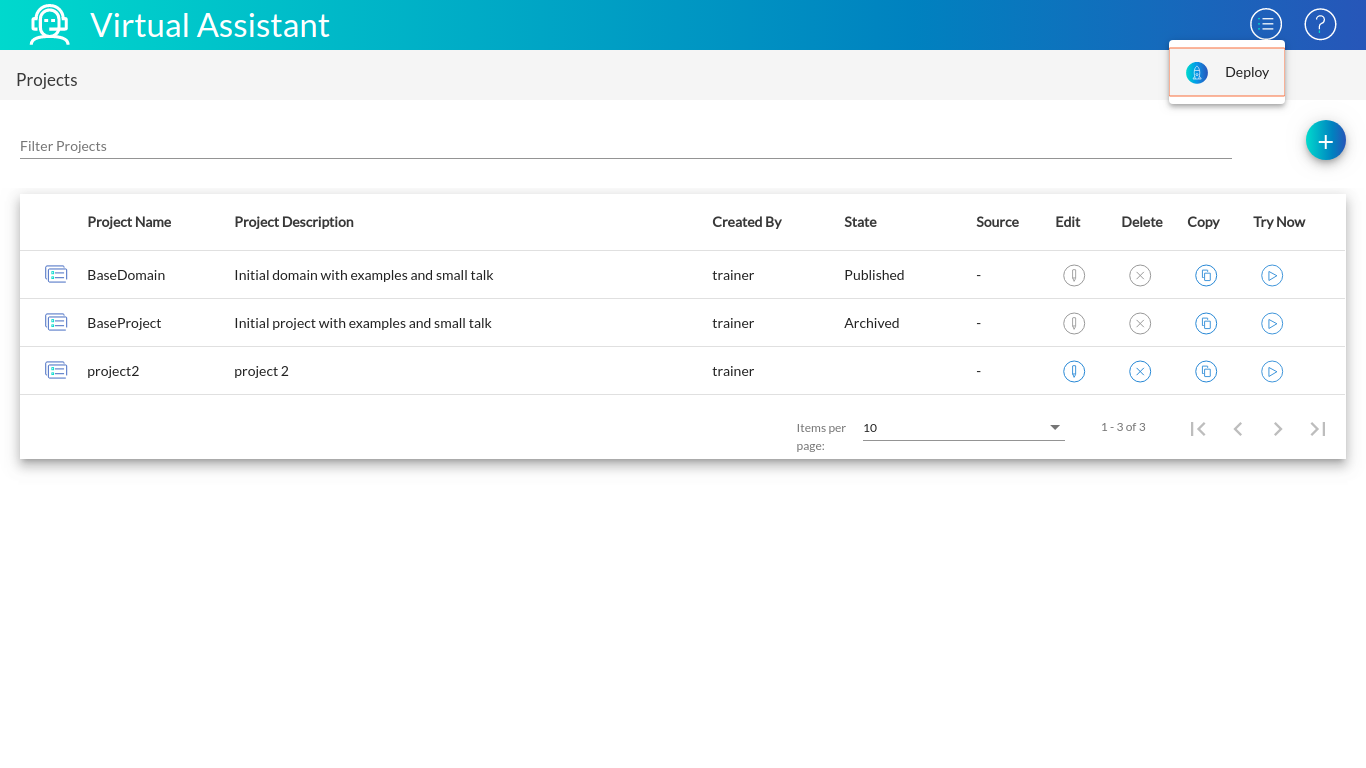
Step 1: Click on the menu button besides the help / support button present on the header. You will get an option of ‘Deploy’. Click on that.
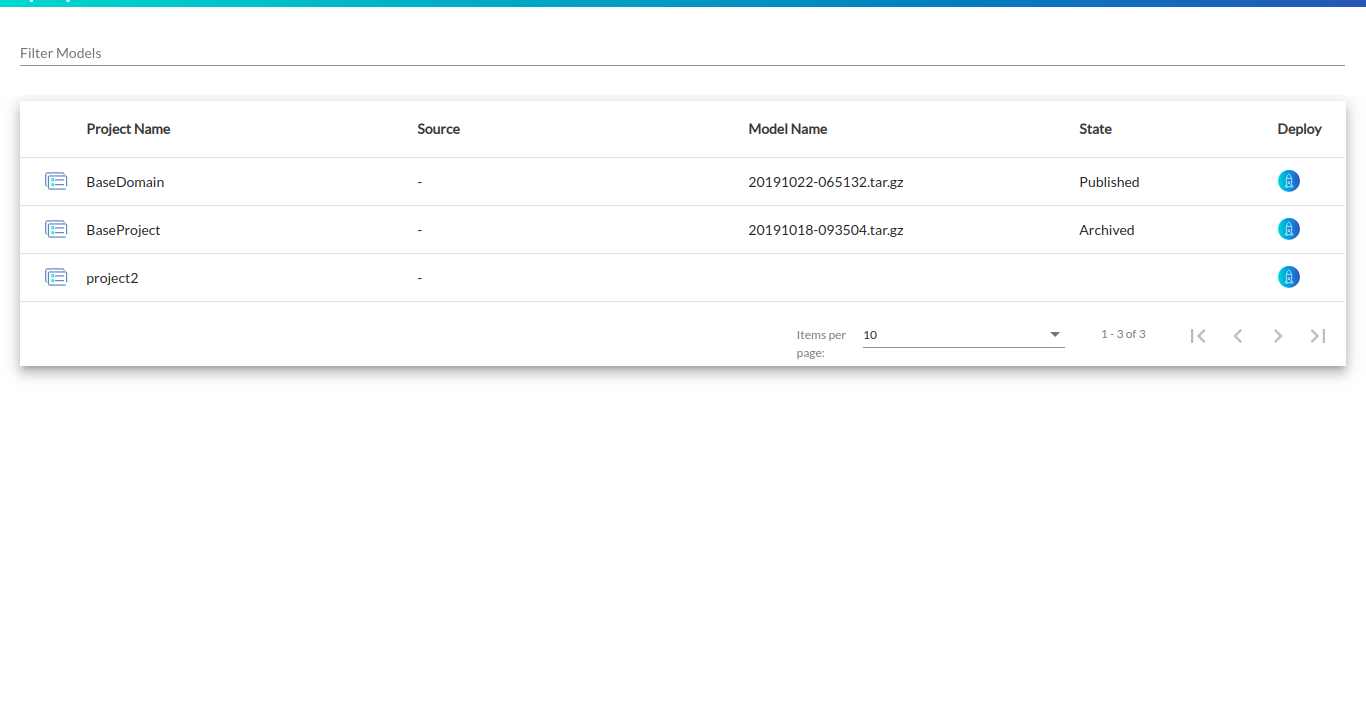
Step 2: Click on the deploy button respective to the project you want to deploy. In our case ‘project2’
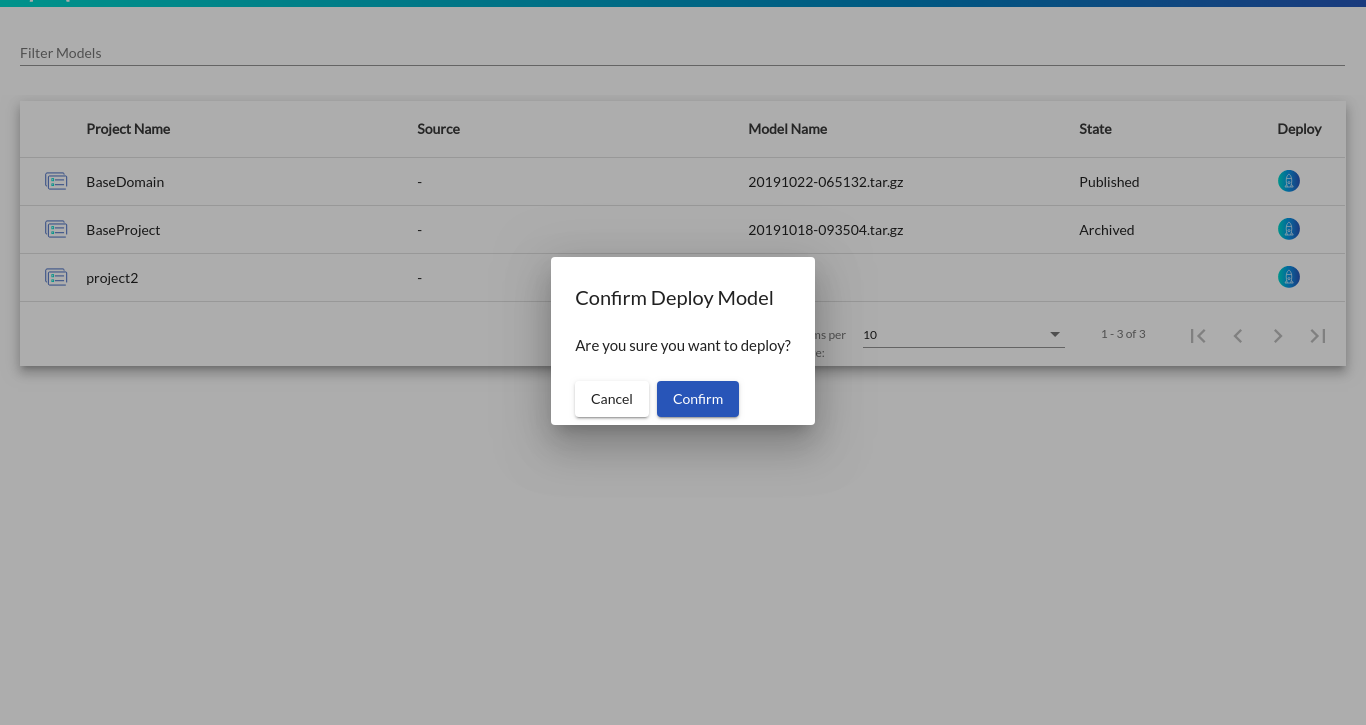
Step 3: Let the bot take time to train & deploy itself
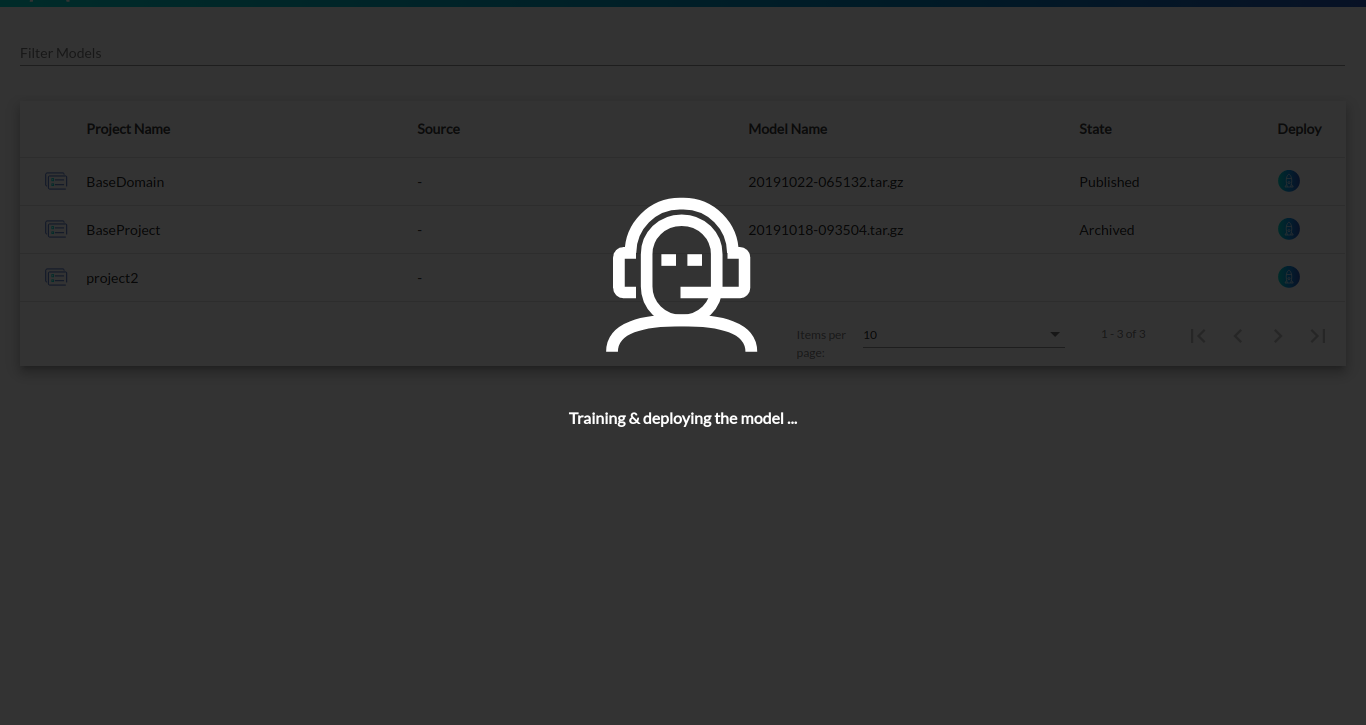
Step 4: Once the the training and deployment part is done, you model gets published. The ‘State’ column of the respective gets updated to ‘Published’ state and the models which are already published get updated to ‘Archived’ state.
Note: At a time, only one project can be published and can be tried out on different connectors and channels.